Usually, virtual disks are used on Proxmox VE virtual machines. The virtual disks are partitioned and operating systems are installed. If you have a lot of virtual machines on your Proxmox VE server, you will be storing the virtual disks of multiple virtual machines on the same storage device, which will limit the storage bandwidth for the virtual machines. Usually, that’s how virtual machines are supposed to run and you will not have any problems with it.
For many reasons, you will want to passthrough physical storage devices on Proxmox VE virtual machines and make use of the full bandwidth of the storage devices on the virtual machines.
For example:
- If you want to set up a file server (i.e. TrueNAS server) on a Proxmox VE virtual machine, you may want to add a physical storage device to your Proxmox VE virtual machine.
- If you want to set up a RAID array on a Proxmox VE virtual machine, that’s also a good reason to passthrough physical storage devices to your Proxmox VE virtual machine.
- If you want to convert a real Windows 10/11 or Linux installation from a physical storage device to a Proxmox VE virtual machine, passing the physical storage device on your Proxmox VE virtual machine is an easy way to do so.
In this article, I am going to show you how to passthrough a physical storage device (SATA HDD/SSD or NVME SSD) to a Proxmox VE virtual machine.
Table of Contents
- Listing Installed Storage Devices of Proxmox VE Server
- Find the Unique ID of the Storage Device on Proxmox VE
- Passthrough a Physical Storage Device to a Proxmox VE Virtual Machine
- Checking if the Storage Device is Added to the Proxmox VE Virtual Machine
- Removing the Storage Device from the Proxmox VE Virtual Machine
- Conclusion
- References
Listing Installed Storage Devices of Proxmox VE Server
To passthrough a storage device on a Proxmox VE virtual machine, you need to find the device name of the storage device.
To find the device name of the storage device, navigate to the Proxmox VE shell and run the following command:
$ lsblk -d
All the storage devices installed on your Proxmox VE server should be listed. You will find the name, size, and other information on the storage devices here.

Find the Unique ID of the Storage Device on Proxmox VE
To passthrough a storage device on a Proxmox VE virtual machine, you need to find the unique ID of the storage device. The unique ID of the storage device won’t change even if you install the storage device on a different SATA or NVME port of your Proxmox VE server. That’s why I recommend you to use the unique ID of the storage device to passthrough the storage device on a Proxmox VE virtual machine.
Let’s say, you want to passthrough the storage device sdb on a Proxmox VE virtual machine. To find the unique ID of the storage device sdb, run the following command:
$ ls -lh /dev/disk/by-id/ | grep --color sdb$
The available unique IDs of the storage device should be printed.
In my case, the storage device sdb has 2 unique IDs:
- ata-Samsung_SSD_860_EVO_500GB_S3Z3ND0NC01243J
- wwn-0x5002538ec0c09743

You can access the storage devices using the unique ID in the format:
/dev/disk/by-id/
For example:
- /dev/disk/by-id/ata-Samsung_SSD_860_EVO_500GB_S3Z3ND0NC01243J
- /dev/disk/by-id/wwn-0x5002538ec0c09743
Passthrough a Physical Storage Device to a Proxmox VE Virtual Machine
Once you find the unique ID of the storage device that you want to add to a Proxmox VE virtual machine, you need to find the first unoccupied SATA/SCSI slot of the Proxmox VE virtual machine in which you can add the physical storage device.
First, find all the occupied SATA or SCSI slot of your desired Proxmox VE virtual machine (Proxmox VE virtual machine ID 101 in this example) with the following command:
$ qm config 101 | egrep --color -i "^(sata|scsi)"
As you can see, the Proxmox VE virtual machine 101 occupied SATA slot 0, and SCSI slot 0 and 1. So, we can add a new storage device on either SATA slot 1 or SCSI slot 2.

To add the physical storage device ata-Samsung_SSD_860_EVO_500GB_S3Z3ND0NC01243J to the SCSI slot 2 of the Proxmox VE virtual machine 101, run the following command:
$ qm set 101 -scsi2 /dev/disk/by-id/ata-Samsung_SSD_860_EVO_500GB_S3Z3ND0NC01243J
To add the physical storage device ata-Samsung_SSD_860_EVO_500GB_S3Z3ND0NC01243J to the SATA slot 1 of the Proxmox VE virtual machine 101, run the following command:
$ qm set 101 -sata1 /dev/disk/by-id/ata-Samsung_SSD_860_EVO_500GB_S3Z3ND0NC01243J
The physical storage device should be added to your desired Proxmox VE virtual machine.

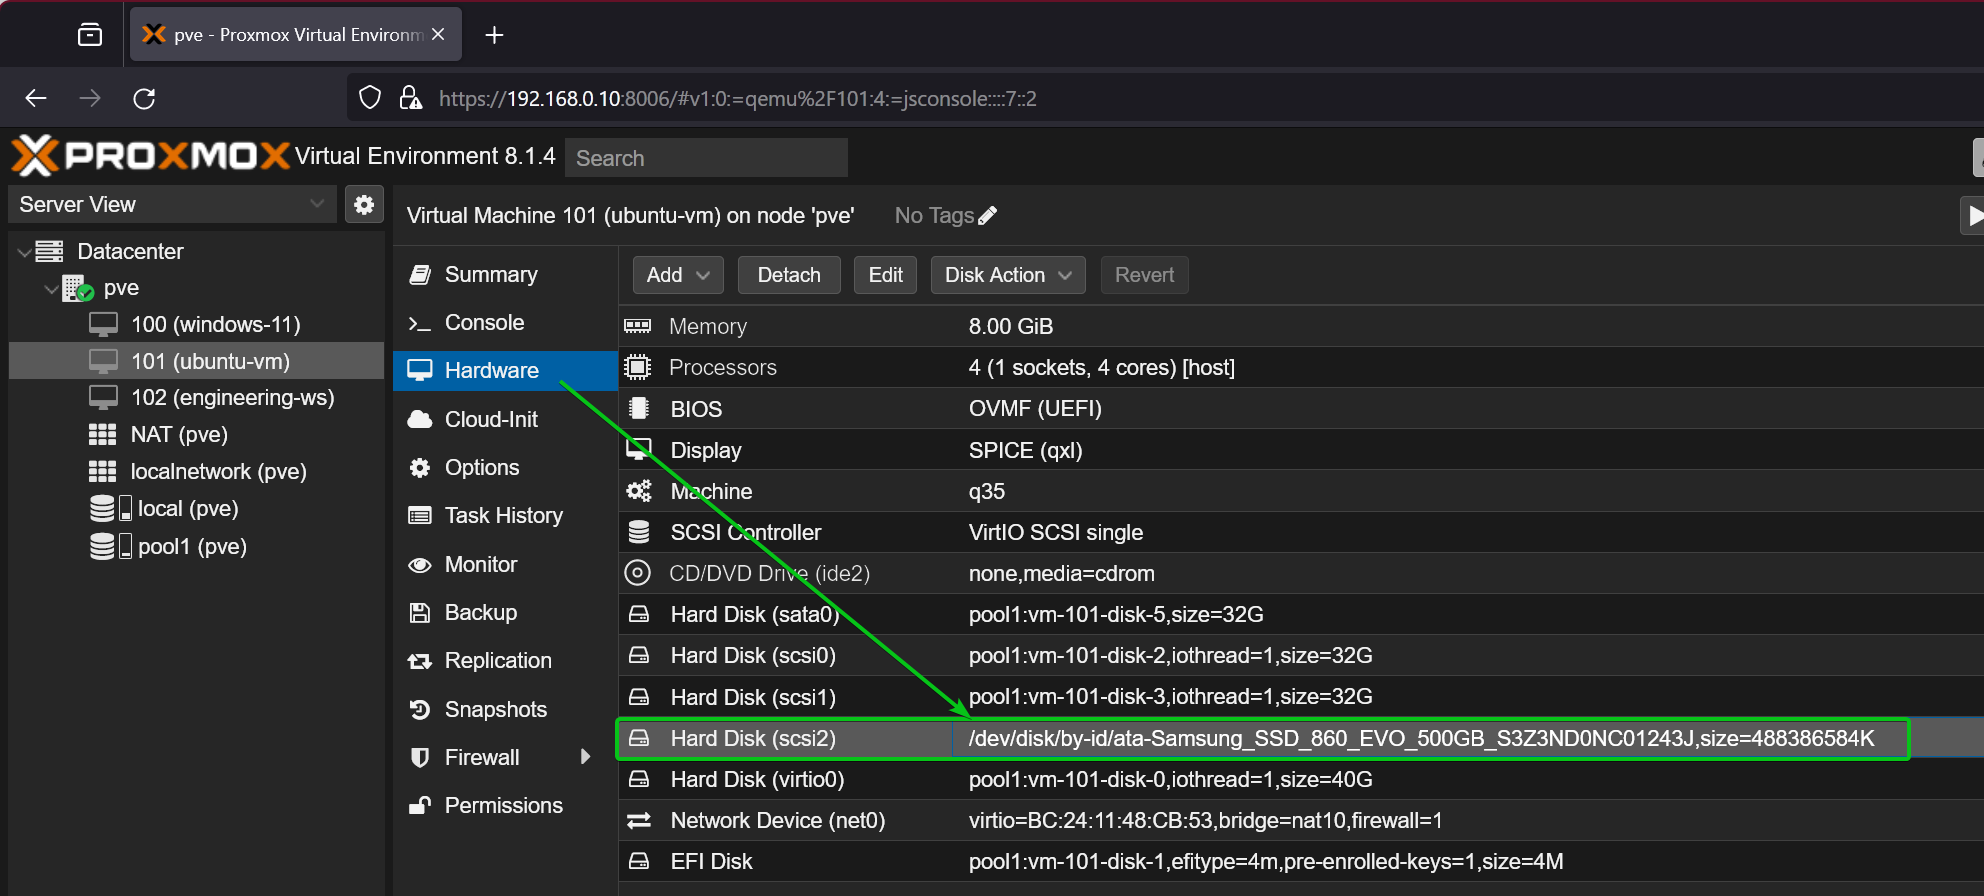
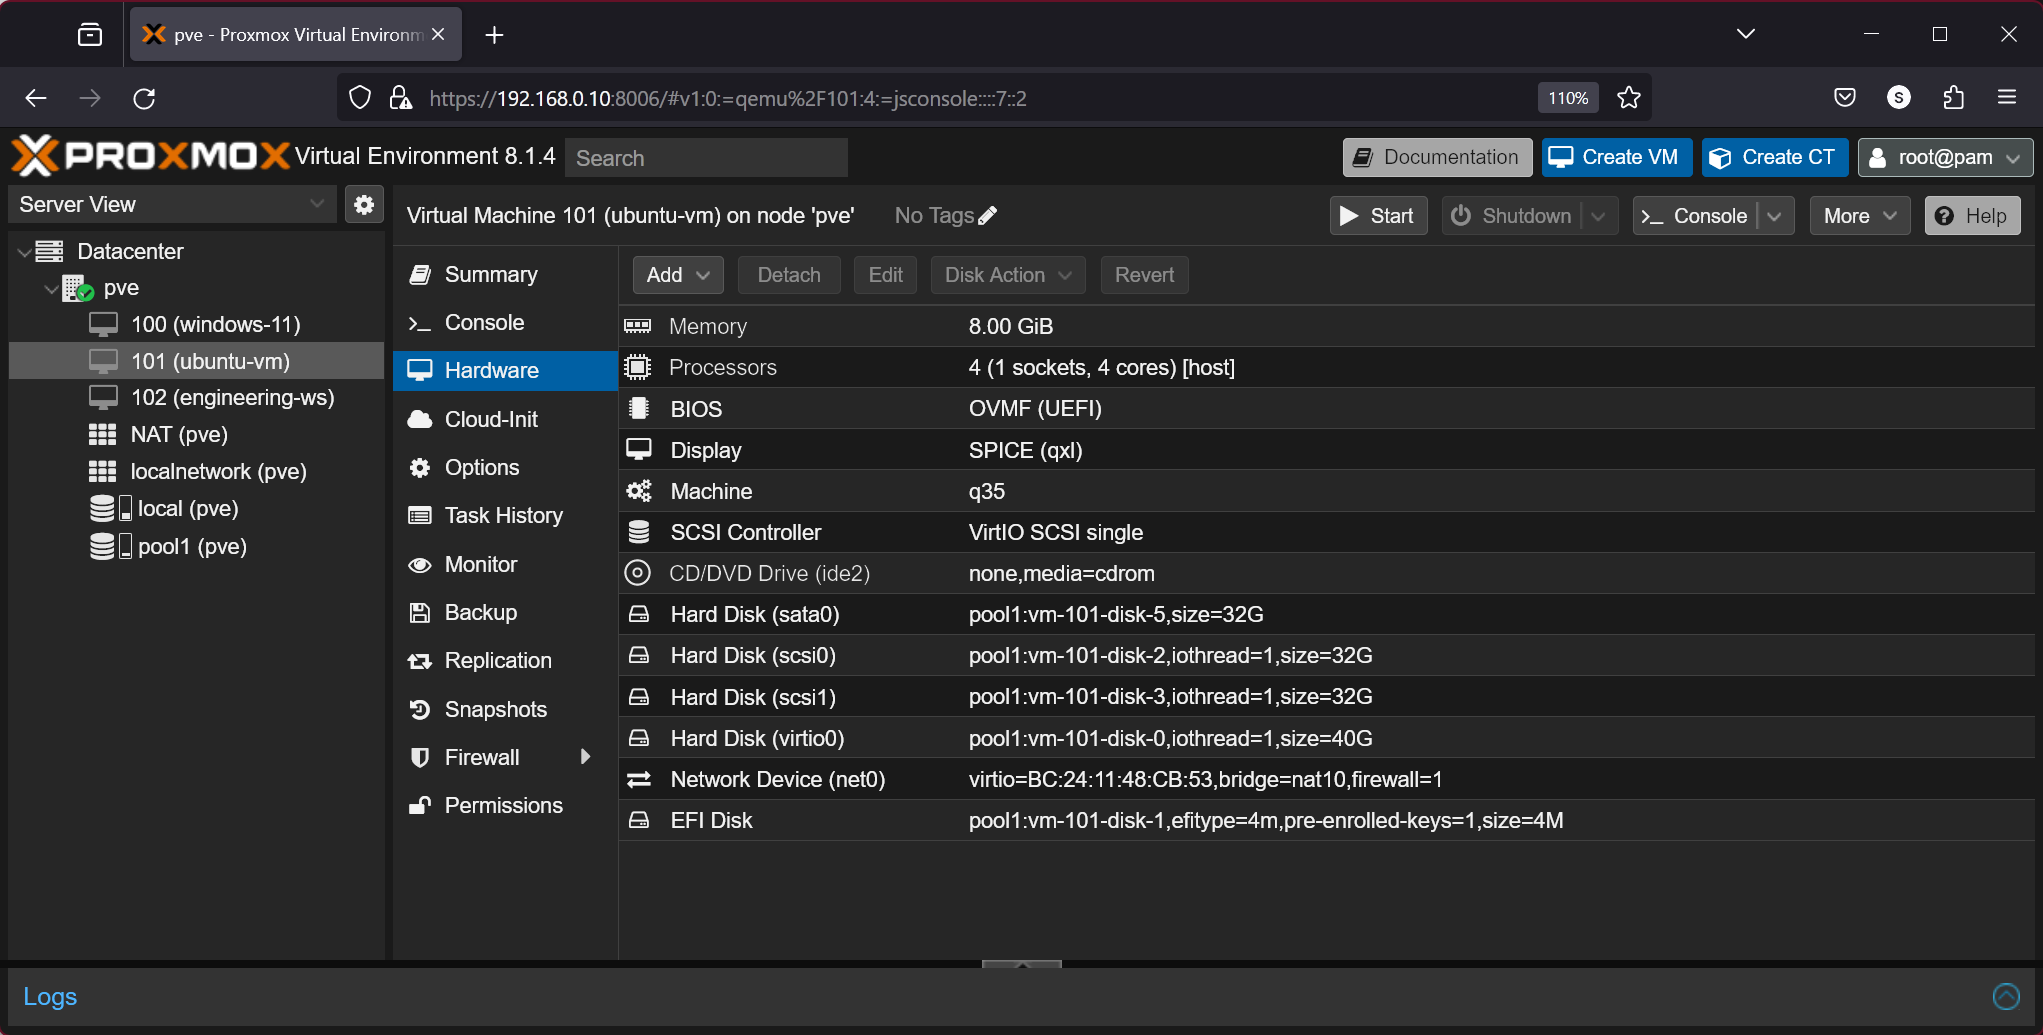
The newly added storage device should also show up in the Hardware section of the Proxmox VE virtual machine.
Checking if the Storage Device is Added to the Proxmox VE Virtual Machine
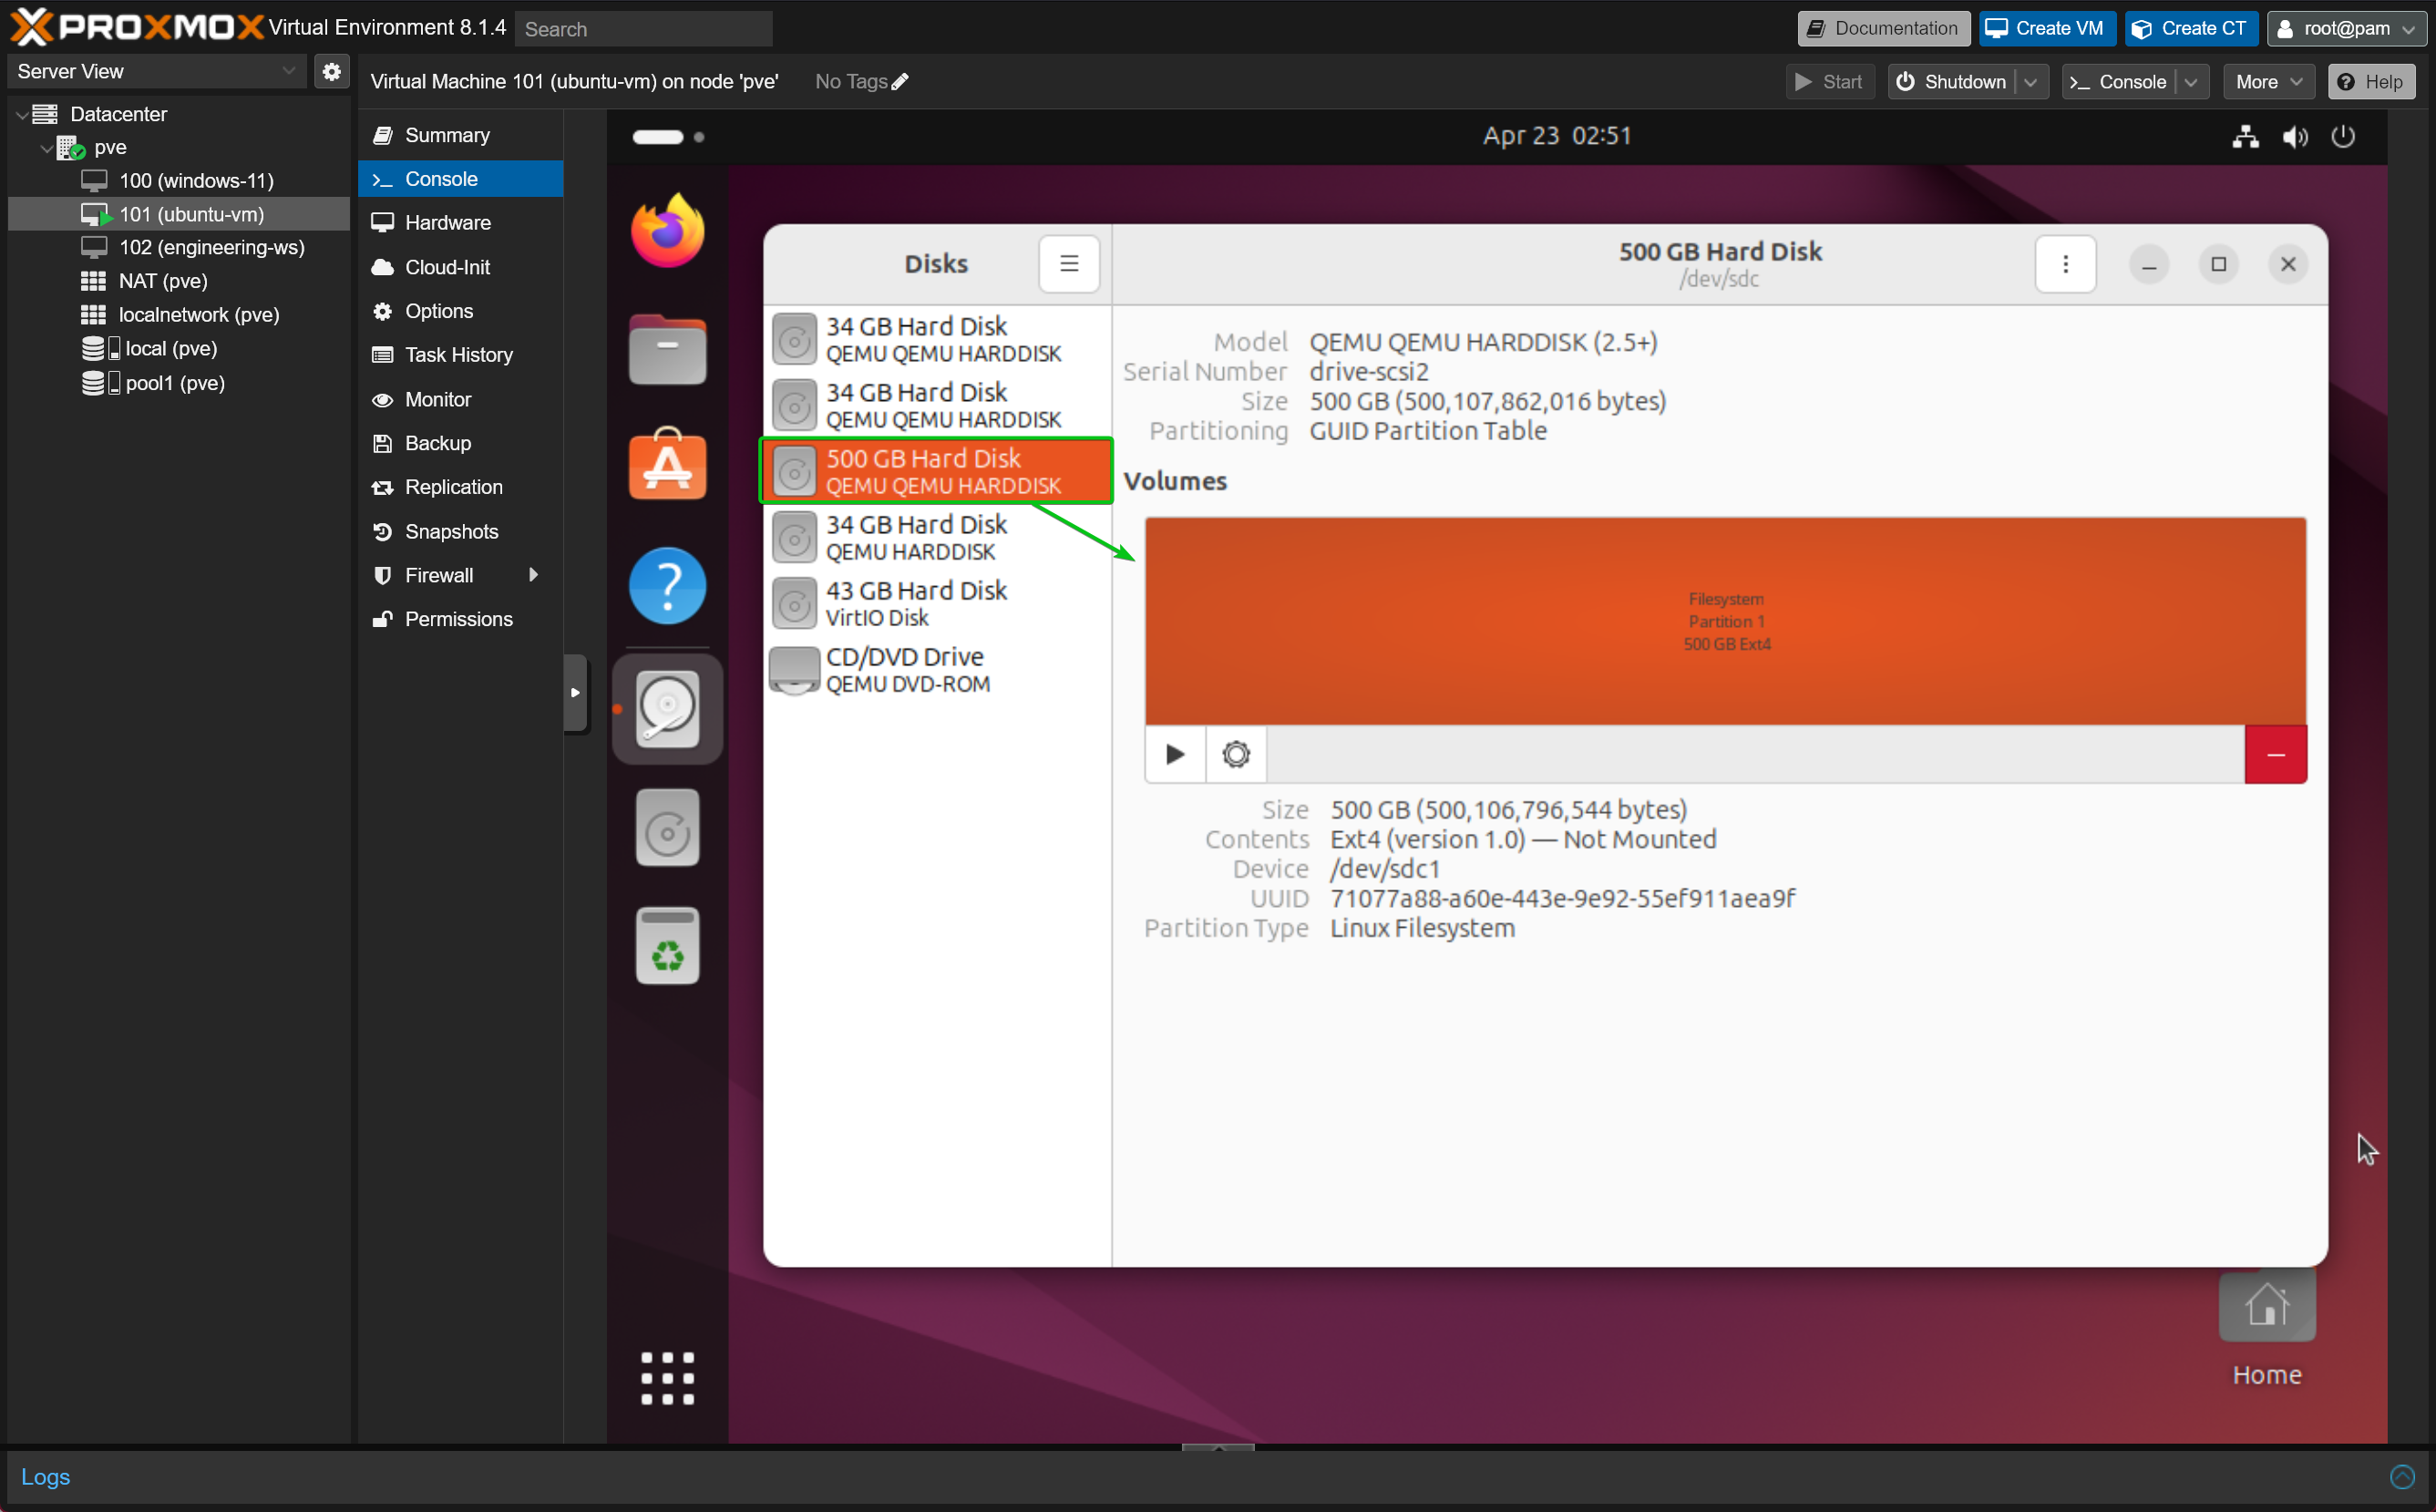
Once the physical storage device is added to the Proxmox VE virtual machine, just start the virtual machine and you should be able to access it from the operating system installed on the virtual machine.
Removing the Storage Device from the Proxmox VE Virtual Machine
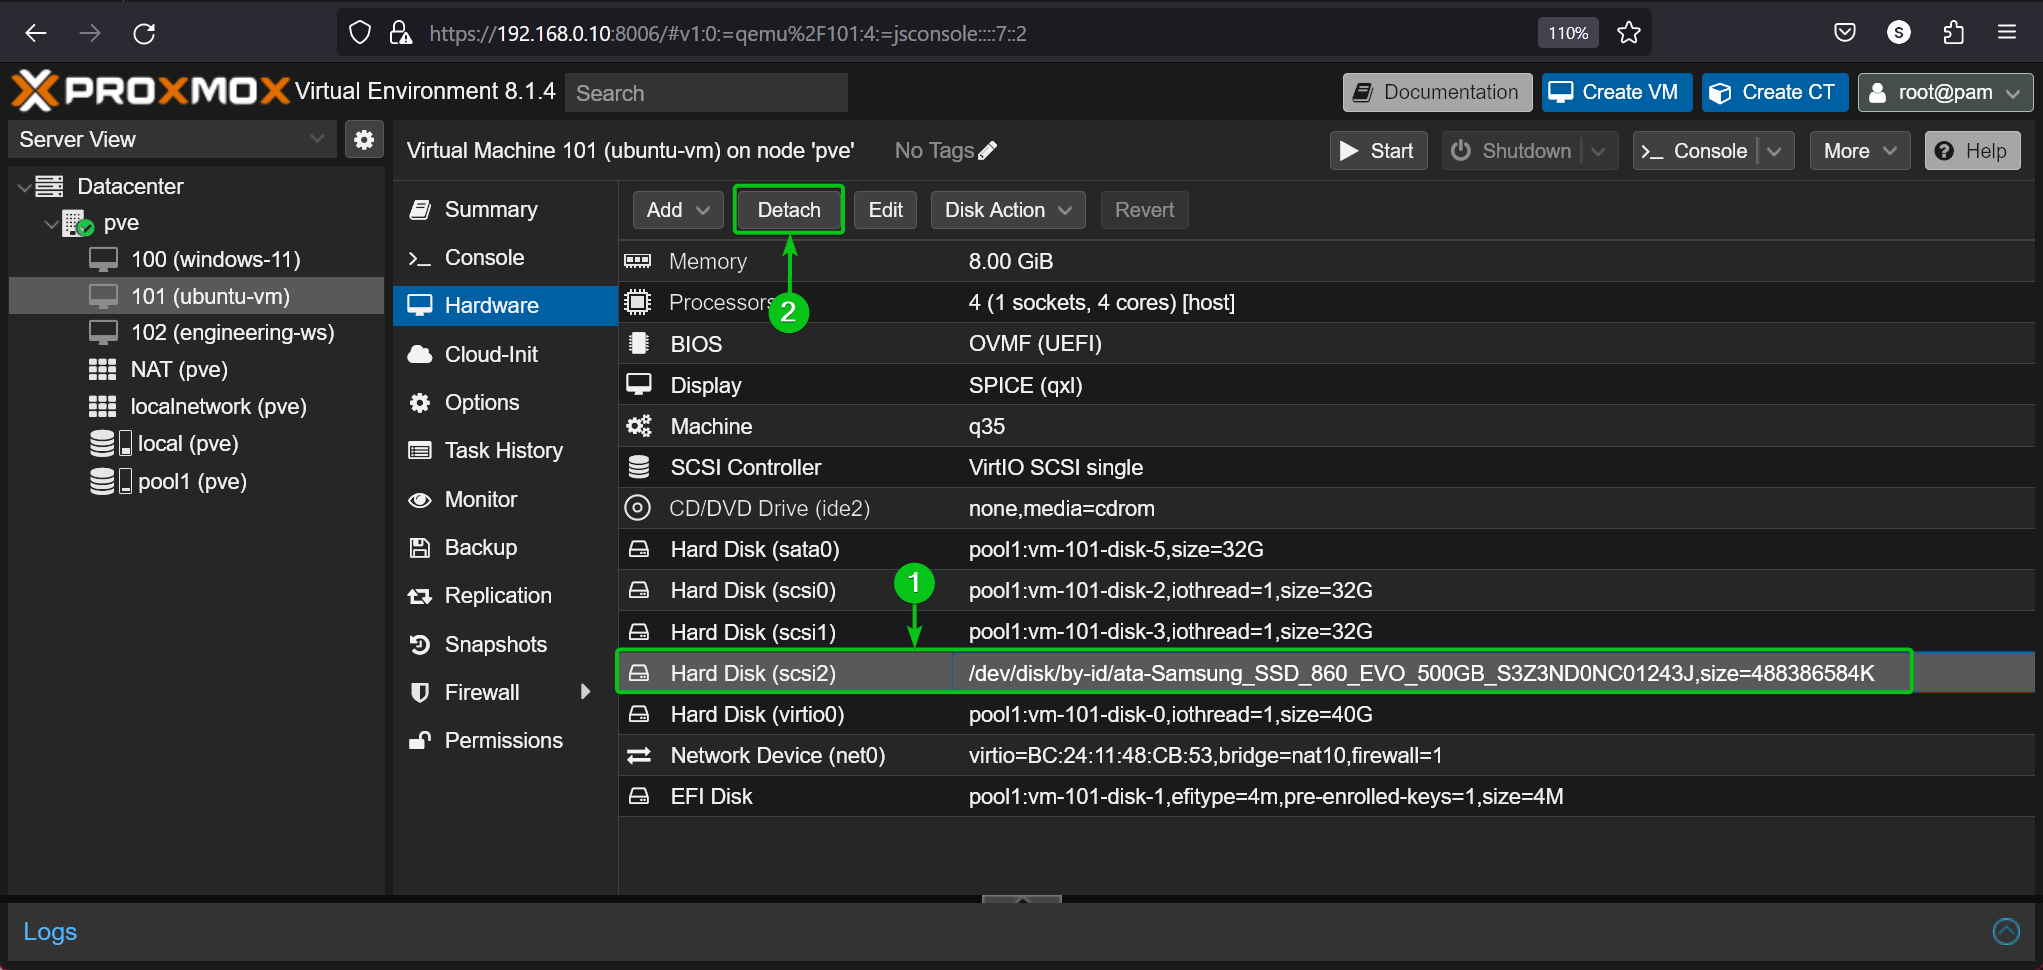
To remove the physical storage device from the Proxmox VE virtual machine, navigate to the Hardware section of the virtual machine, select the storage device[1] and click on Detach[2].
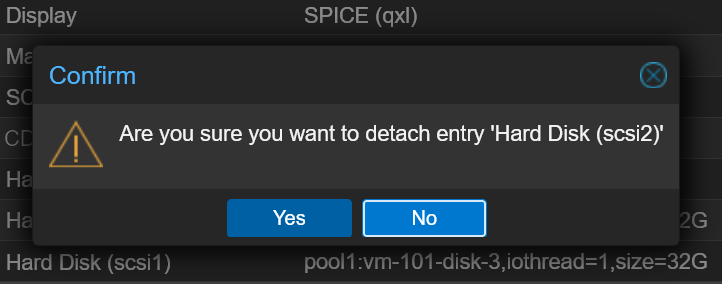
Click on Yes.
The physical storage device should be removed from the Proxmox VE virtual machine.
Conclusion
In this article, I have shown you how to find the unique ID of the SATA HDDs/SSDs and NVME SSDs installed on your Proxmox VE server. I have also shown you how to passthrough physical storage devices on your Proxmox VE virtual machines. I have shown you how to remove a physical storage device from your Proxmox VE virtual machine as well.
References
More...