 Tweet
Tweet
In this article, I am going to show you how to download the ISO image of Windows 11 and VirtIO Windows drivers on Proxmox VE 8, create a Windows 11 virtual machine (VM) on Proxmox VE 8, install Windows 11 on the Proxmox VE 8 virtual machine (VM), and install VirtIO drivers and QEMU guest agent on the Windows 11 Proxmox VE 8 virtual machine (VM).
Table of Contents
- How to Download/Upload the Windows 11 ISO Image on Proxmox VE 8
- Downloading the Latest VirtIO Drivers ISO File for Windows 11 on Proxmox VE 8
- Creating a Windows 11 Proxmox VE 8 Virtual Machine (VM)
- Installing Windows 11 on the Proxmox VE 8 Virtual Machine (VM)
- Installing VirtIO Drivers and QEMU Guest Agent on the Windows 11 Proxmox VE 8 Virtual Machine (VM)
- Removing the Windows 11 and VirtIO Drivers ISO Images from the Windows 11 Proxmox VE 8 Virtual Machine (VM)
- Conclusion
- References
How to Download/Upload the Windows 11 ISO Image on Proxmox VE 8
There are two ways to get the Windows 11 ISO image on your Proxmox VE 8 server.
- Download the Windows 11 ISO image on your computer and upload it to Proxmox VE from your computer.
- Download the Windows 11 ISO image directly on Proxmox VE.
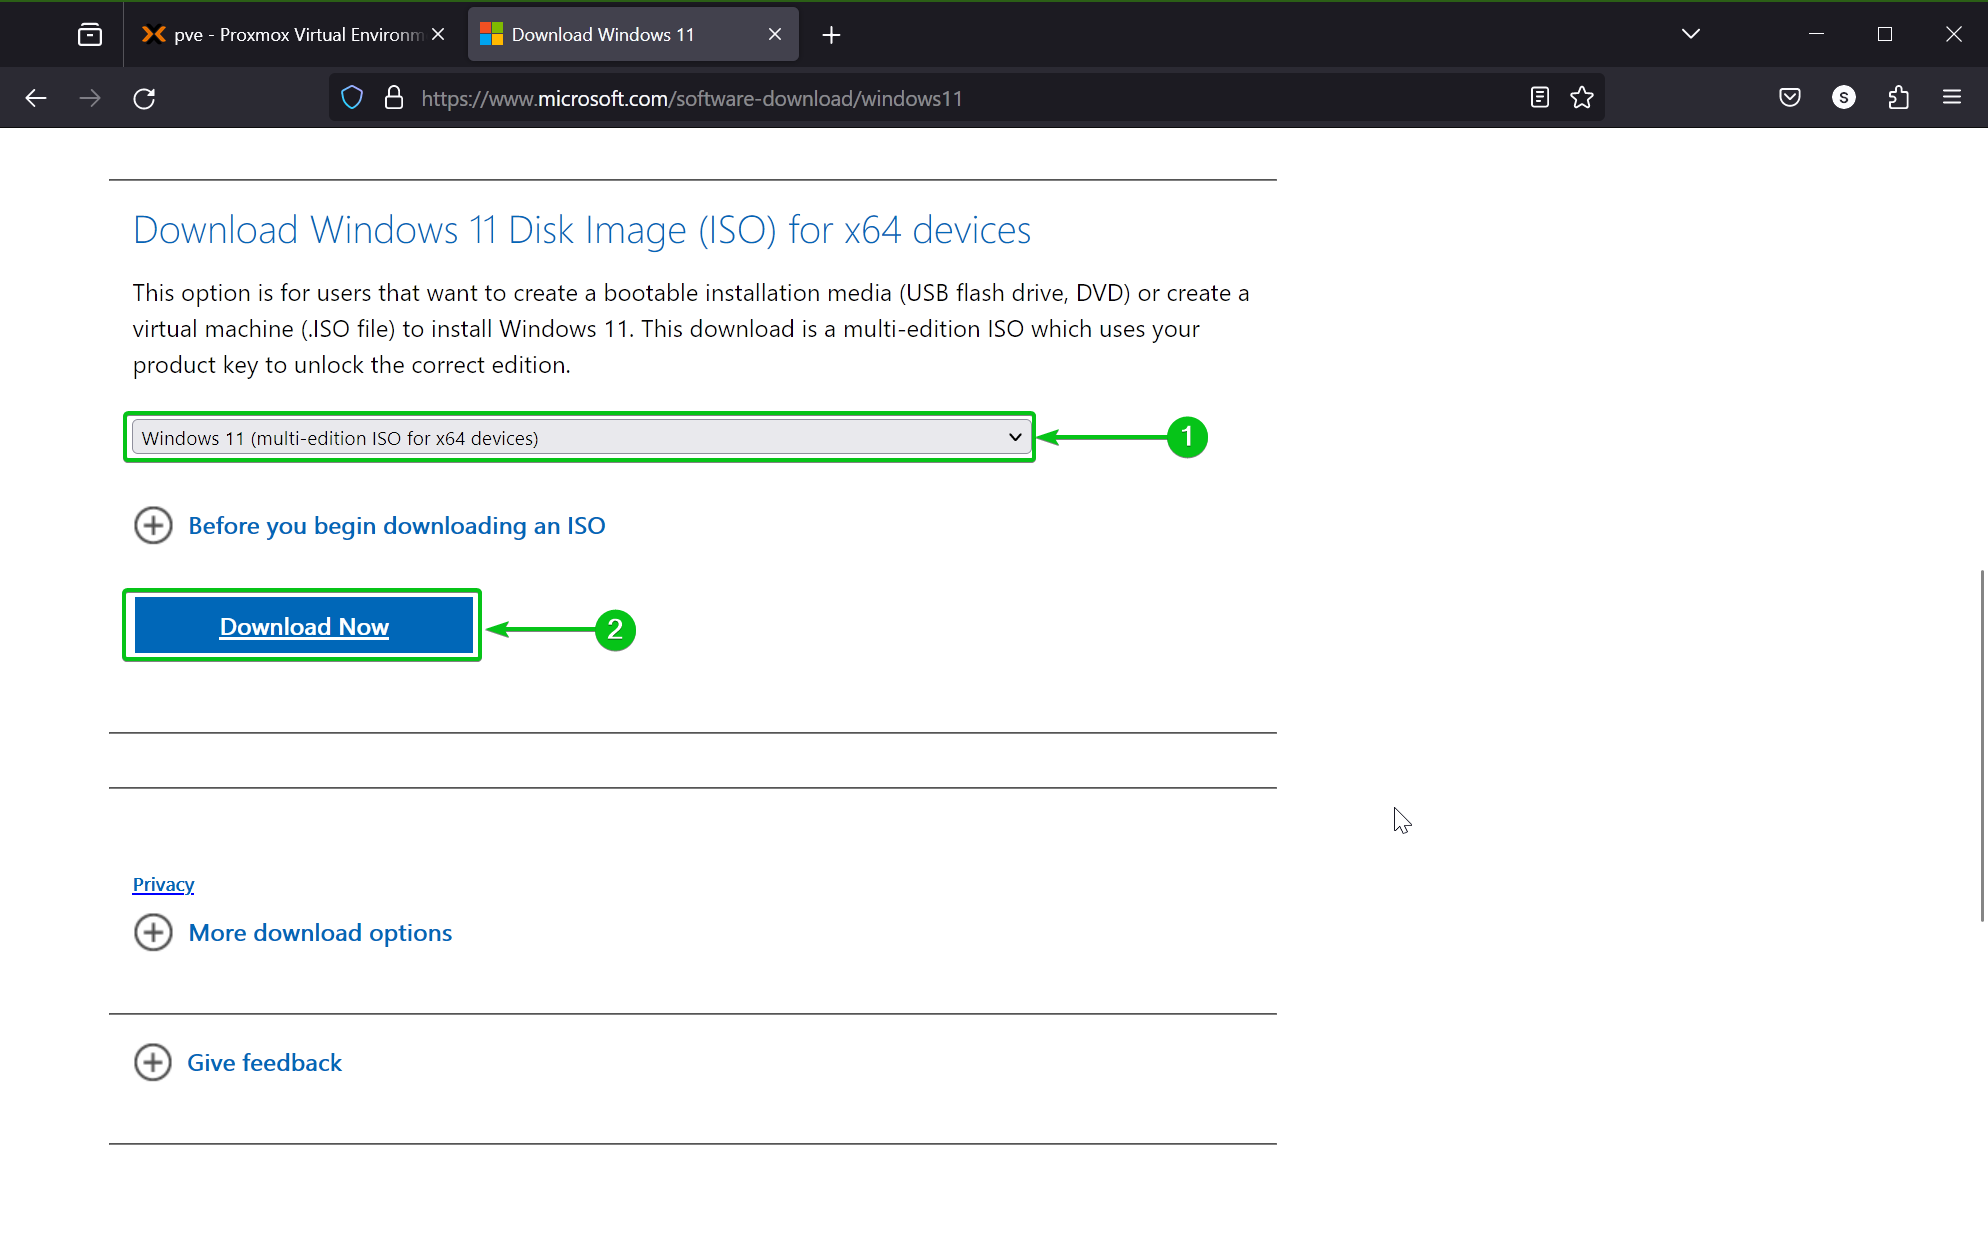
To download the Windows 11 ISO image, visit the official download page of Windows 11 from your favorite web browser.
Once the page loads, select Windows 11 (multi-edition ISO for x64 devices)[1] from the dropdown menu and click on Download Now[2].
Select your language from the dropdown menu[1] and click on Confirm[2].
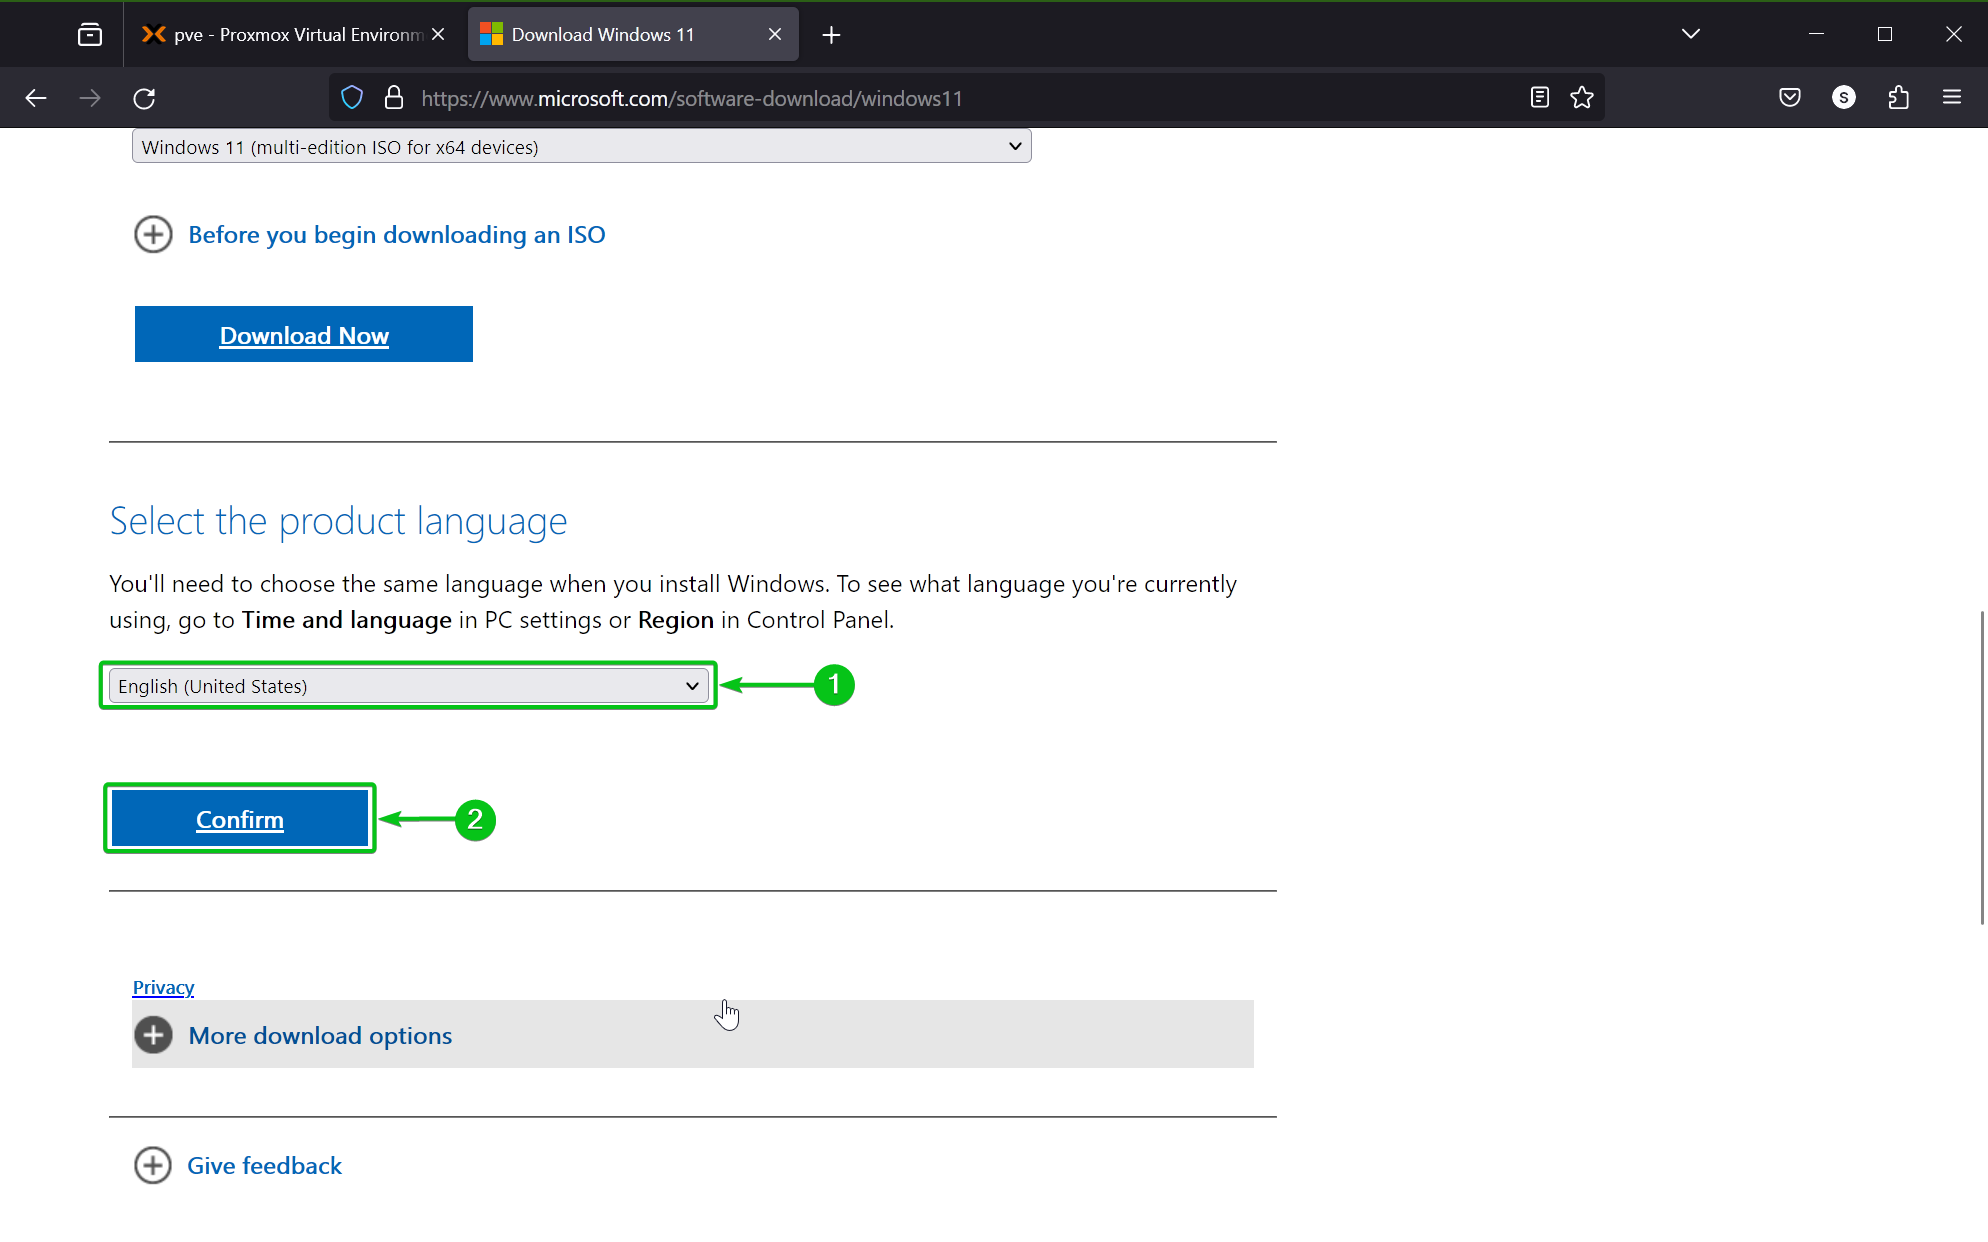
The download link for the Windows 11 ISO image should be generated.
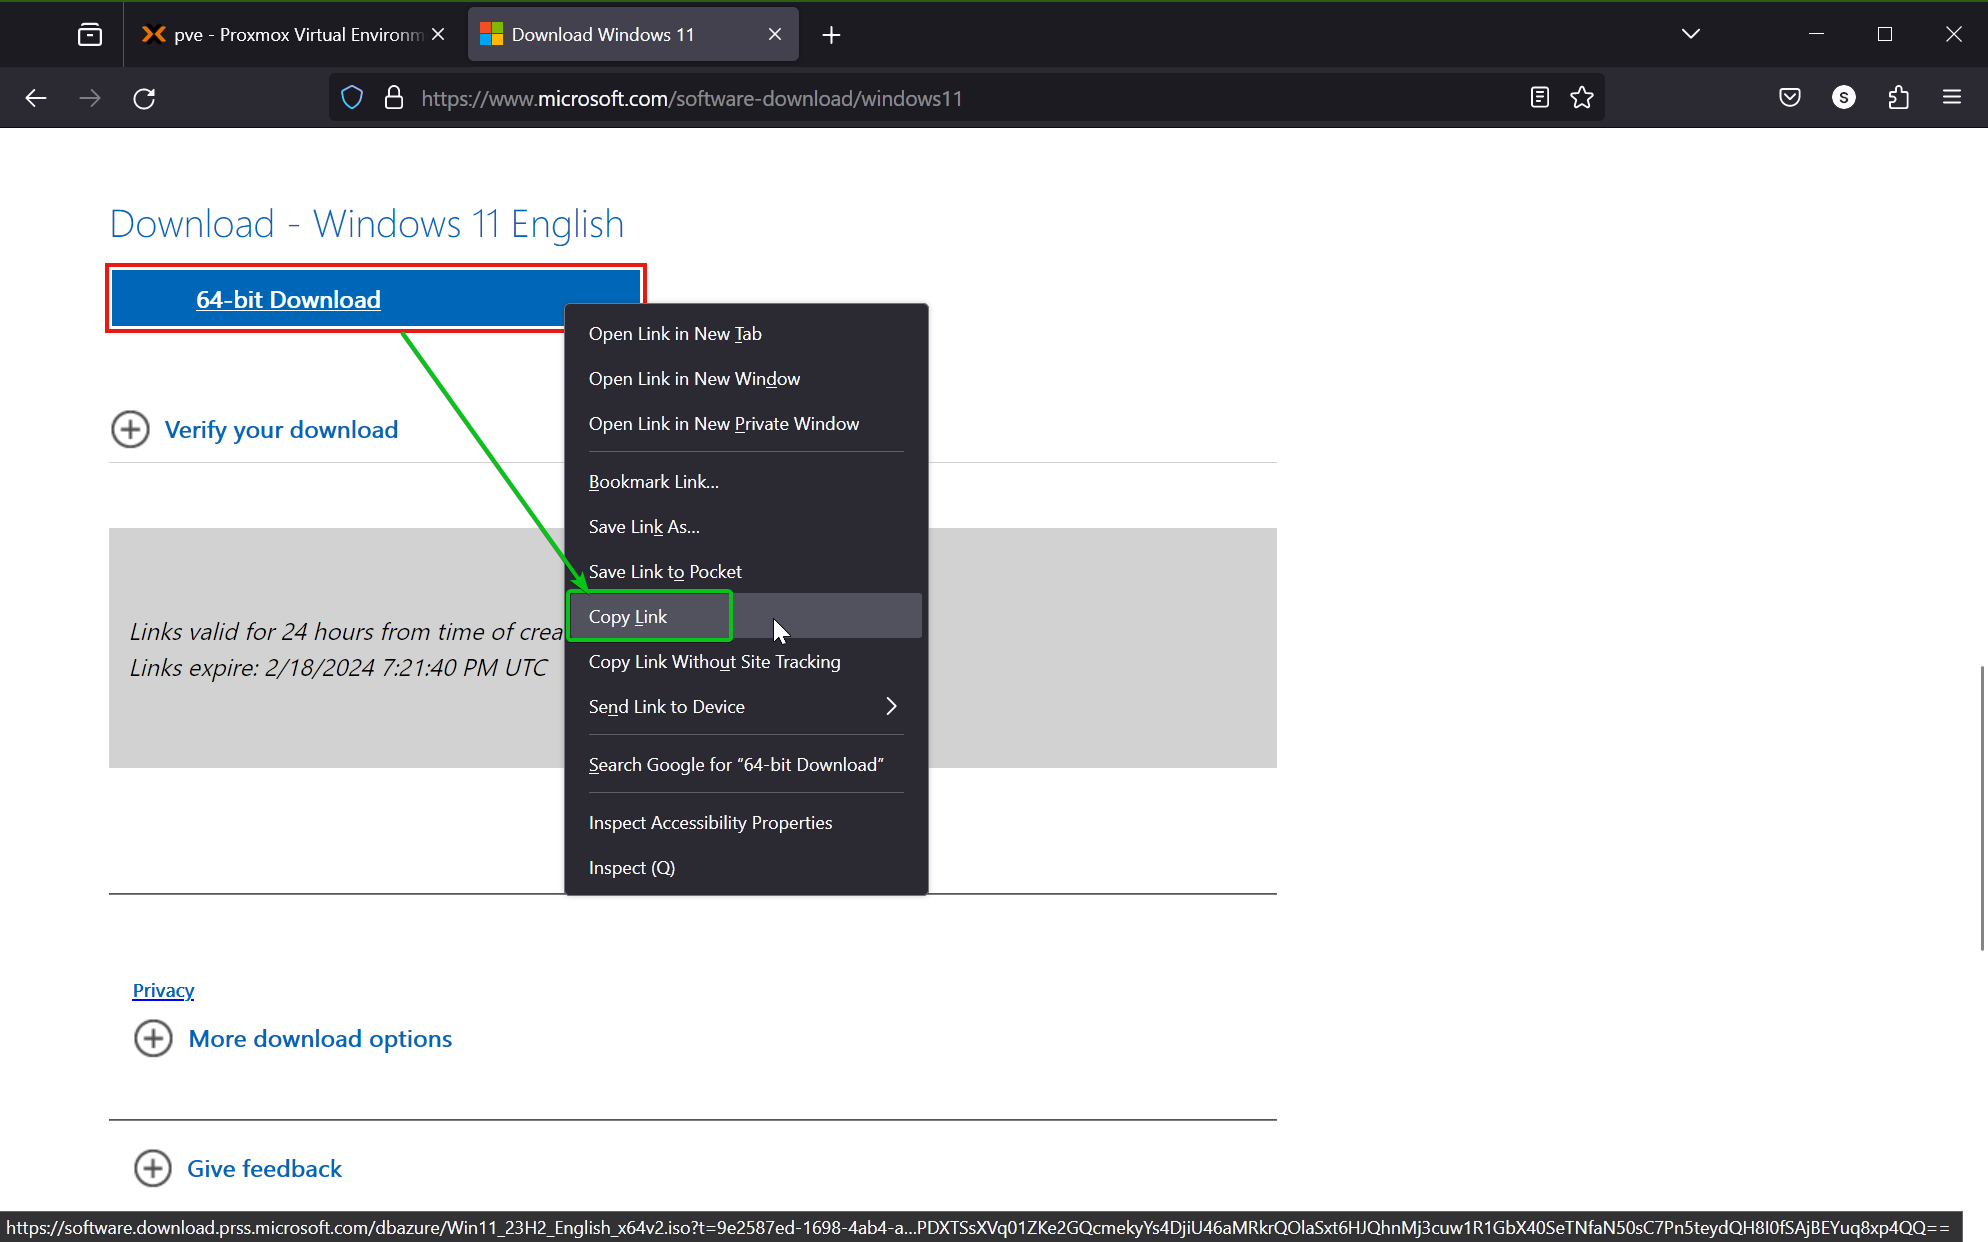
To download the Windows 11 ISO image on your computer (so that you can upload it to Proxmox VE), click on the 64-bit Download button.
To download the Windows 11 ISO image on your Proxmox VE 8 server directly, right-click (RMB) on the 64-bit Download button and click on Copy Link (or similar option depending on your web browser) to copy the download link of the Windows 11 ISO image.
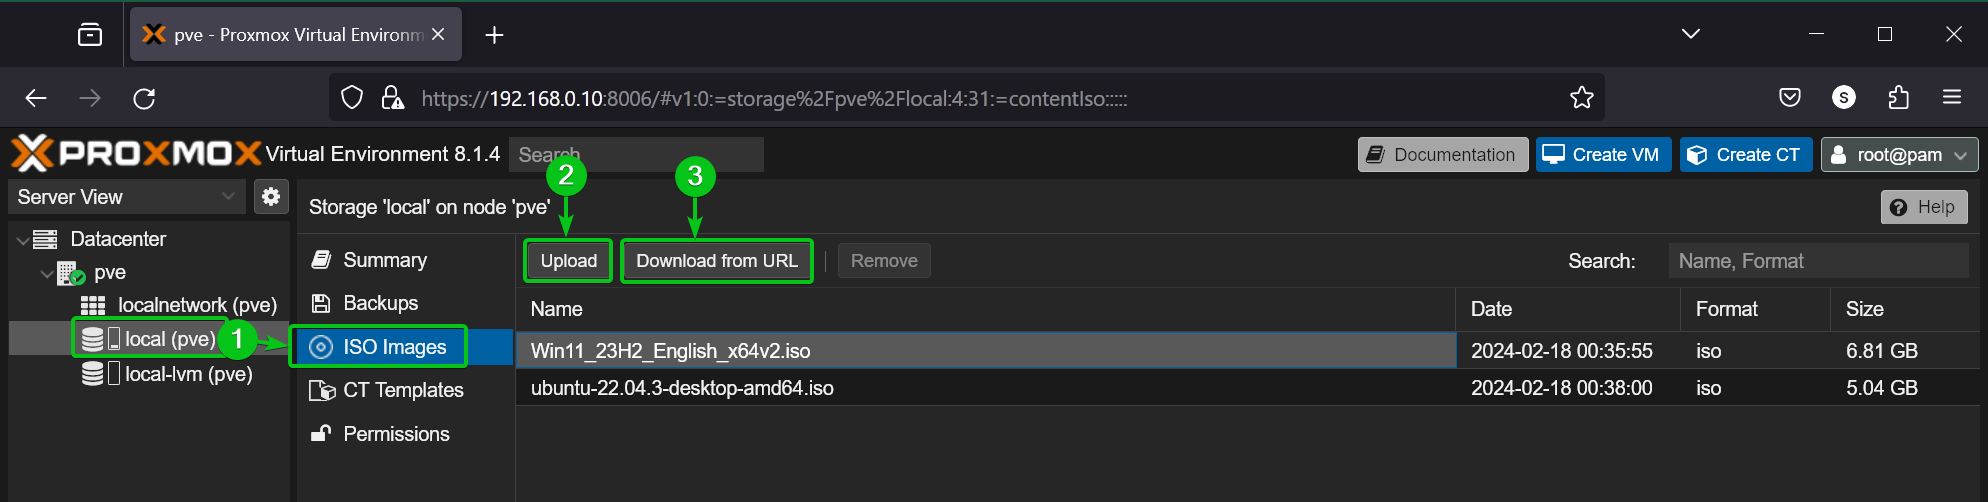
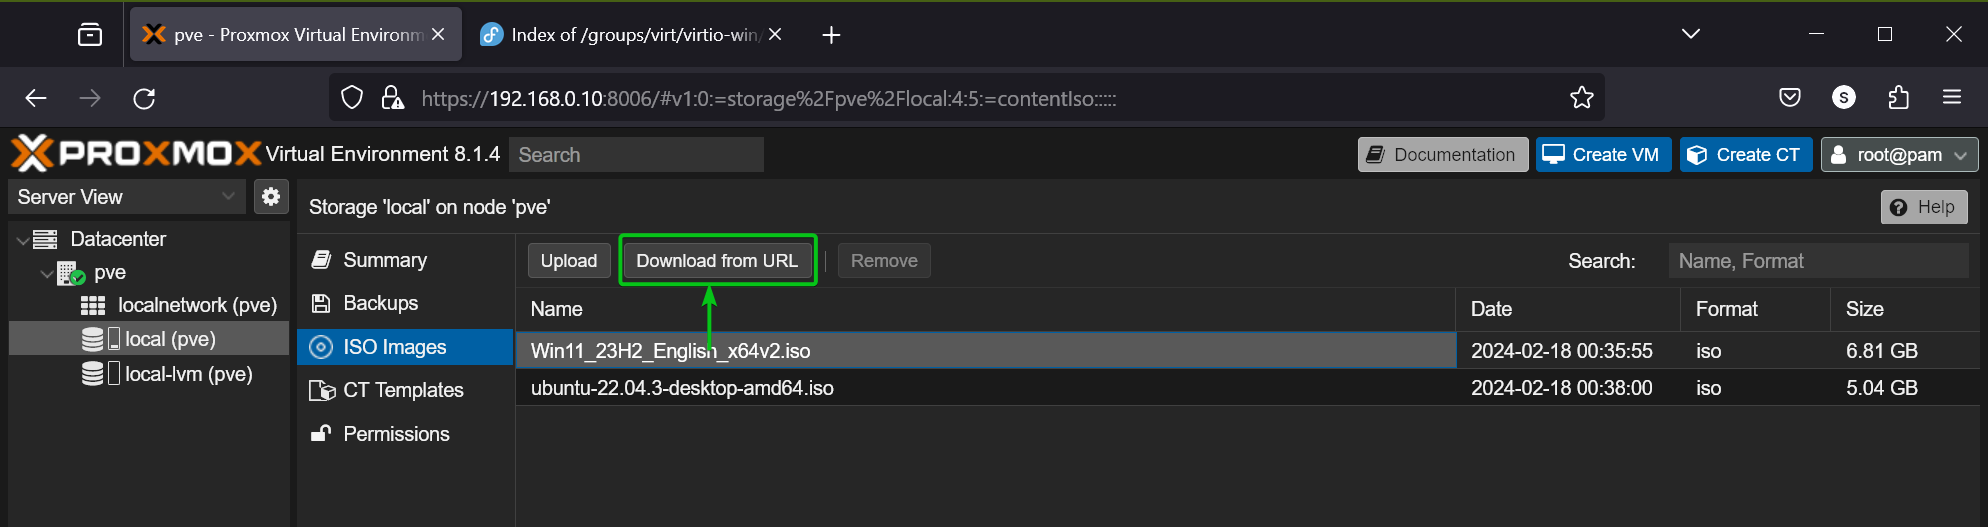
Now, navigate to the ISO Images section of your desired Proxmox VE datastore (that supports ISO image) from the resource tree of your Proxmox VE server[1].
If you’ve downloaded the Windows 11 ISO image on your computer, click on Upload and select the Windows 11 ISO image file from your computer to upload it to your Proxmox VE server[2].
If you want to download the Windows 11 ISO image directly on your Proxmox VE server, click on Download from URL on your Proxmox VE server[3]. I will demonstrate this method in this article.
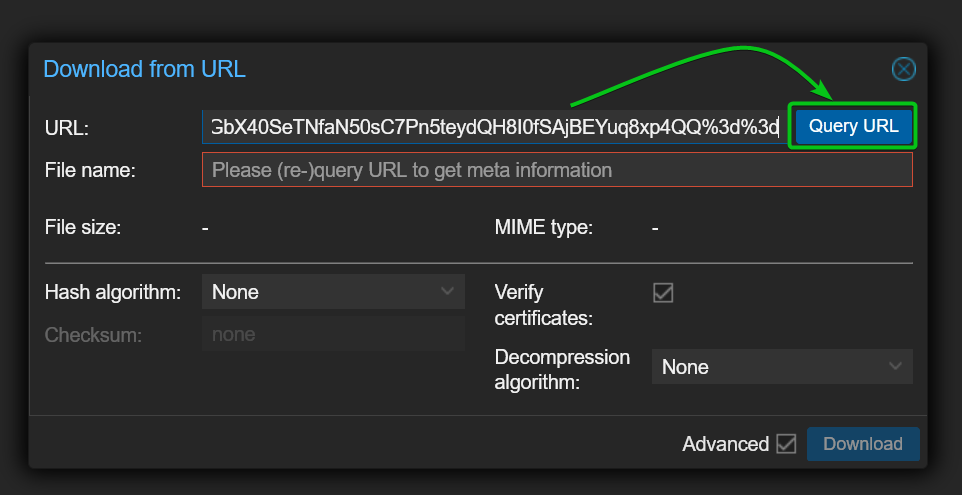
Once you’ve clicked on the Download from URL button, you will see the following window. Paste the Windows 11 ISO download link (that you’ve copied recently) in the URL section and click on Query URL.
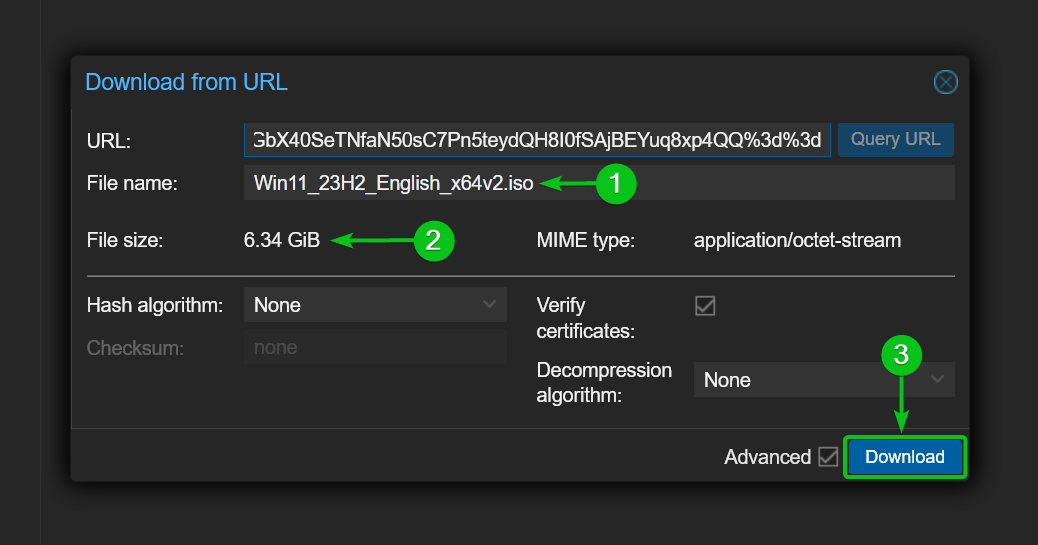
The correct File name[1] and File size[2] of the Windows 11 ISO image should be displayed. Click on Download[3].
Proxmox VE should start downloading the Windows 11 ISO image. It will take a while to complete as it’s a big download. Just wait till it finishes.
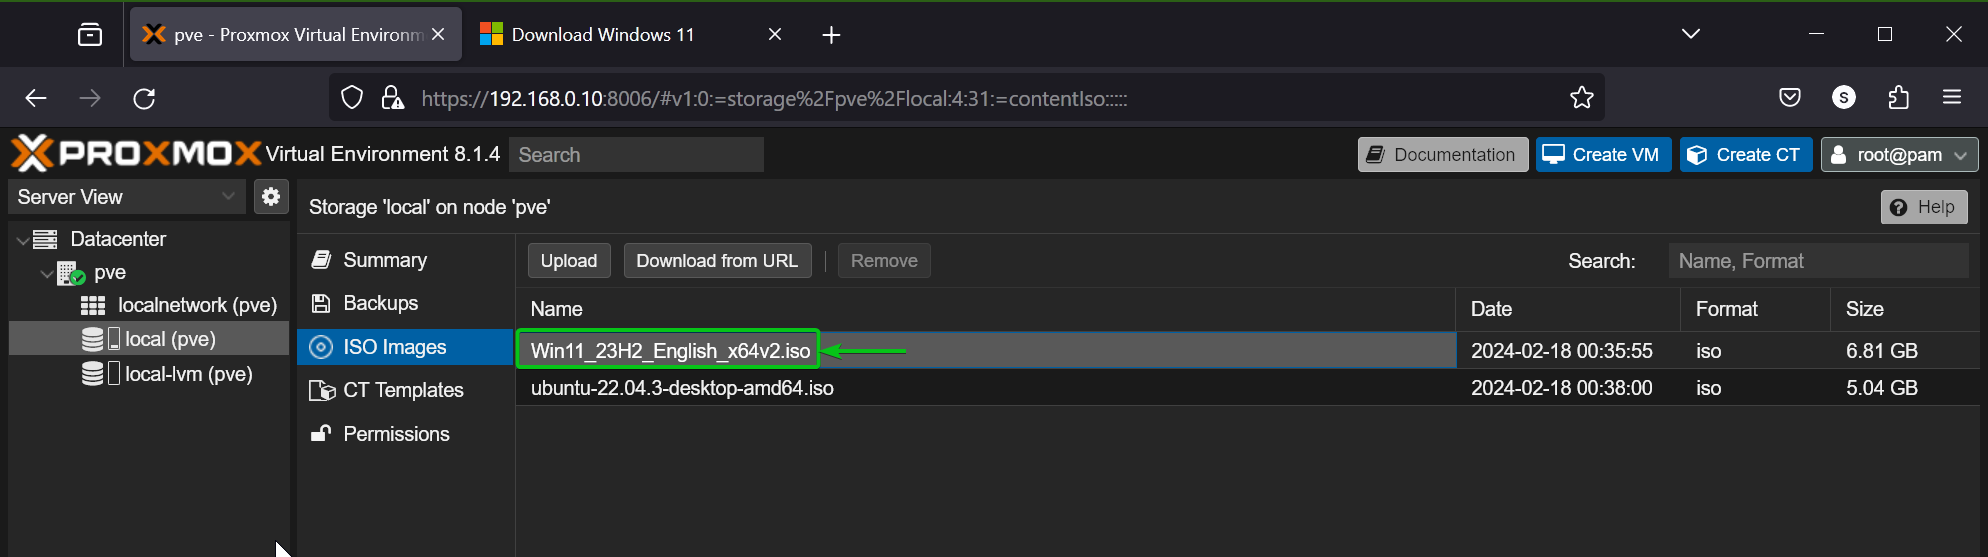
Once the Windows 11 ISO image is downloaded on your Proxmox VE 8 server, it will be listed in the ISO Images section of your selected Proxmox VE datastore.
Downloading the Latest VirtIO Drivers ISO File for Windows 11 on Proxmox VE 8
To get the best performance, you need to install the required VirtIO drivers on the Windows 11 operating system after it’s installed on the Proxmox VE virtual machine.
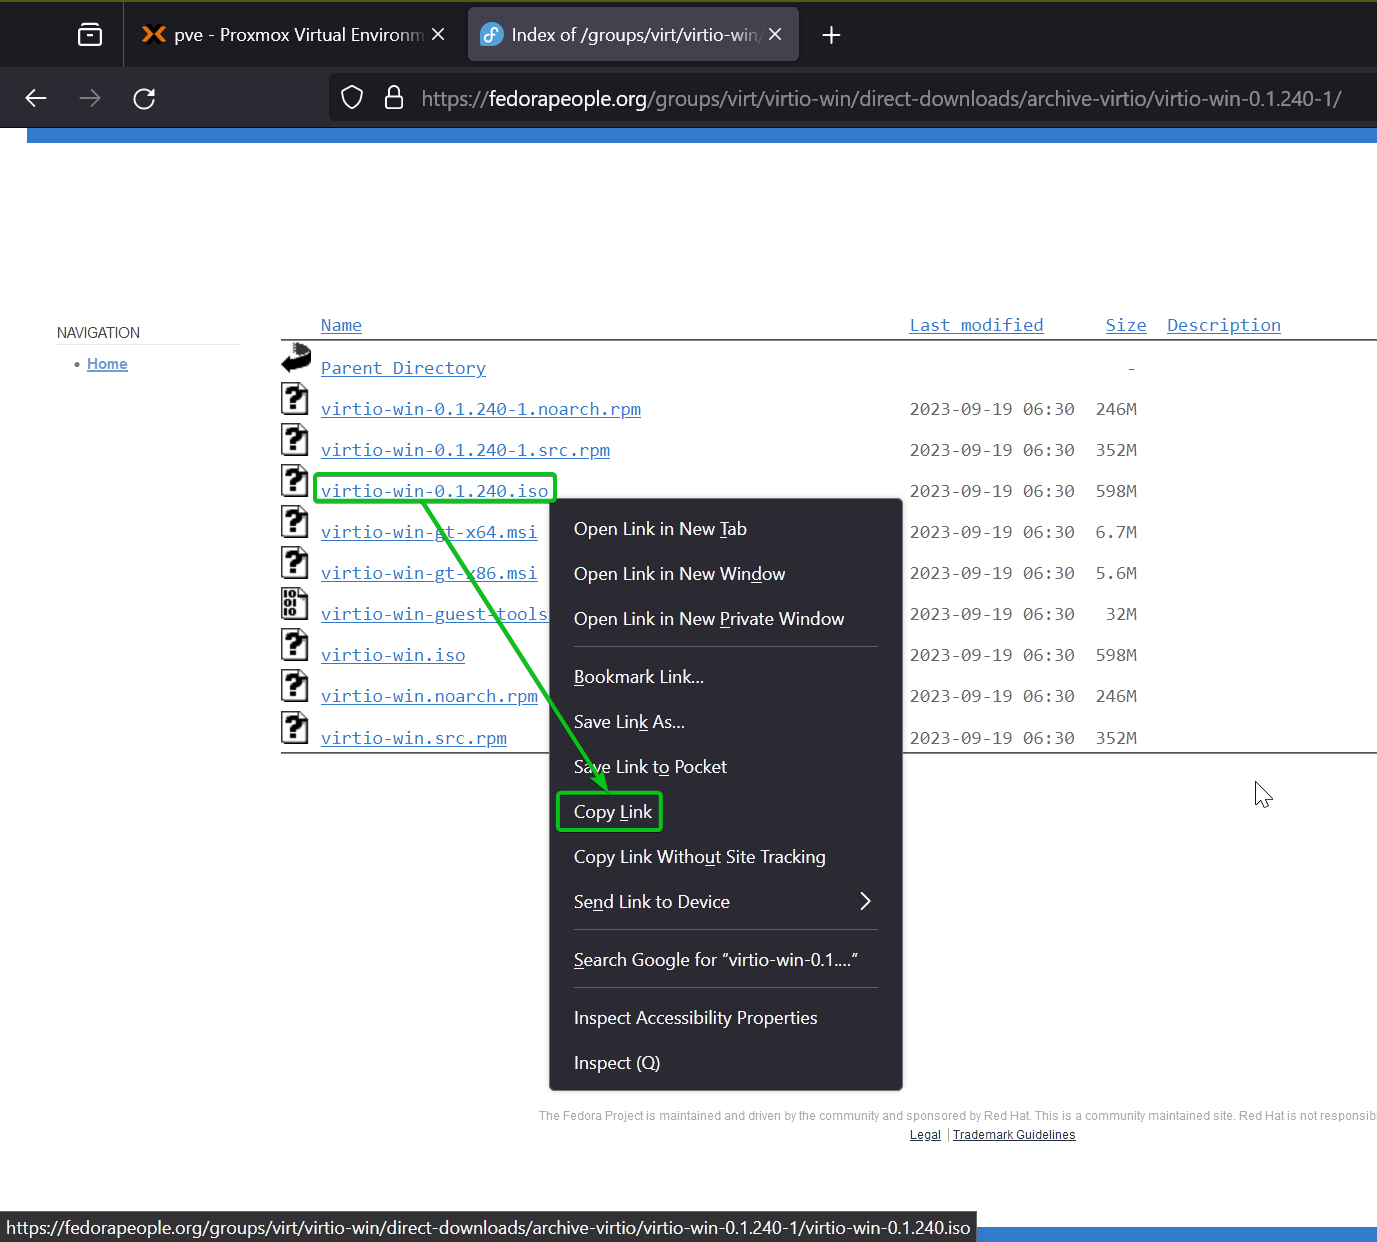
To download the latest version of the VirtIO drivers ISO image file on Proxmox VE 8, visit the official VirtIO drivers download page from your favorite web browser.
Once the page loads, right-click on the virtio-win.iso image file or virtio-win-.iso image file and click on Copy Link (or similar option dependiing on the web browser you’re using).
Then, navigate to the ISO Images section of your desired Proxmox VE datastore (that supports ISO images) and click on Download from URL.
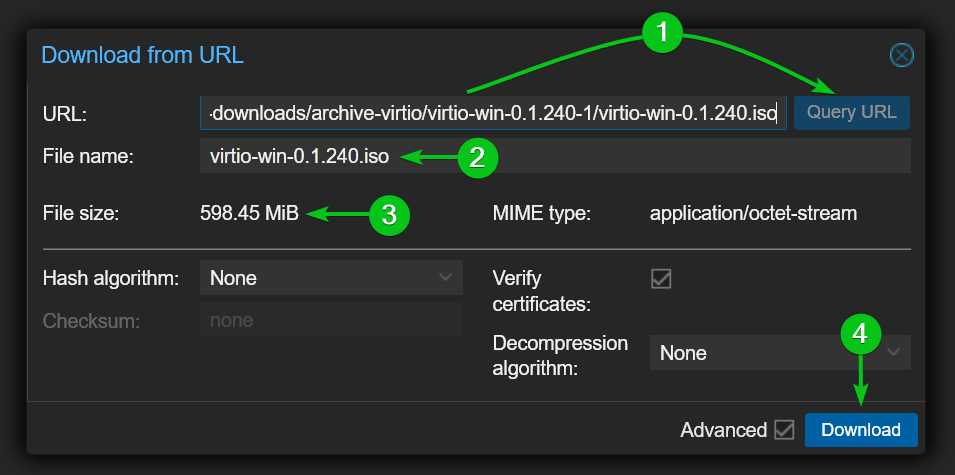
Type in the VirtIO ISO image download link (that you’ve copied recently) in the URL section and click on Query URL[1]. The file name[2] and file size[3] of the VirtIO ISO image should be displayed. Then, click on Download[4].
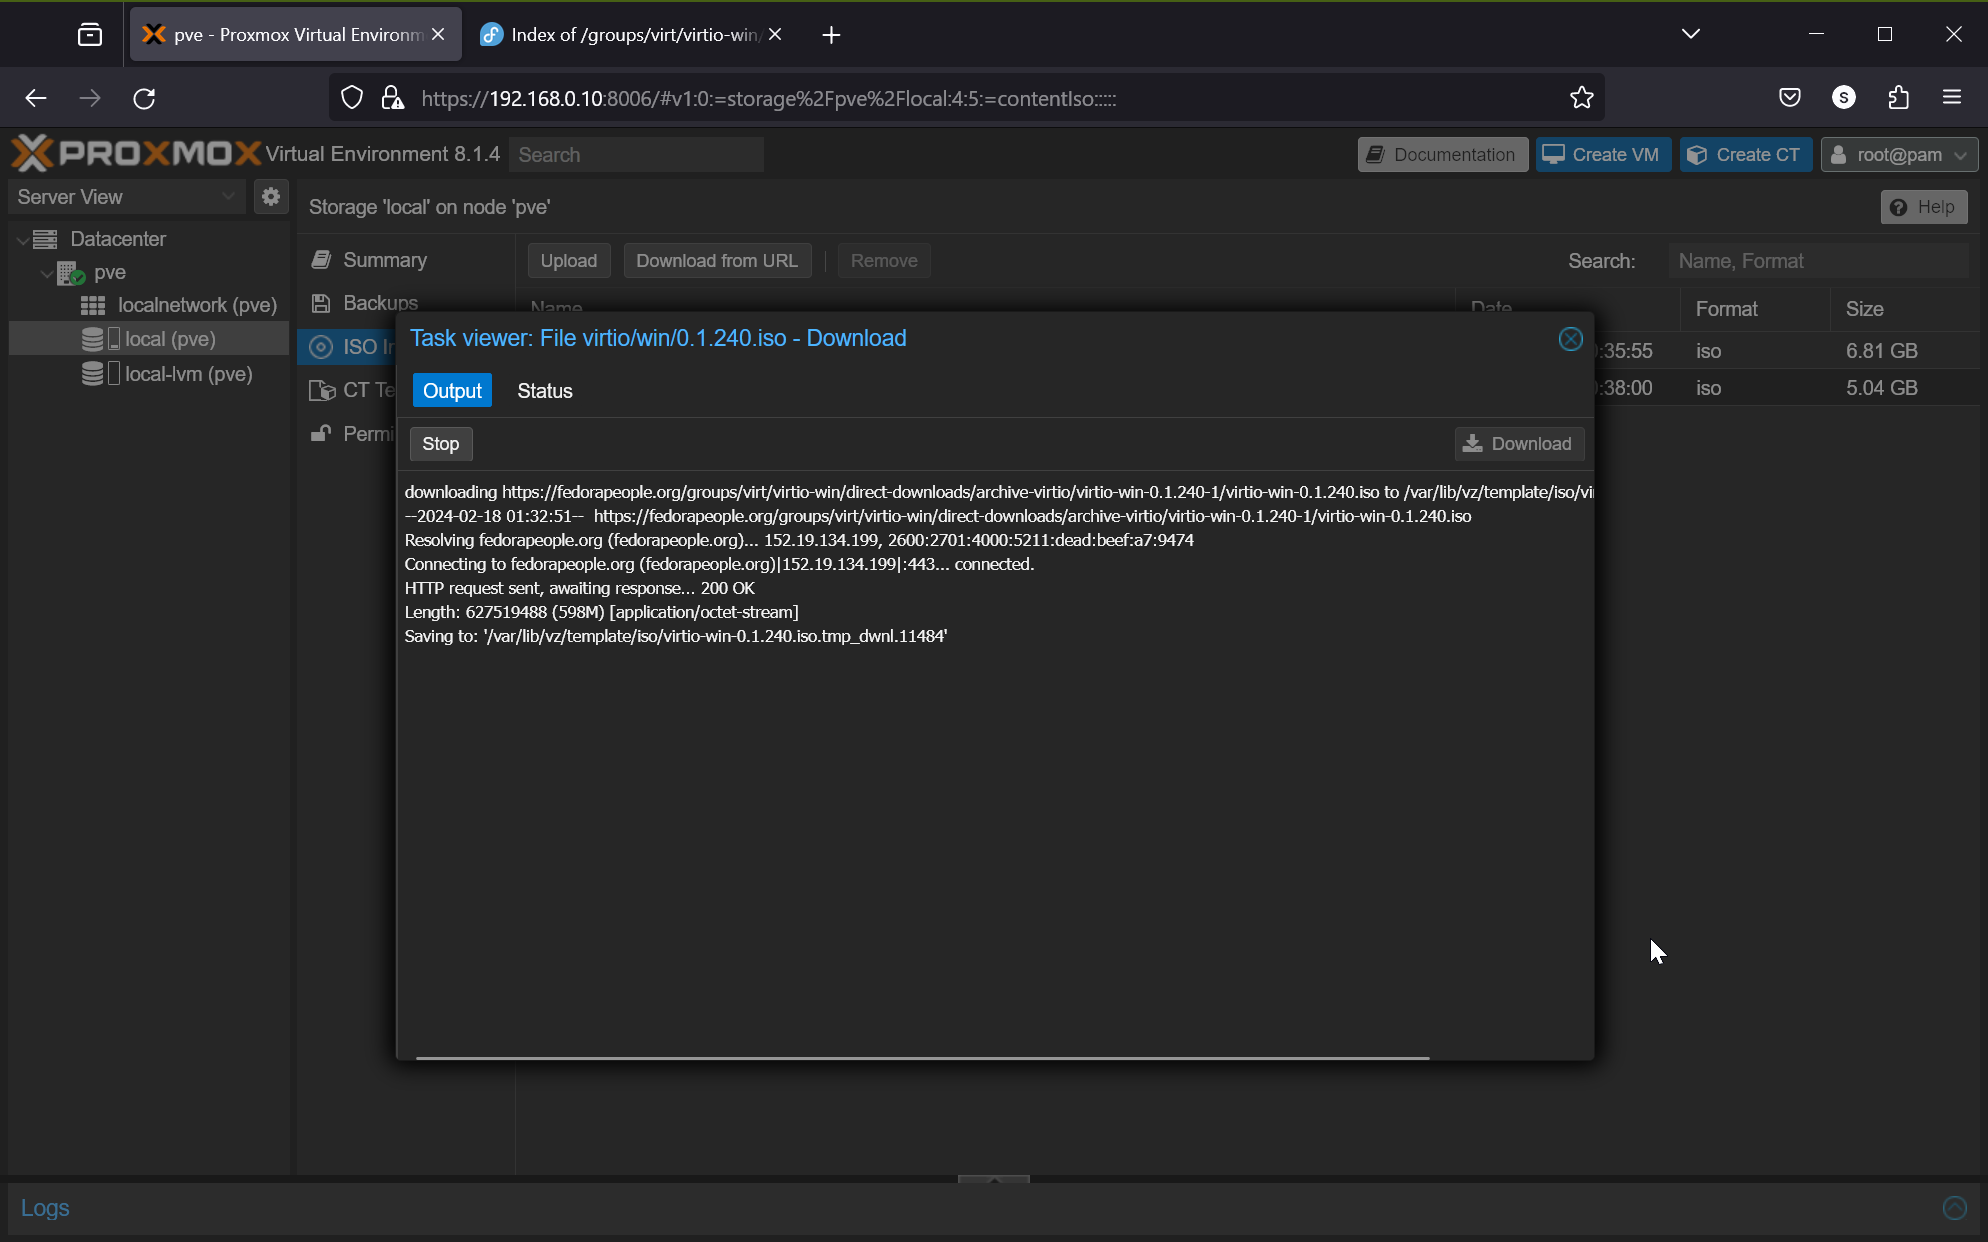
Proxmox VE should start downloading the VirtIO ISO image. It will take a while to complete.
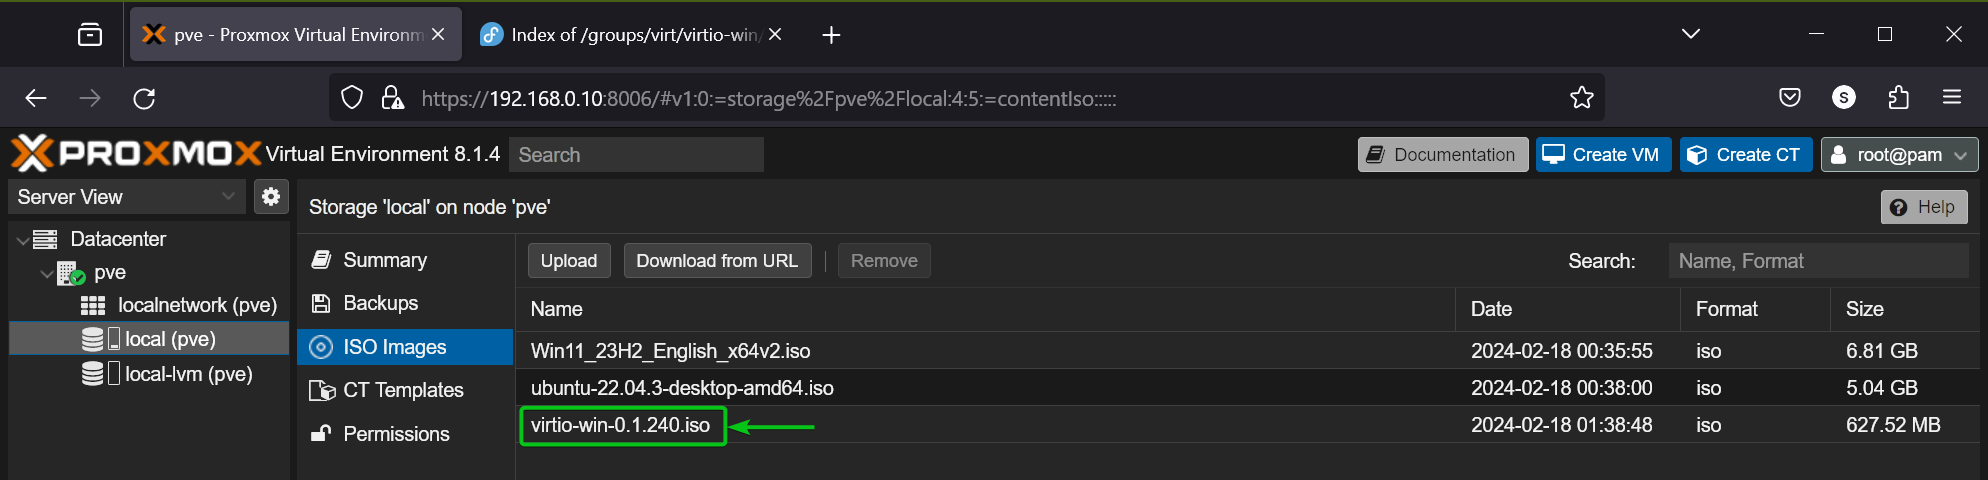
Once the VirtIO ISO image is downloaded, it will be displayed in the ISO Images section of the Proxmox VE datastore (where you’ve downloaded it).
Creating a Windows 11 Proxmox VE 8 Virtual Machine (VM)
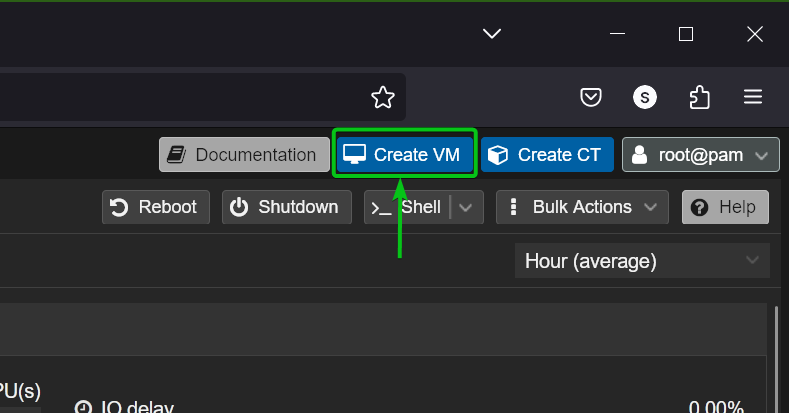
To create a new virtual machine on Proxmox VE 8, click on Create VM from the top-right corner of the Proxmox VE dashboard.
The Proxmox VE 8 virtual machine creation wizard should be displayed.
In the General tab, type in a name for your Windows 11 virtual machine[1] and click on Next[2].

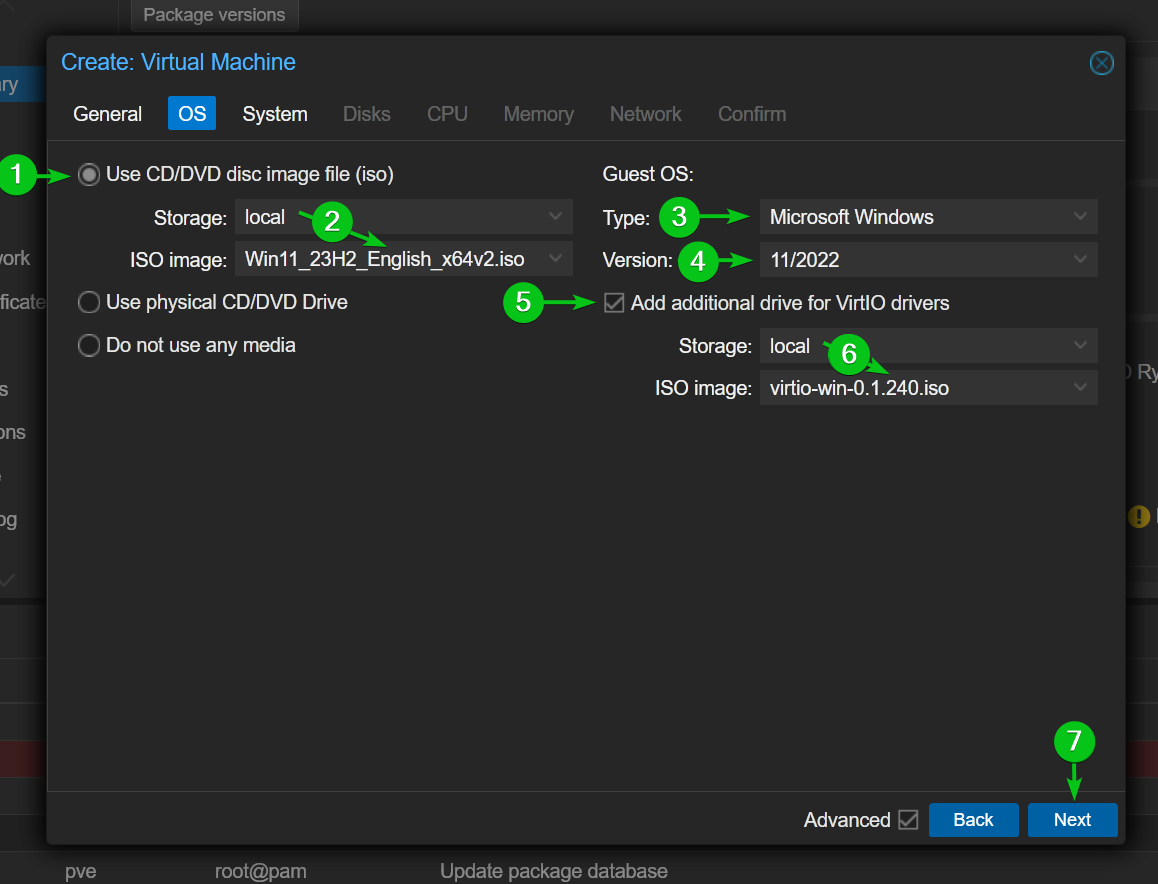
In the OS tab, select USE CD/DVD disk image file (iso)[1], select the datastore where you’ve uploaded/downloaded the Windows 11 ISO image from the Storage dropdown menu, and select the Windows 11 ISO image from the ISO image dropdown menu[2].
Then, select Microsoft Windows from the Guest OS Type dropdown menu[3], select 11/2022 from the Version dropdown menu[4], tick Add additional drive for VirtIO drivers[5], and select the VirtIO drivers ISO image file from the Storage and ISO image dropdown menus[6].
Once you’re done with all the steps, click on Next[7].
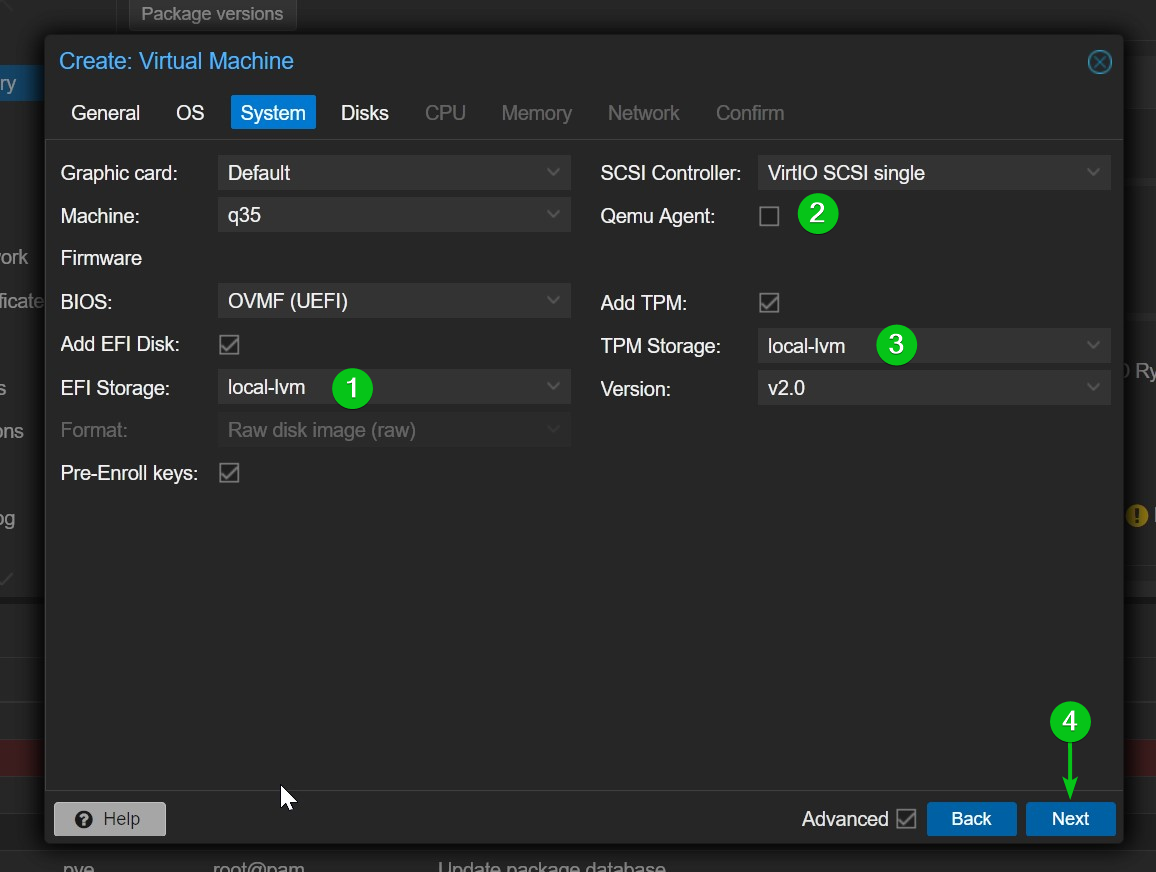
In the System tab, select a datastore for the EFI disk from the EFI Storage dropdown menu[1], tick the Qemu Agent checkbox[2], and select a datastore for the TPM from the TPM Storage dropdown menu[3].
Once you’re done, click on Next[4].
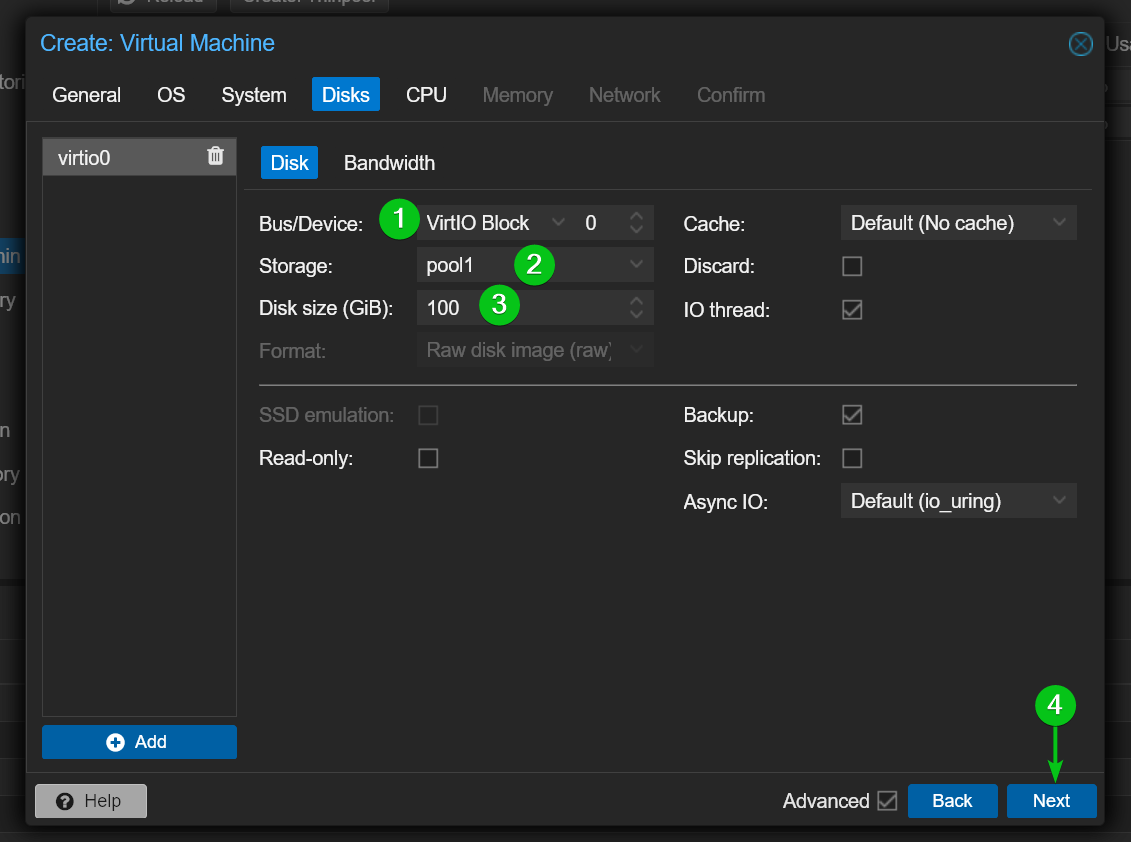
In the Disks tab, select VirtIO Block from the Bus/Device dropdown menu[1], select a datastore for the virtual machine’s disk from the Storage dropdown menu[2], and type in your desired disk size in the Disk size (GiB) section[3].
Once you’re done, click on Next[4].
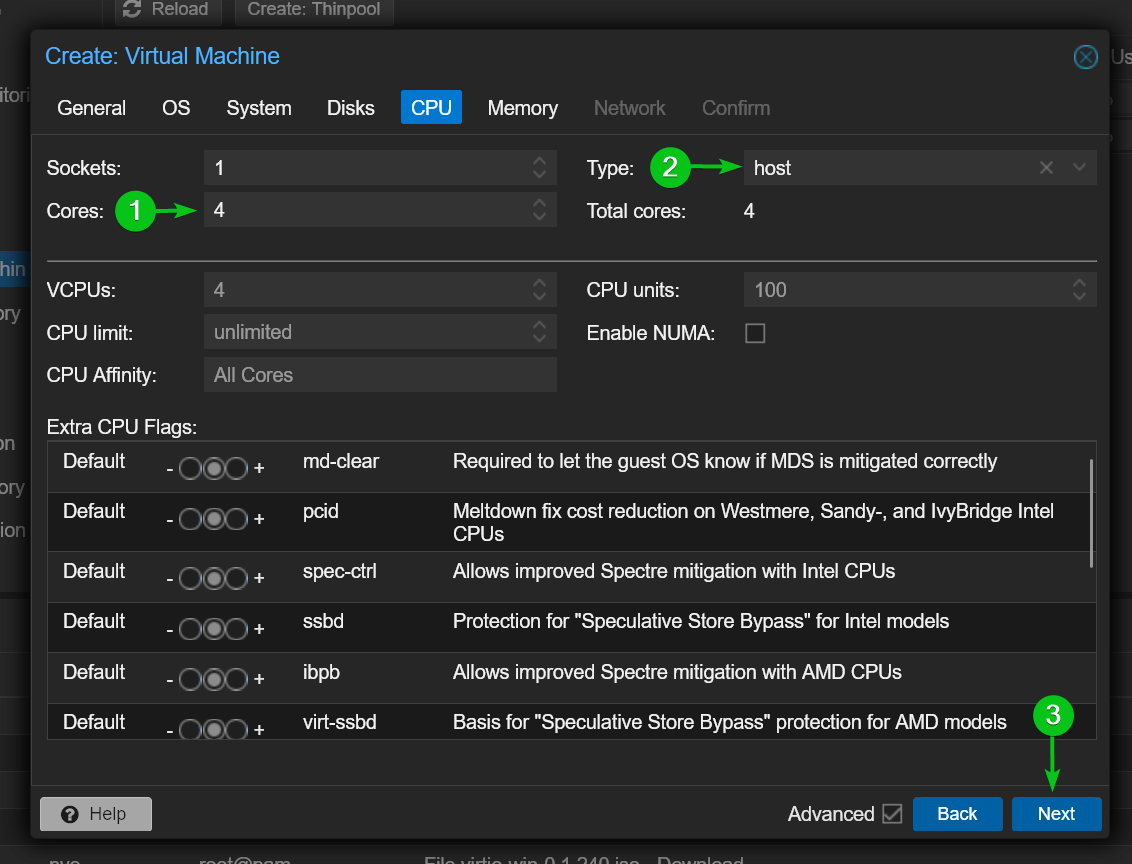
In the CPU tab, select the number of CPU cores you want to allocate for the virtual machine from the Cores section[1], select host from the Type dropdown menu[2], and click on Next[3].
In the Memory tab, type in the amount of memory you want to allocate to the Proxmox VE virtual machine (VM) in the Memory (MiB) section[1].
If you want to overprovision the memory of your Proxmox VE server (allocate more memory to virtual machines than you have available on your Proxmox VE server), tick Ballooning Device[2] and type in the minimum amount of memory that you want to allocate to the virtual machine in the Minimum memory (MiB) section[3].
If you enable Ballooning Device for this virtual machine, the virtual machine will release unused memory to the Proxmox VE server so that it can allocate it to other virtual machines. For more information on this, read the Proxmox VE Dynamic Memory Management documentation.
Once you’re done, click on Next[4].

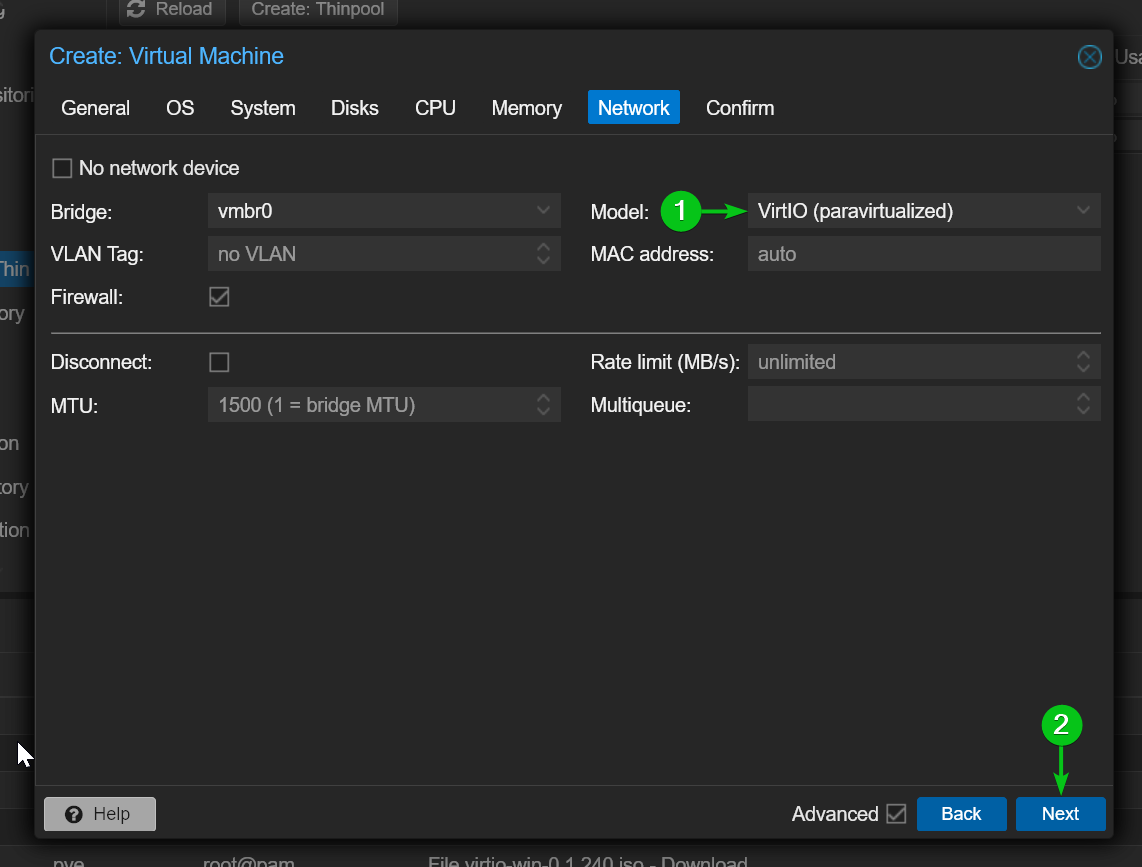
In the Network tab, select VirtIO (paravirtualized)[1] from the Model dropdown menu and click on Next[2].
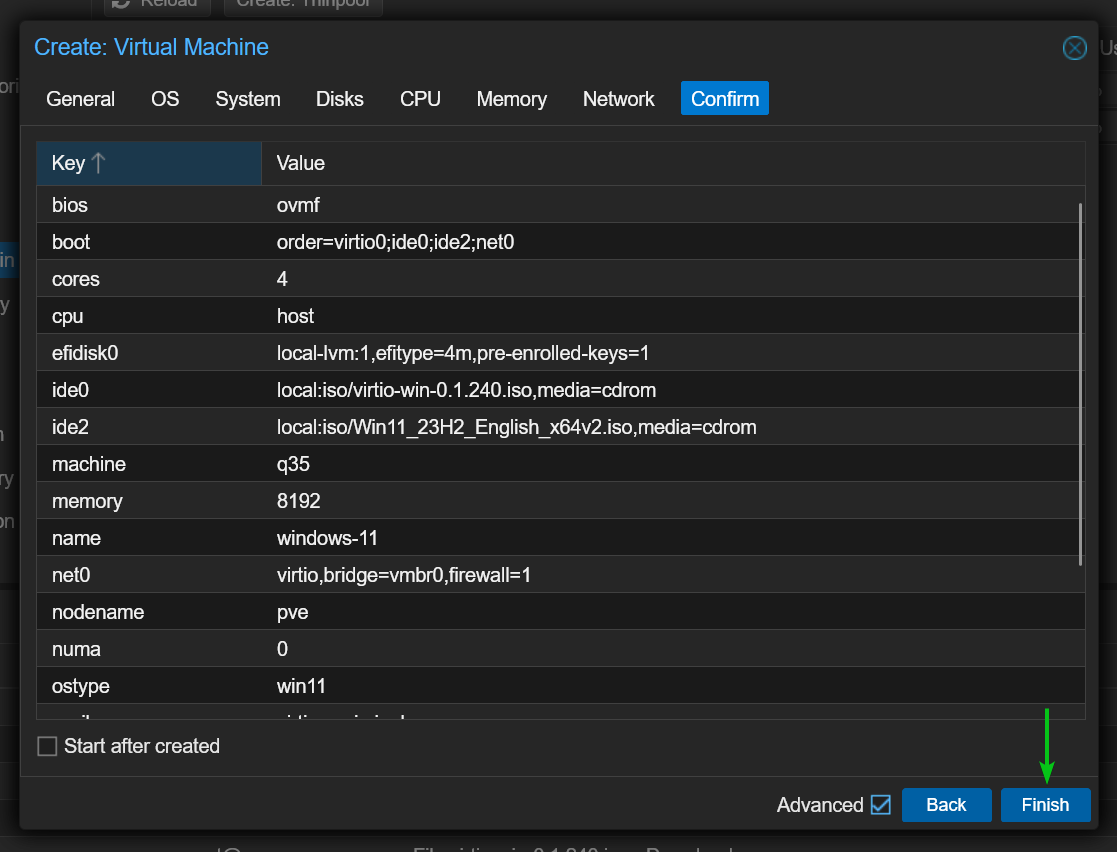
Click on Finish.
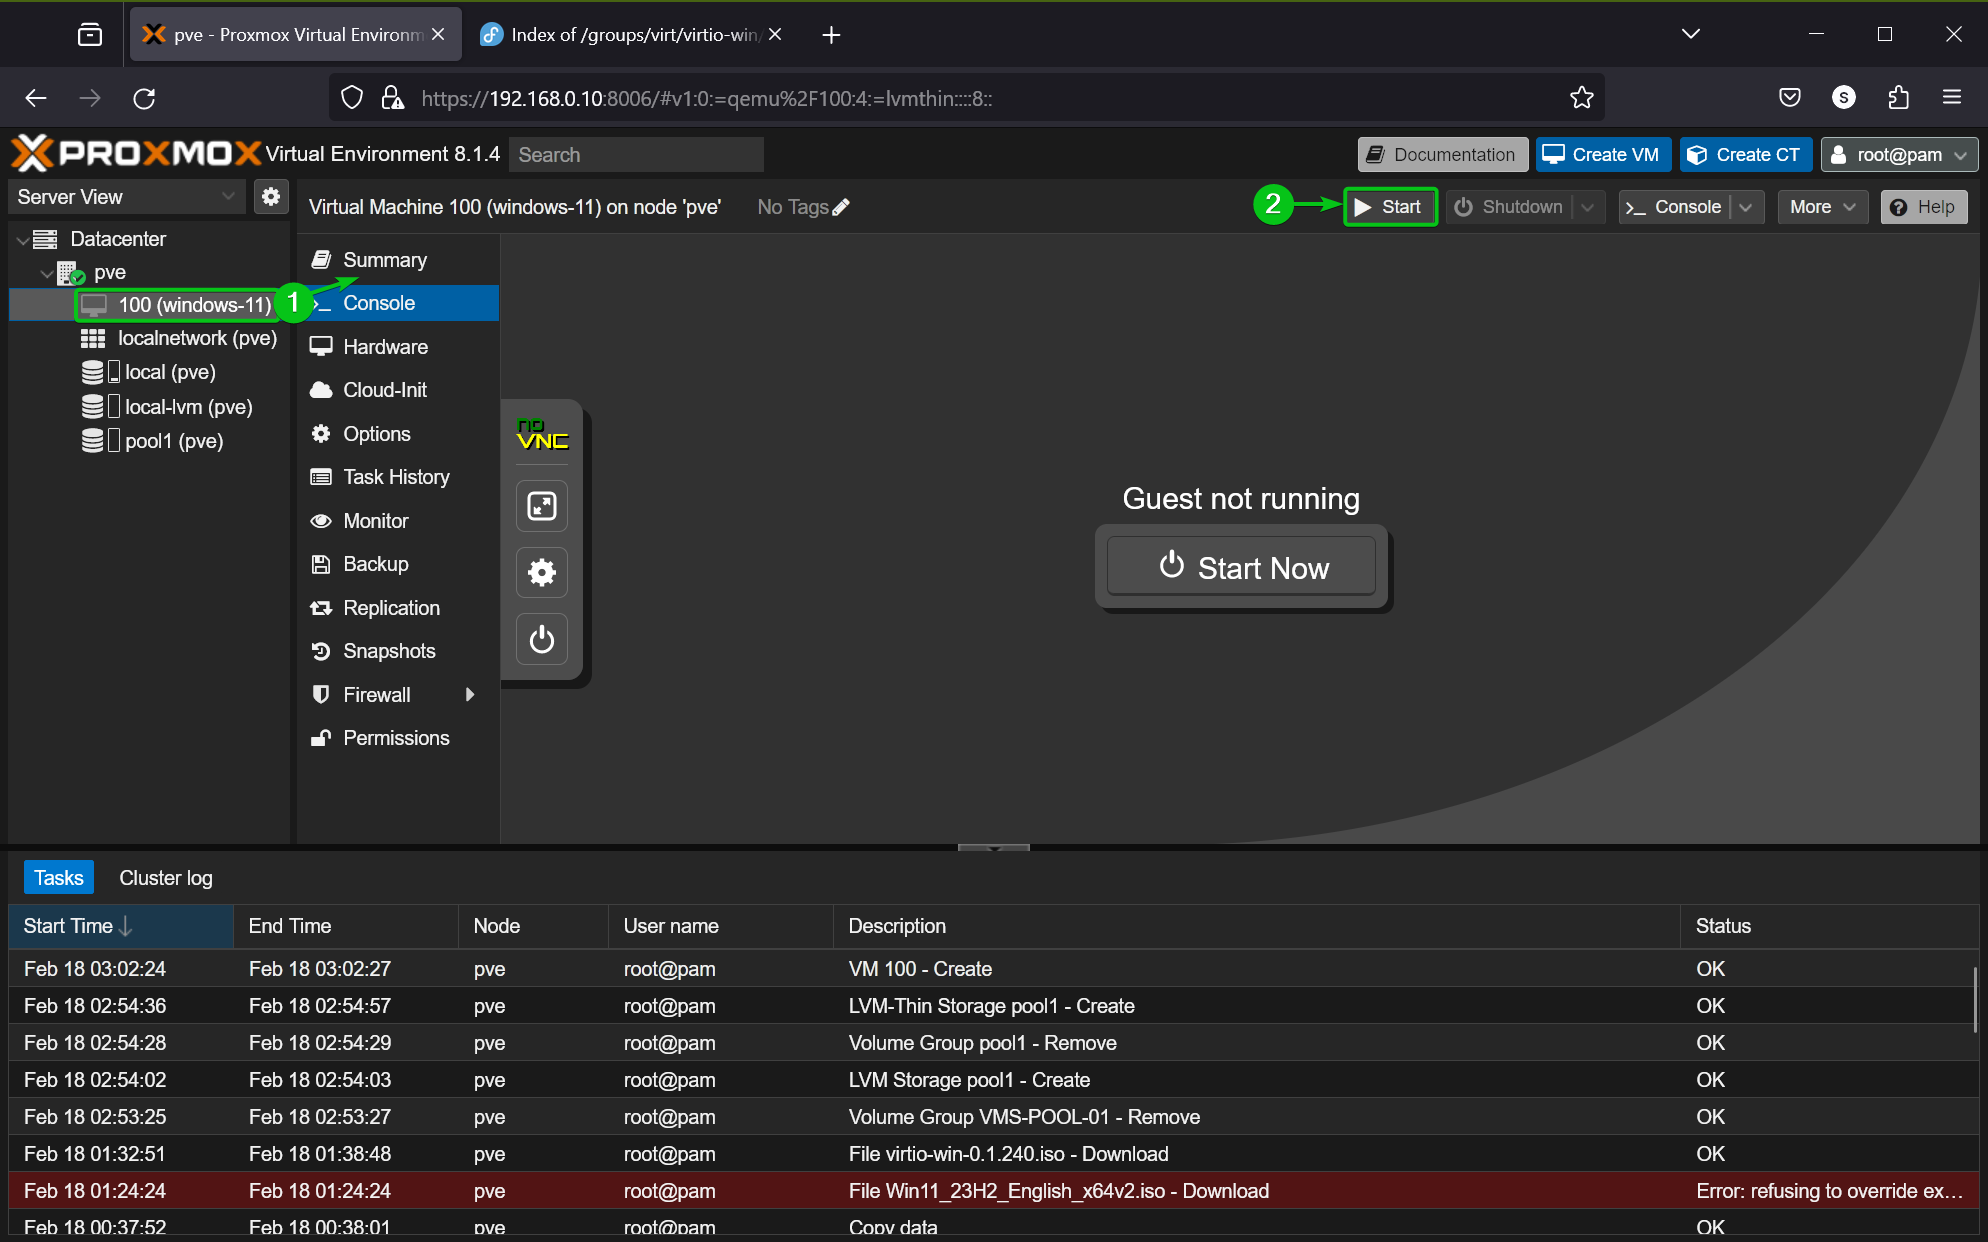
A Windows 11 Proxmox VE 8 virtual machine should be created[1].
To start the Windows 11 virtual machine, click on Start[2].
Press any key and the Windows 11 installer should be displayed on the virtual machine. From here, you can install Windows 11 on the Proxmox VE virtual machine as usual.

Installing Windows 11 on the Proxmox VE 8 Virtual Machine (VM)
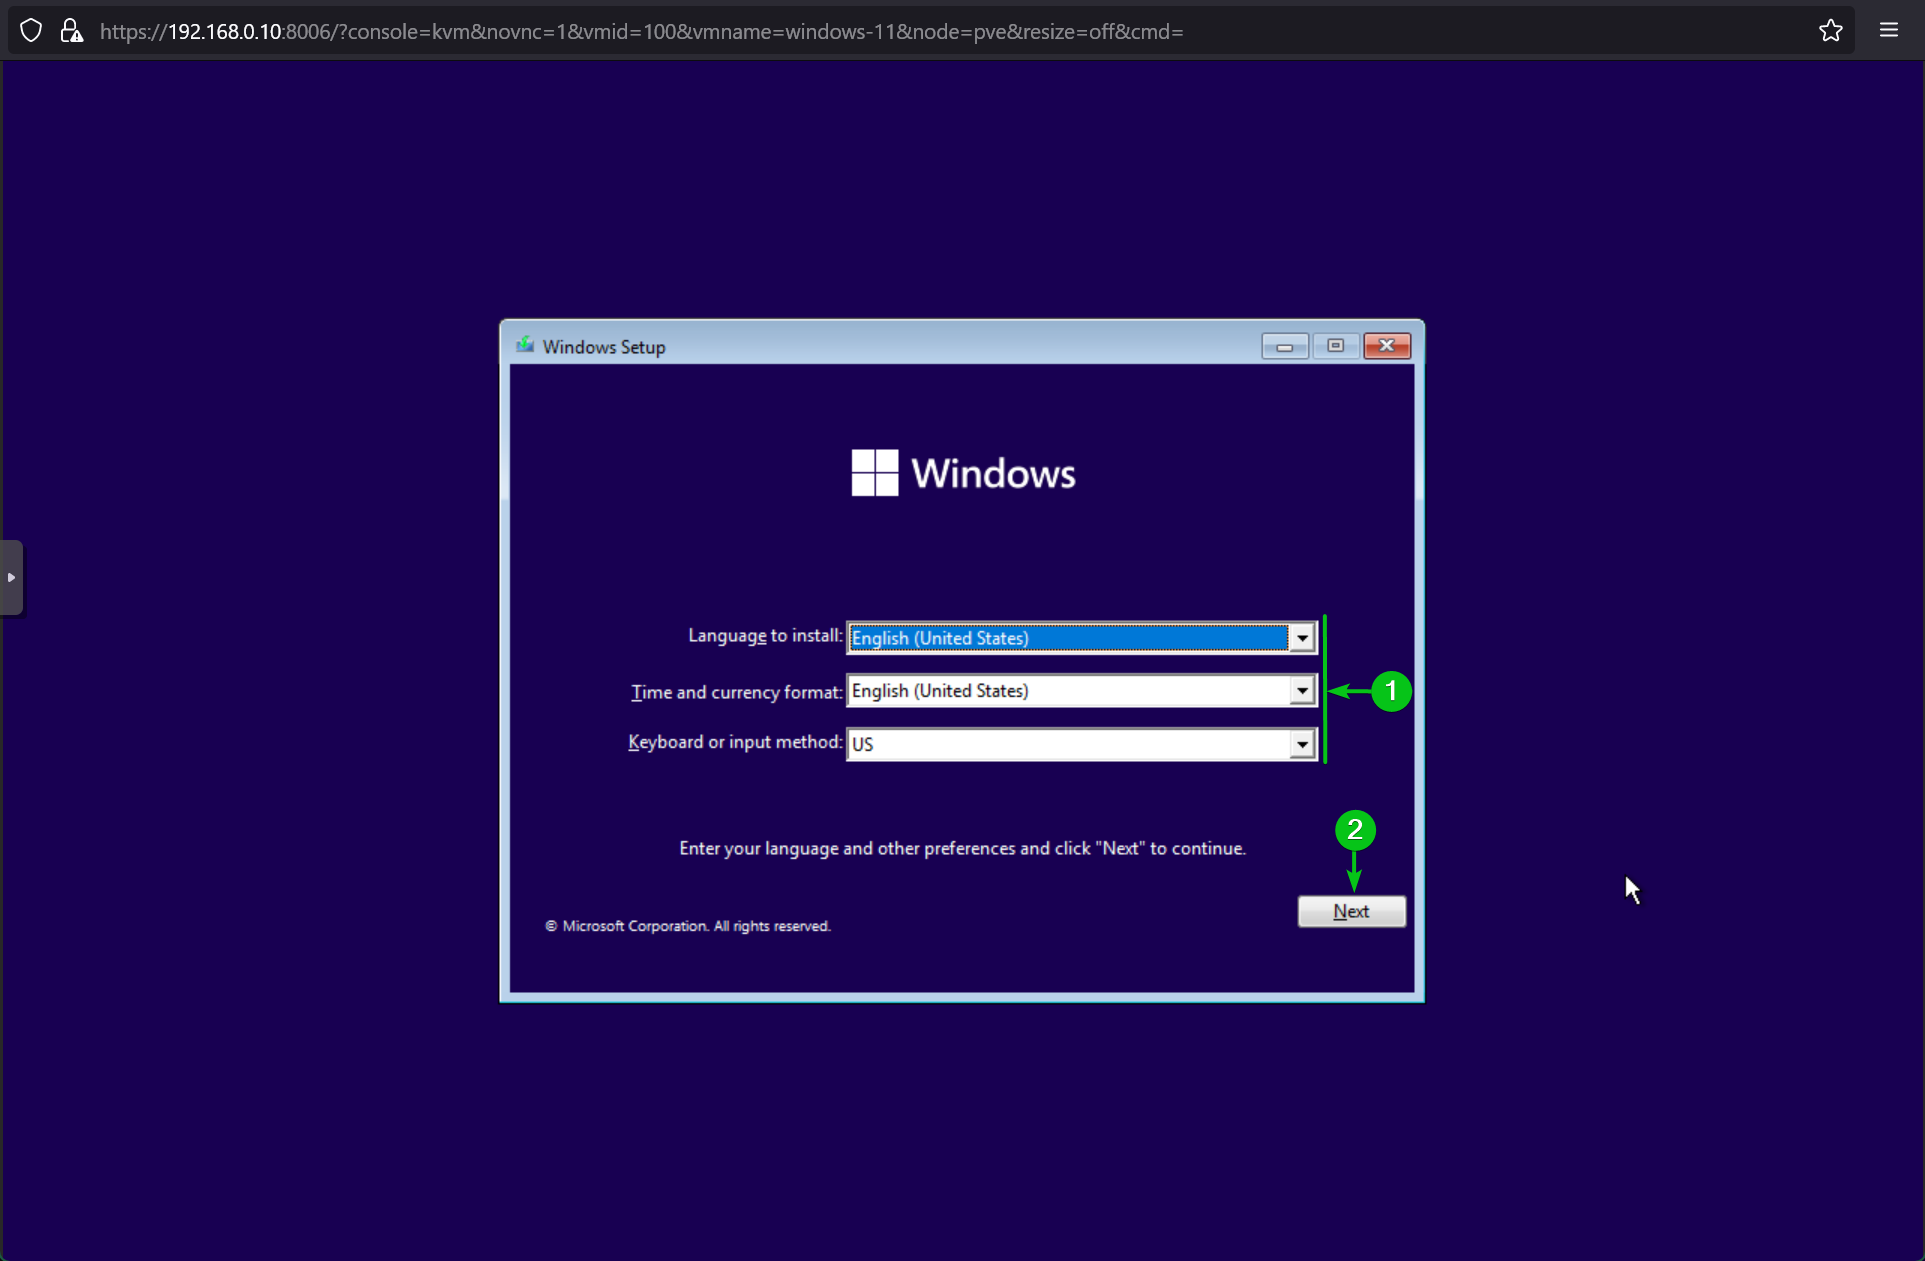
To install Windows 11, select your language, time and currency format, and keyboard/input method from the respective dropdown menus[1] and click on Next[2].
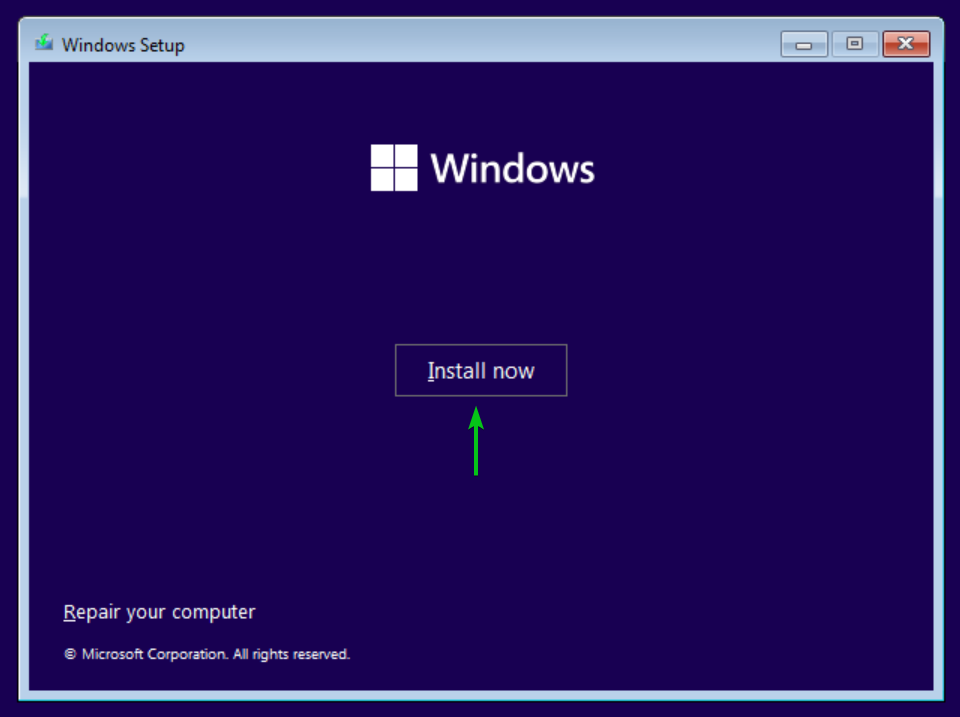
Click on Install now.
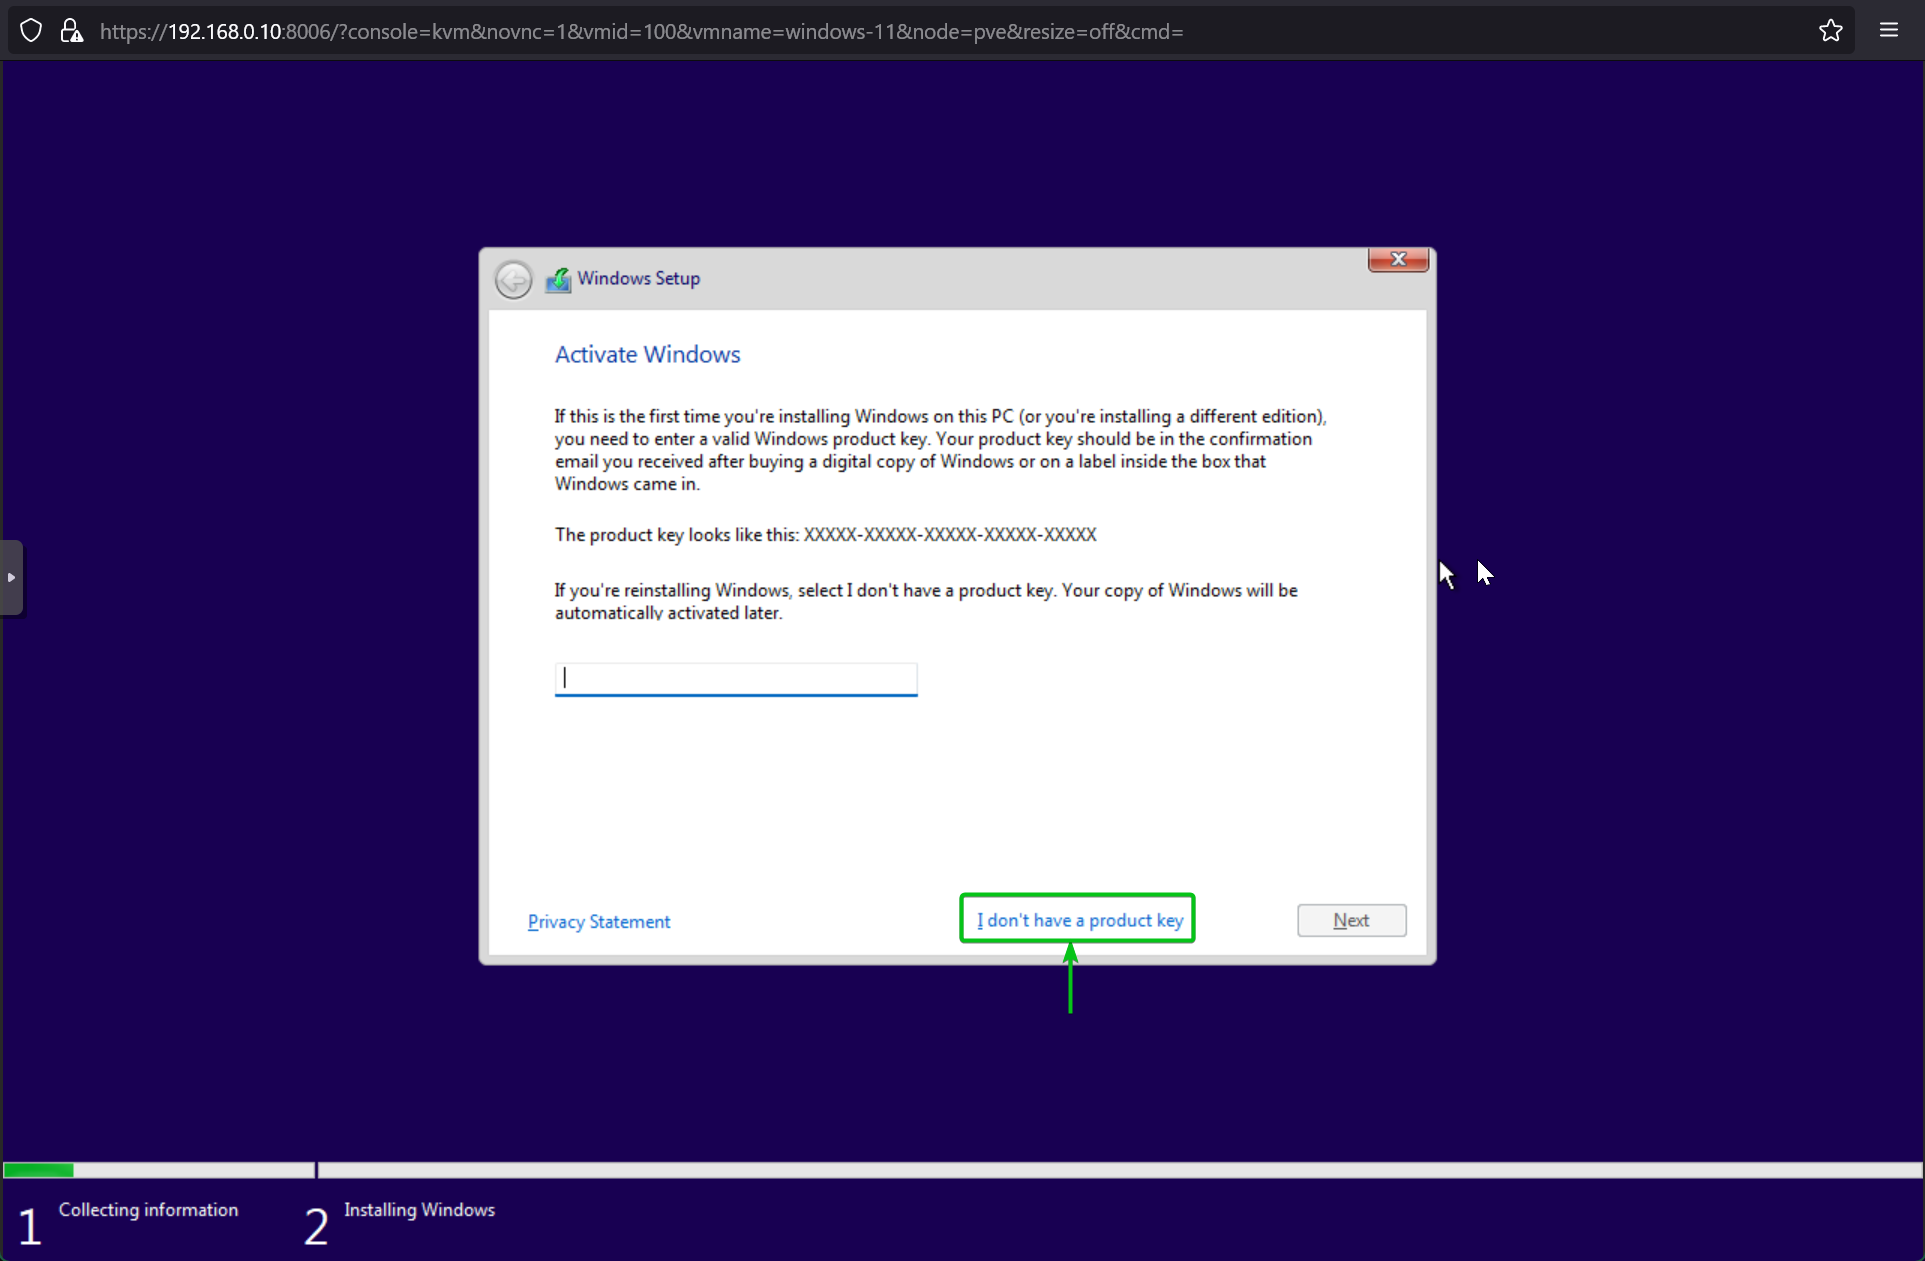
If you have a Windows 11 license key, type it in and click on Next.
If you don’t have a Windows 11 license key or want to activate Windows 11 later, click on I don’t have a product key.
Select the Windows 11 version that you want to install on the Proxmox VE virtual machine and click on Next.

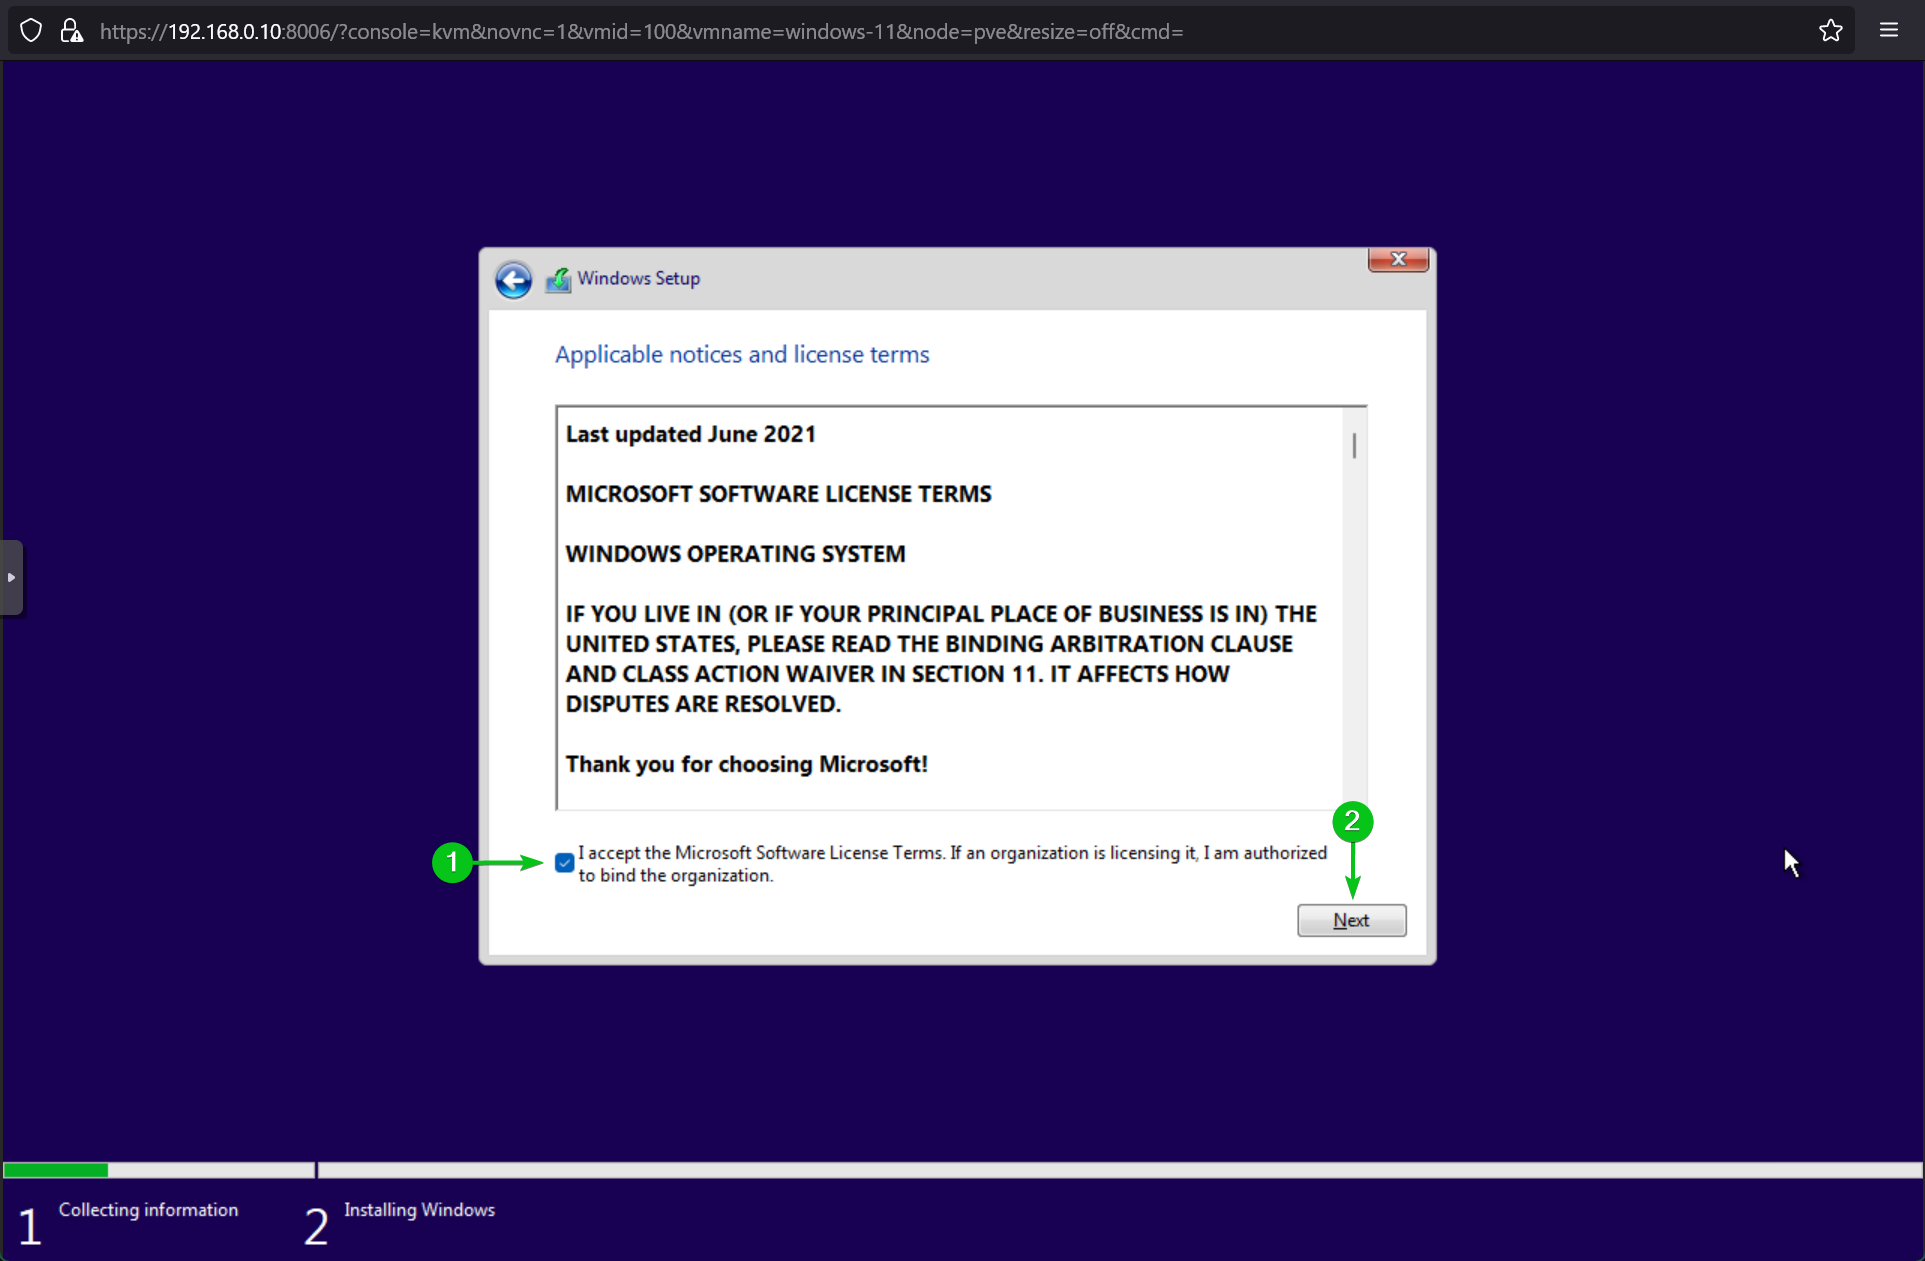
Tick the I accept the Microsoft Software License Terms… checkbox[1] and click on Next[2].
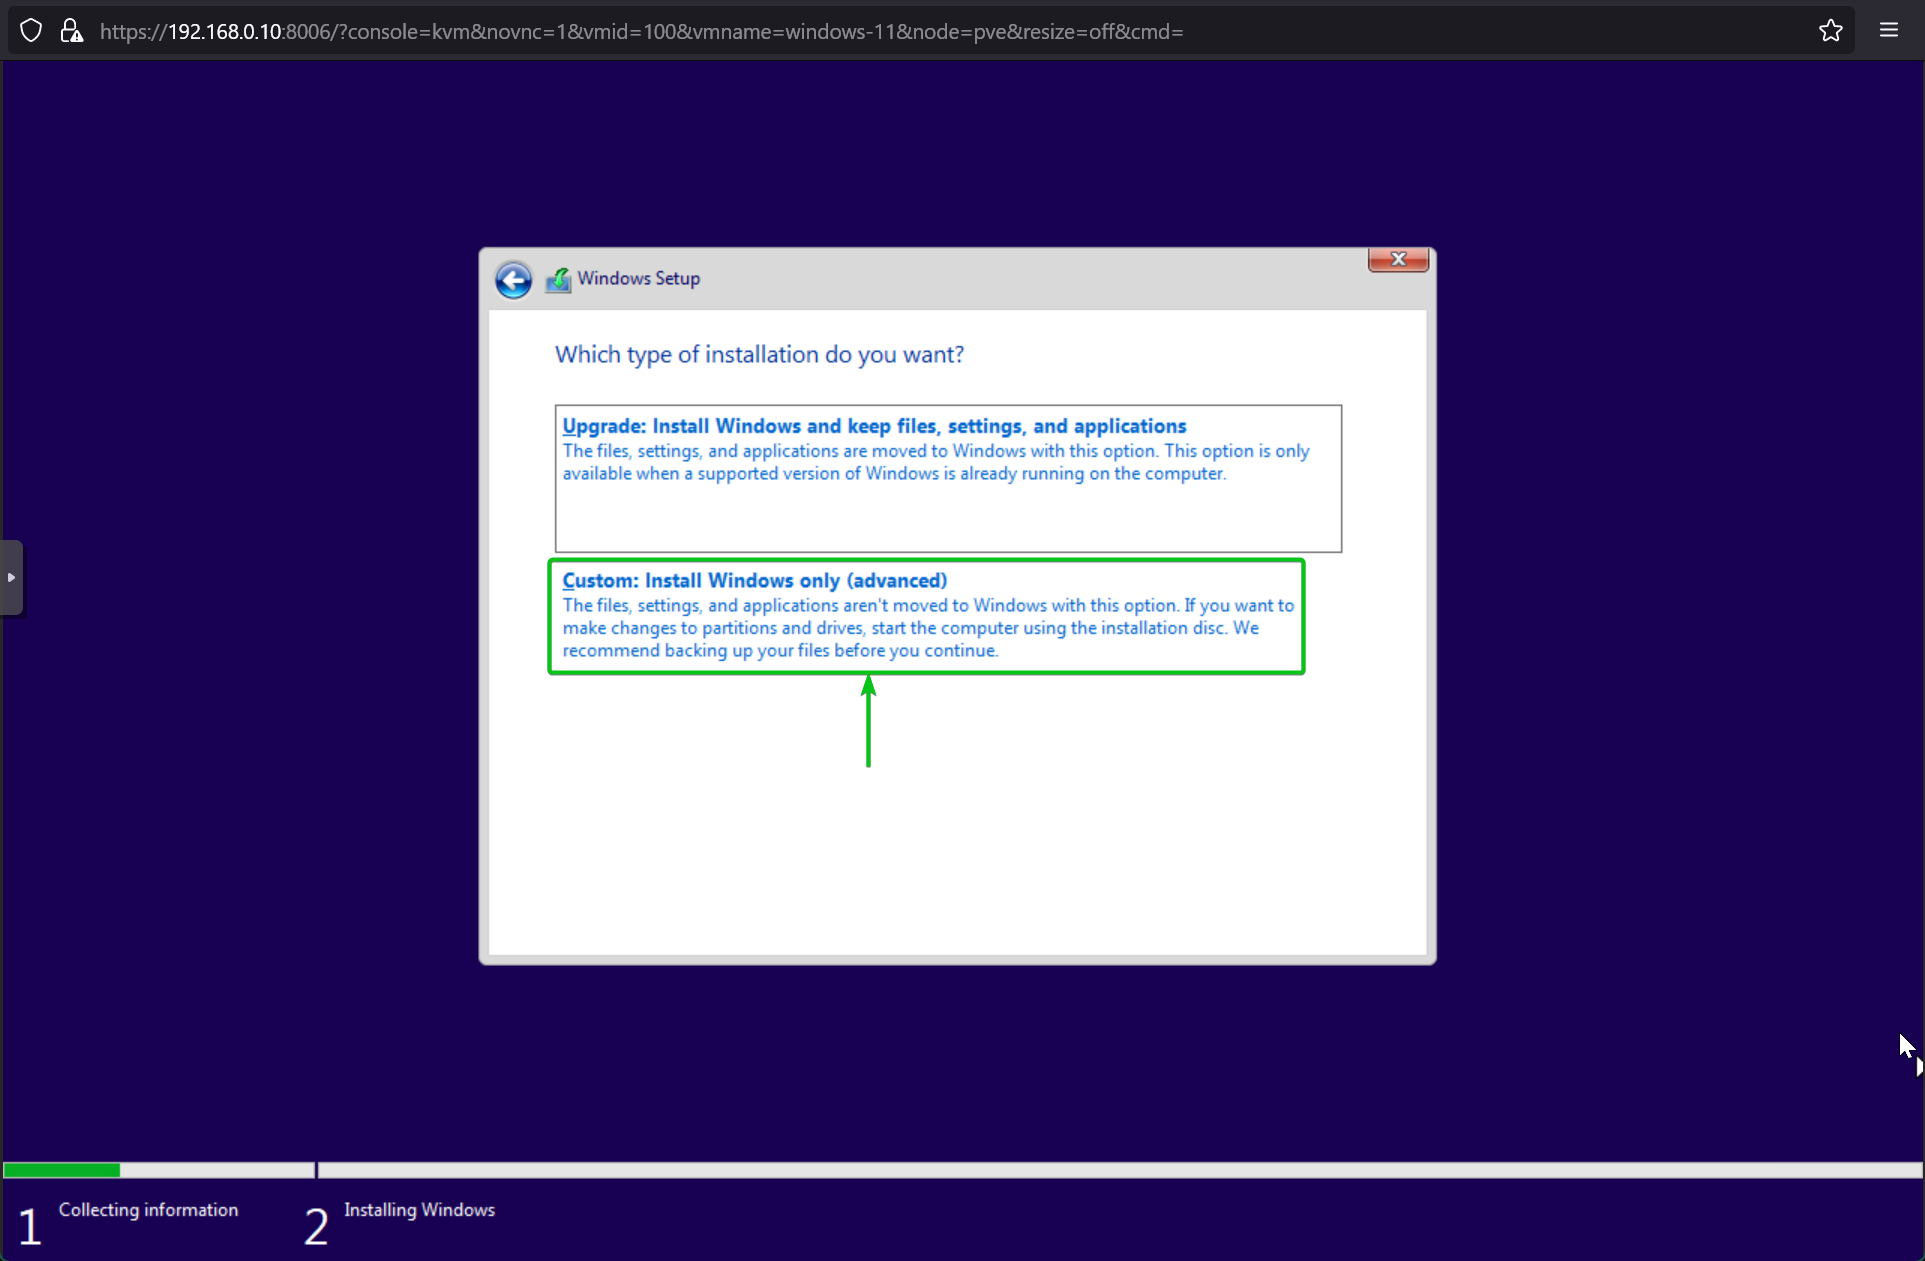
Click on Custom: Install Windows only (advanced).
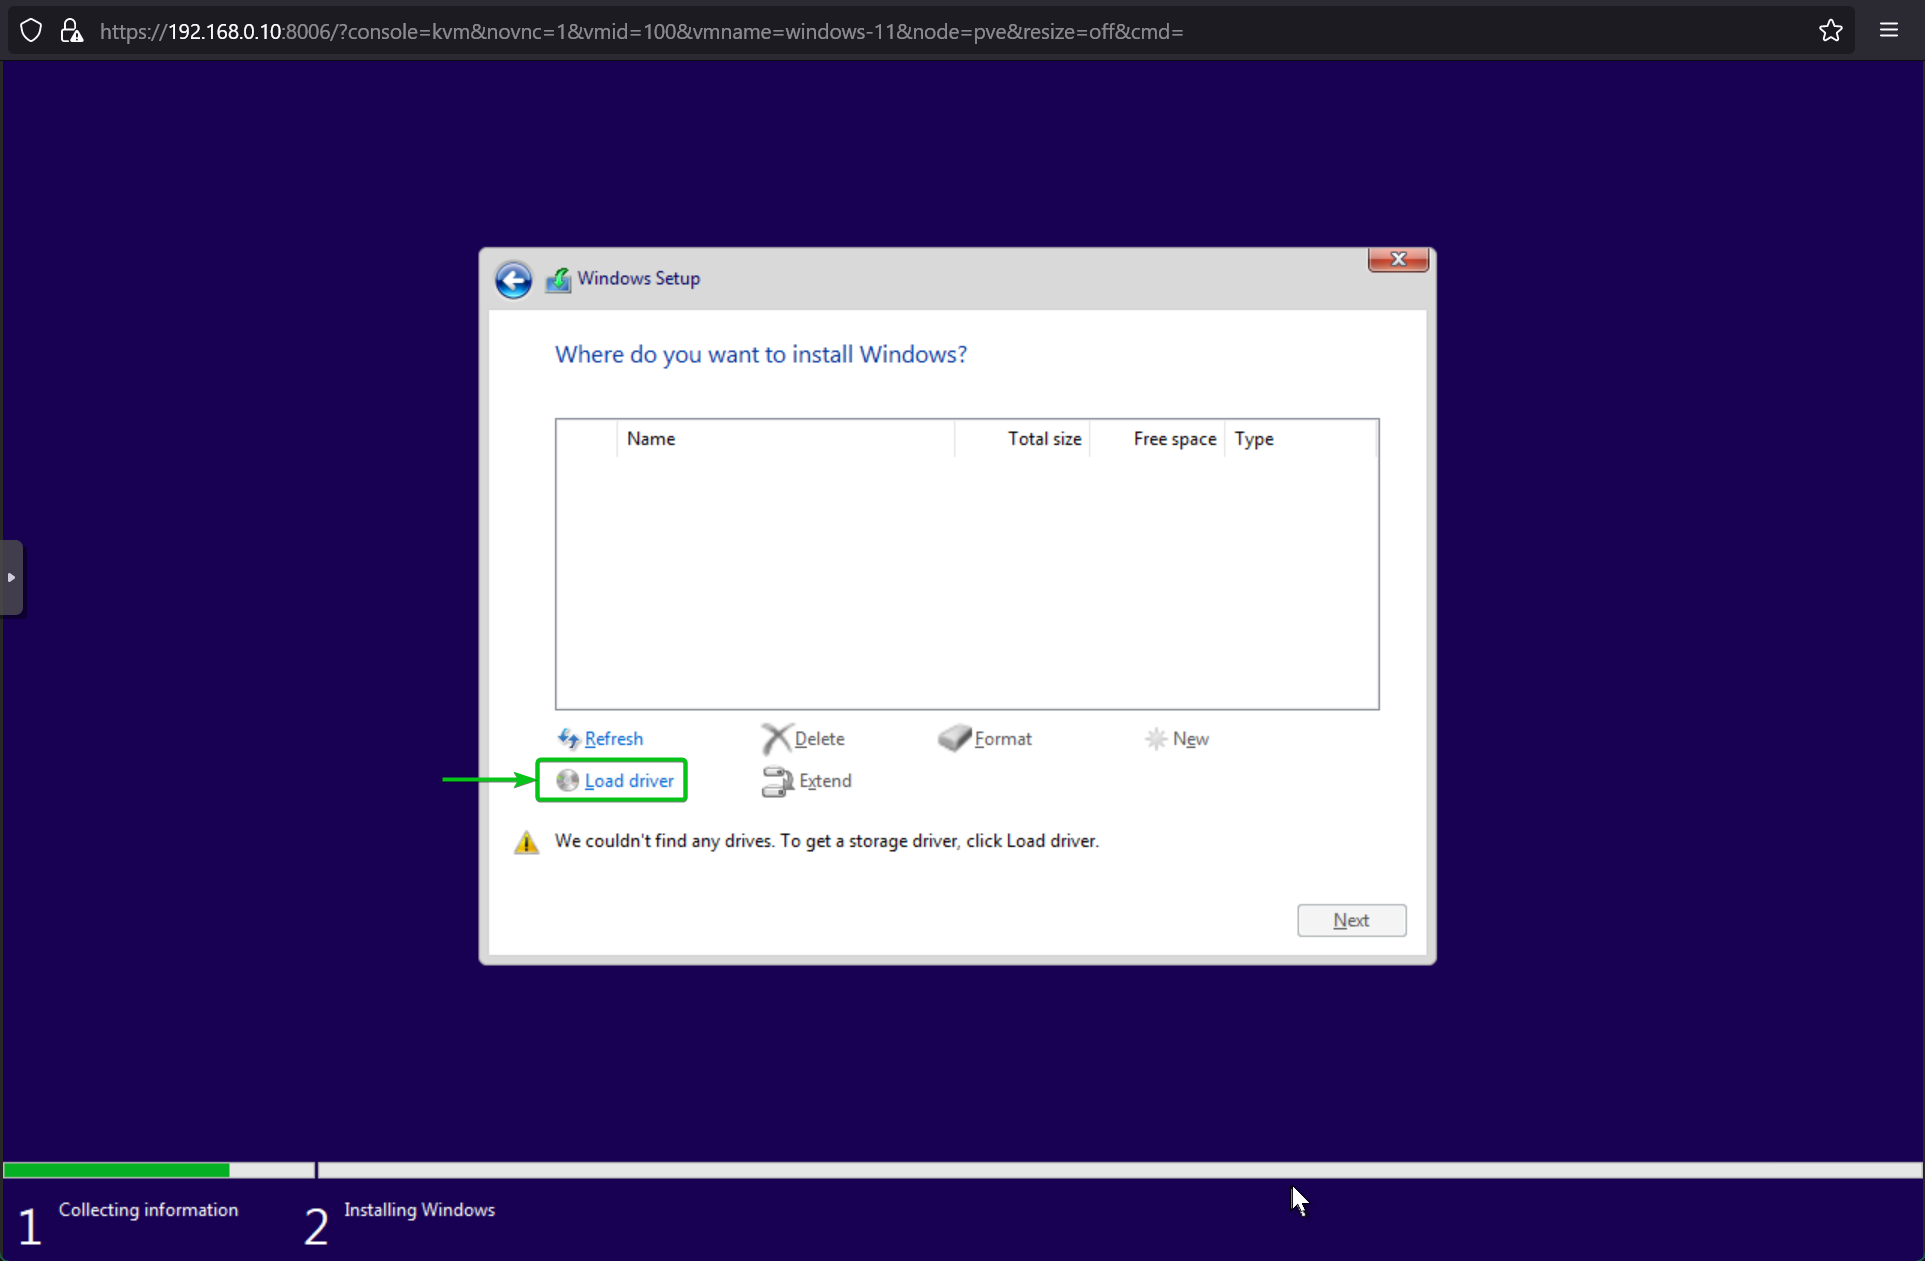
Now, you have to install the VirtIO SCSI driver and VirtIO Ethernet driver to successfully install Windows 11 on the Proxmox VE 8 virtual machine.
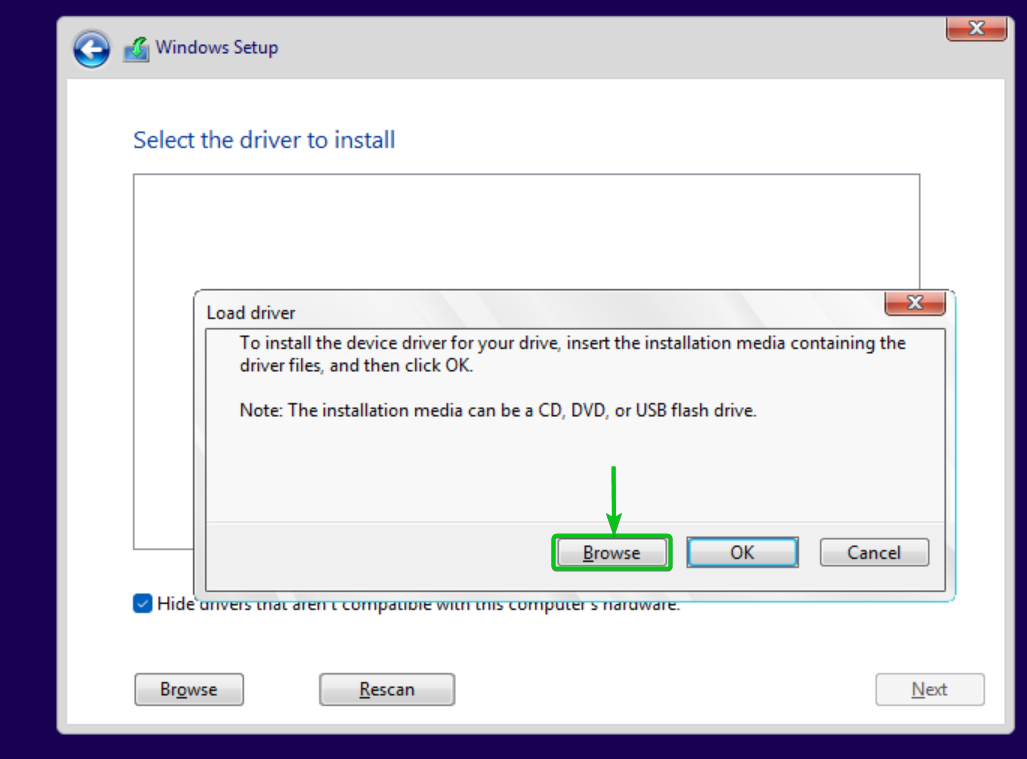
To install the VirtIO SCSI driver from the VirtIO drivers ISO file, click on Load driver.
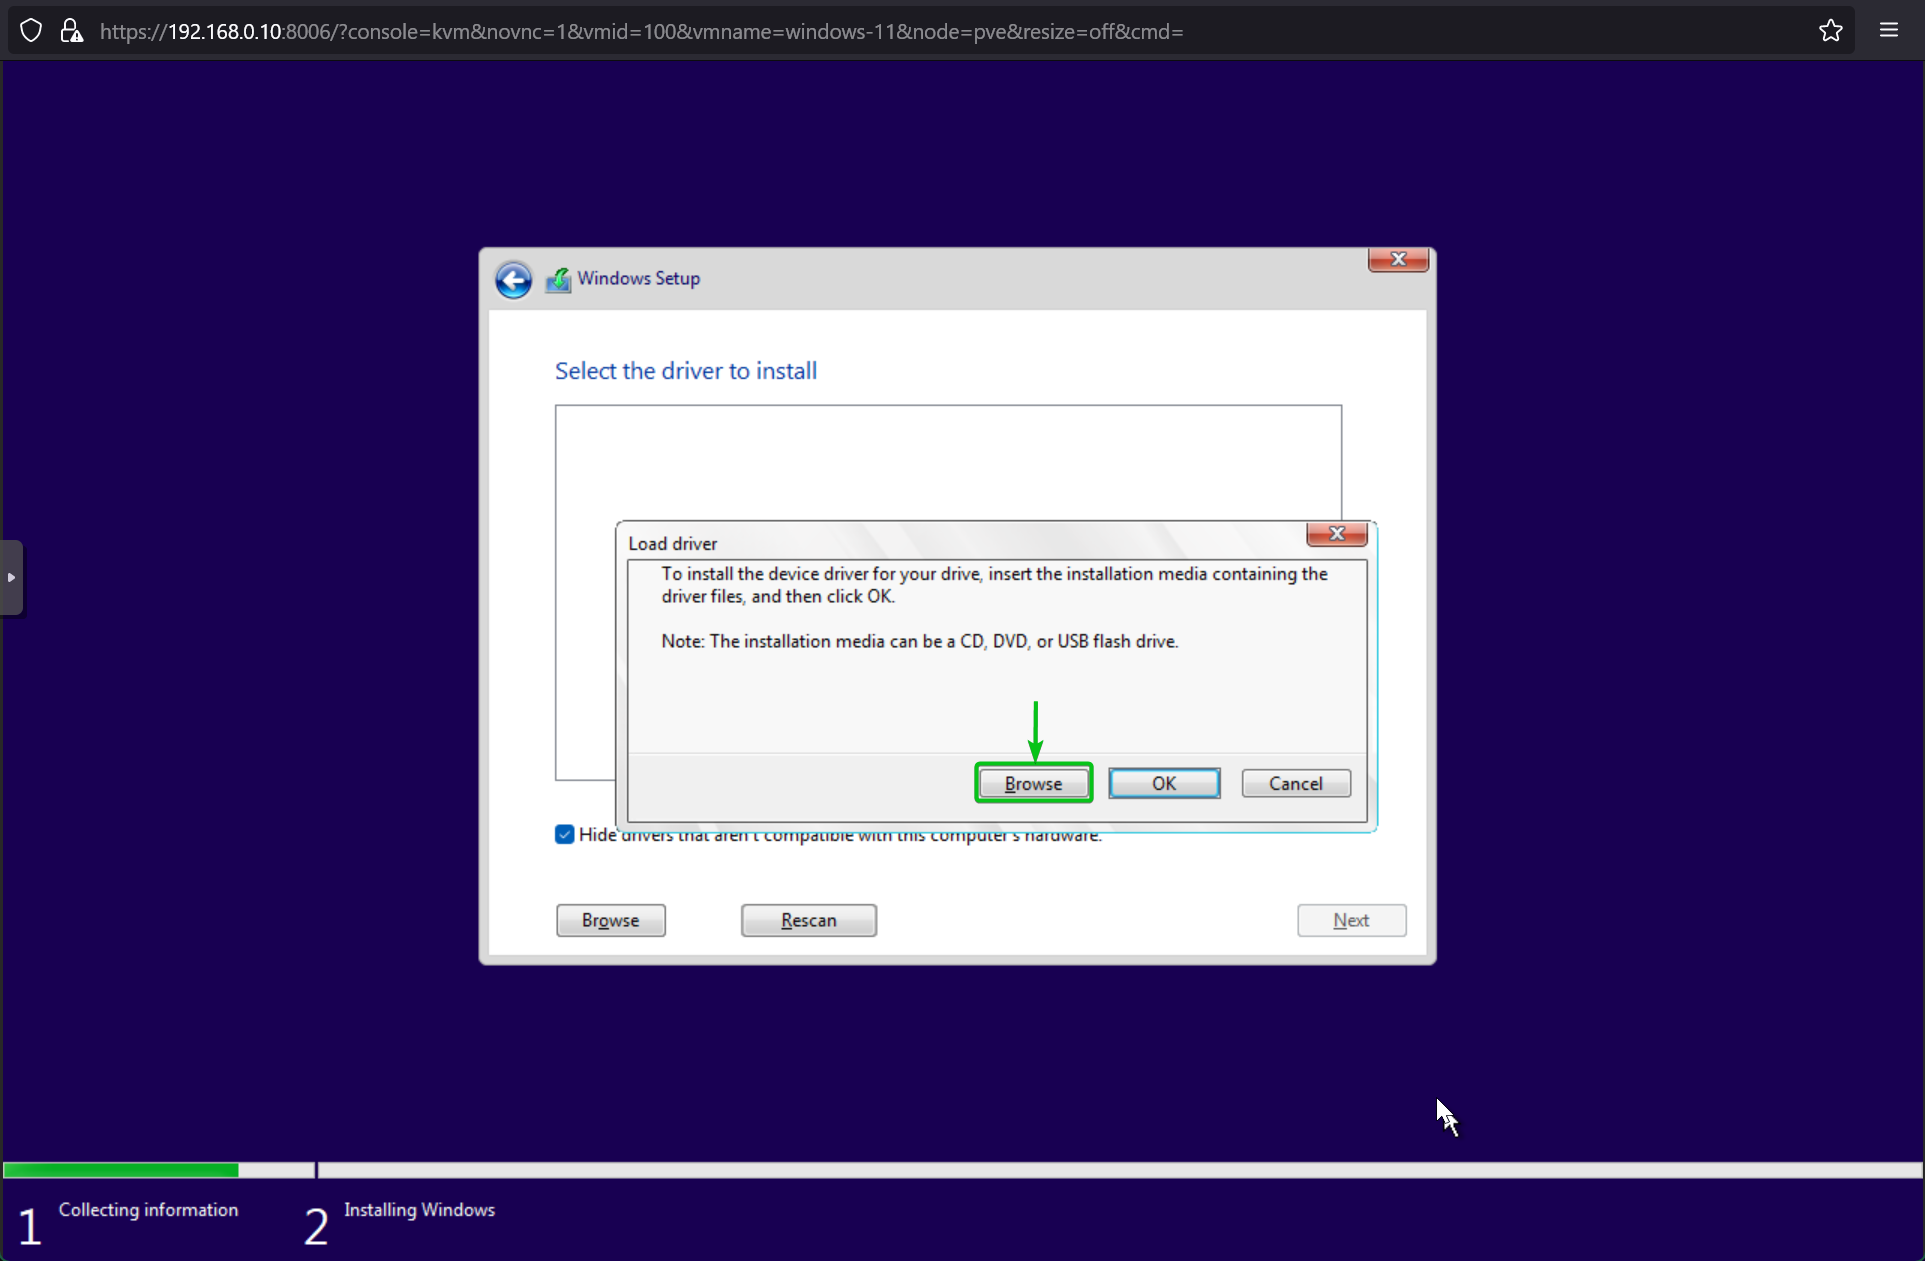
Click on Browse.
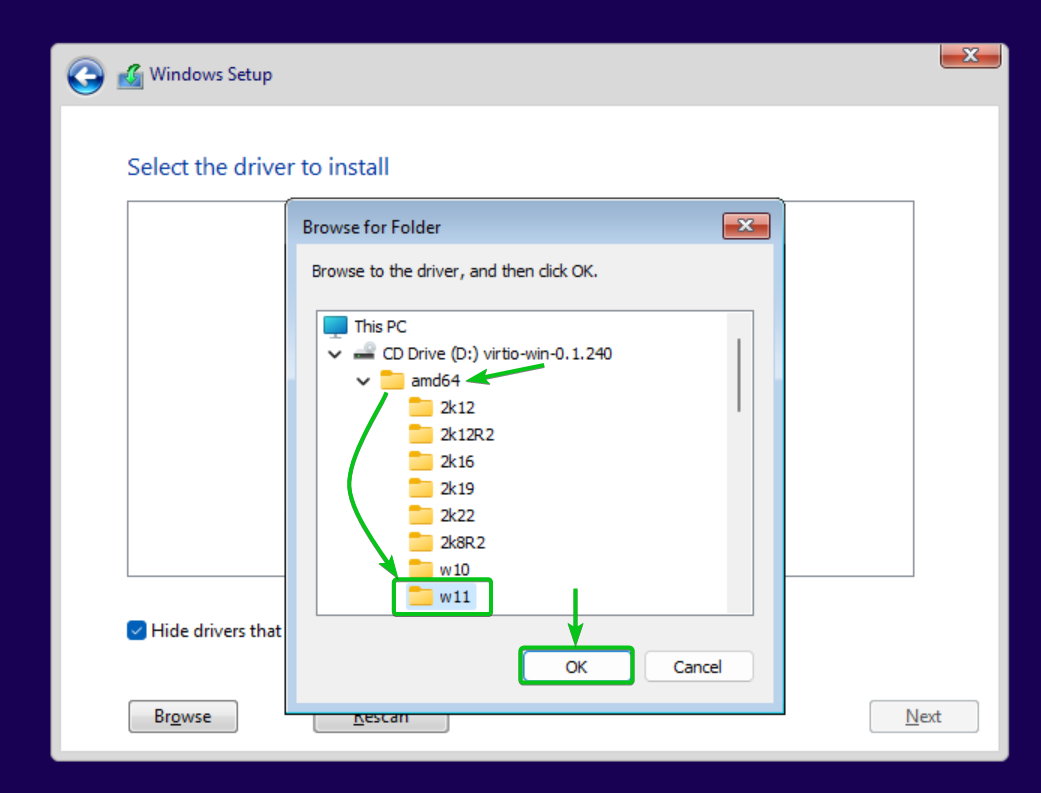
Select CD Drive: virtio-win > amd64 > w11 folder and click on OK as marked in the screenshot below.
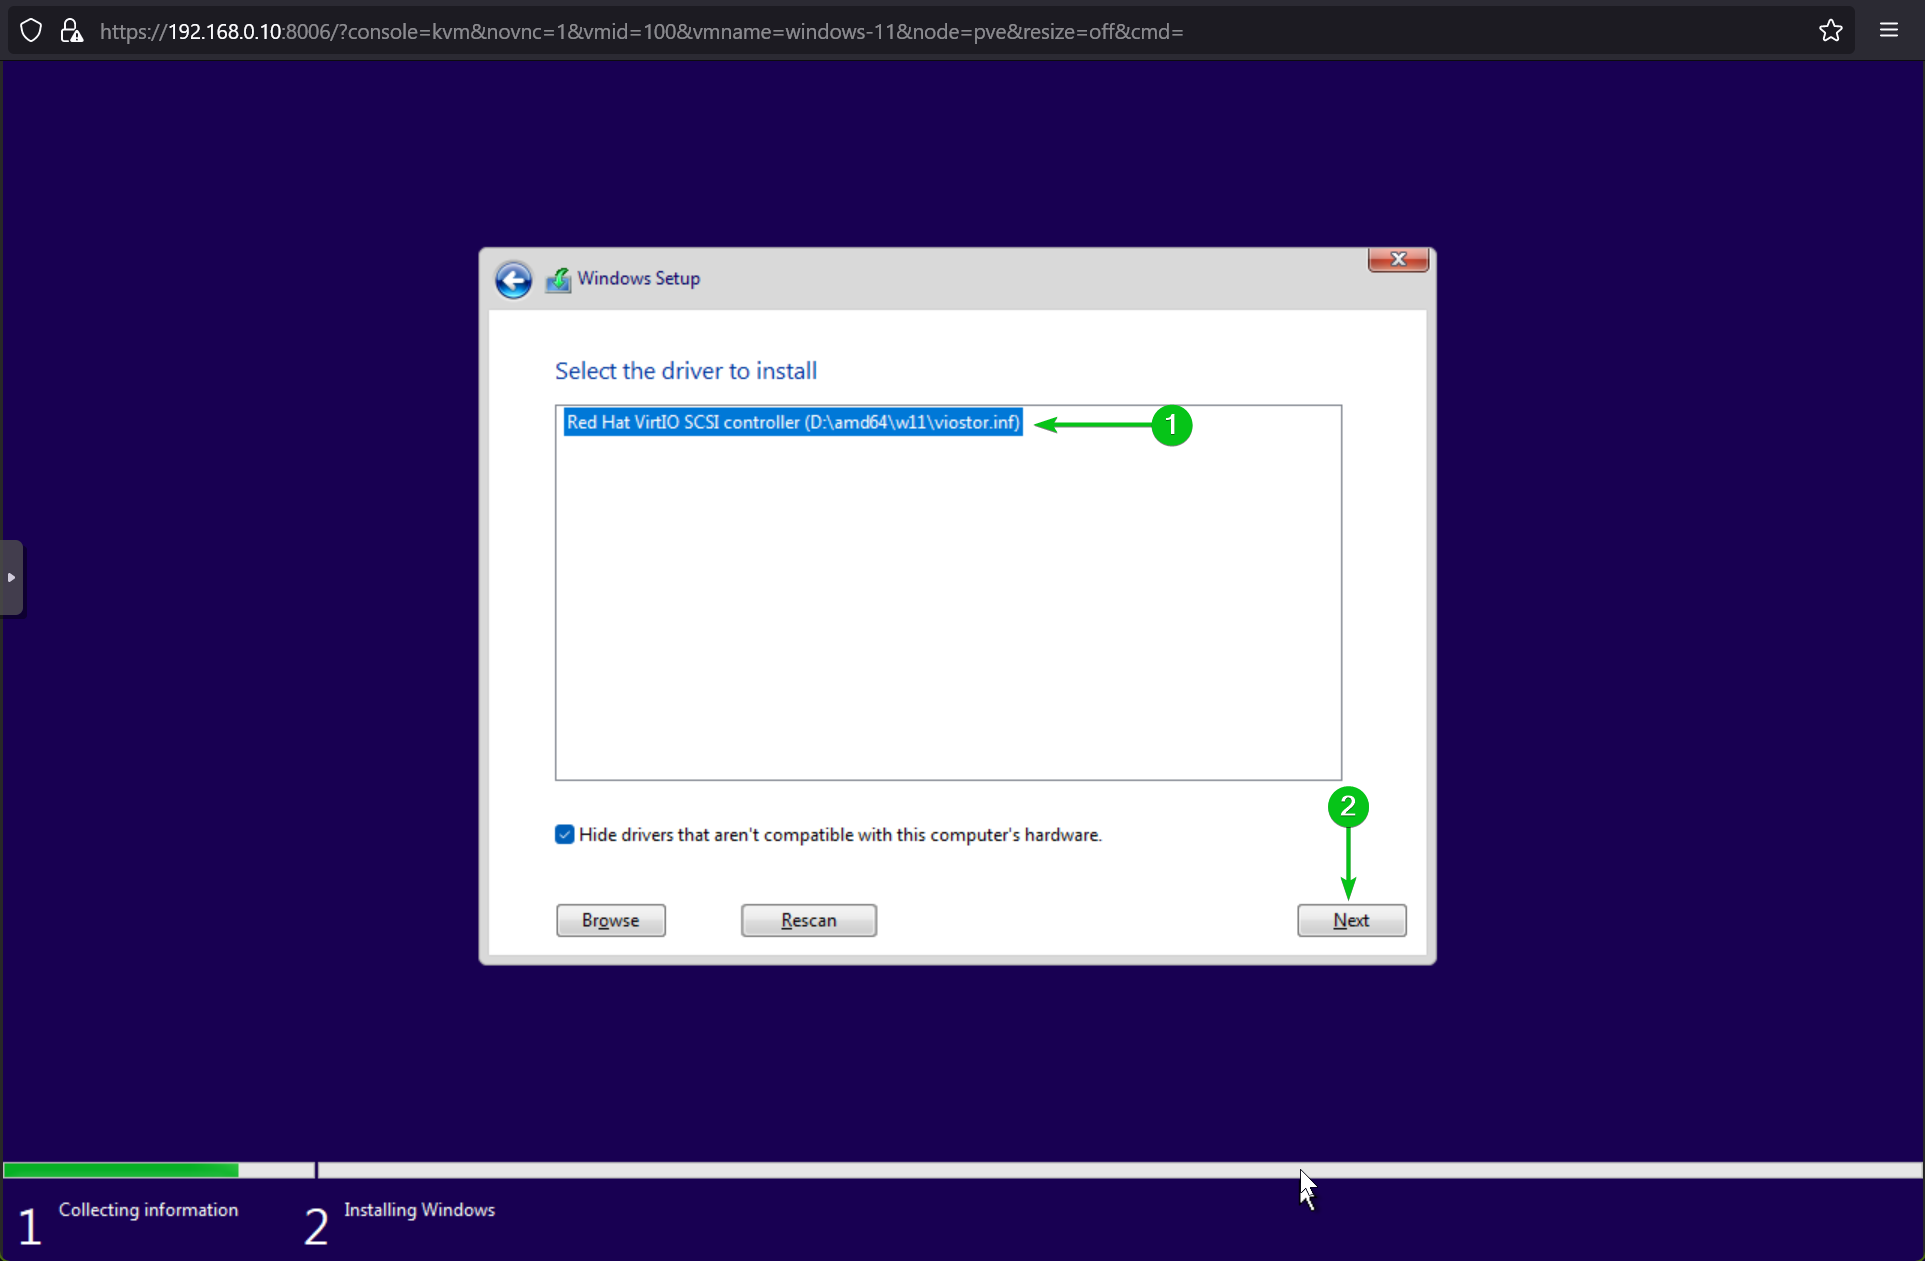
The VirIO SCSI driver should be listed.
Select the Red Hat VirtIO SCSI controller driver[1] and click on Next[2].
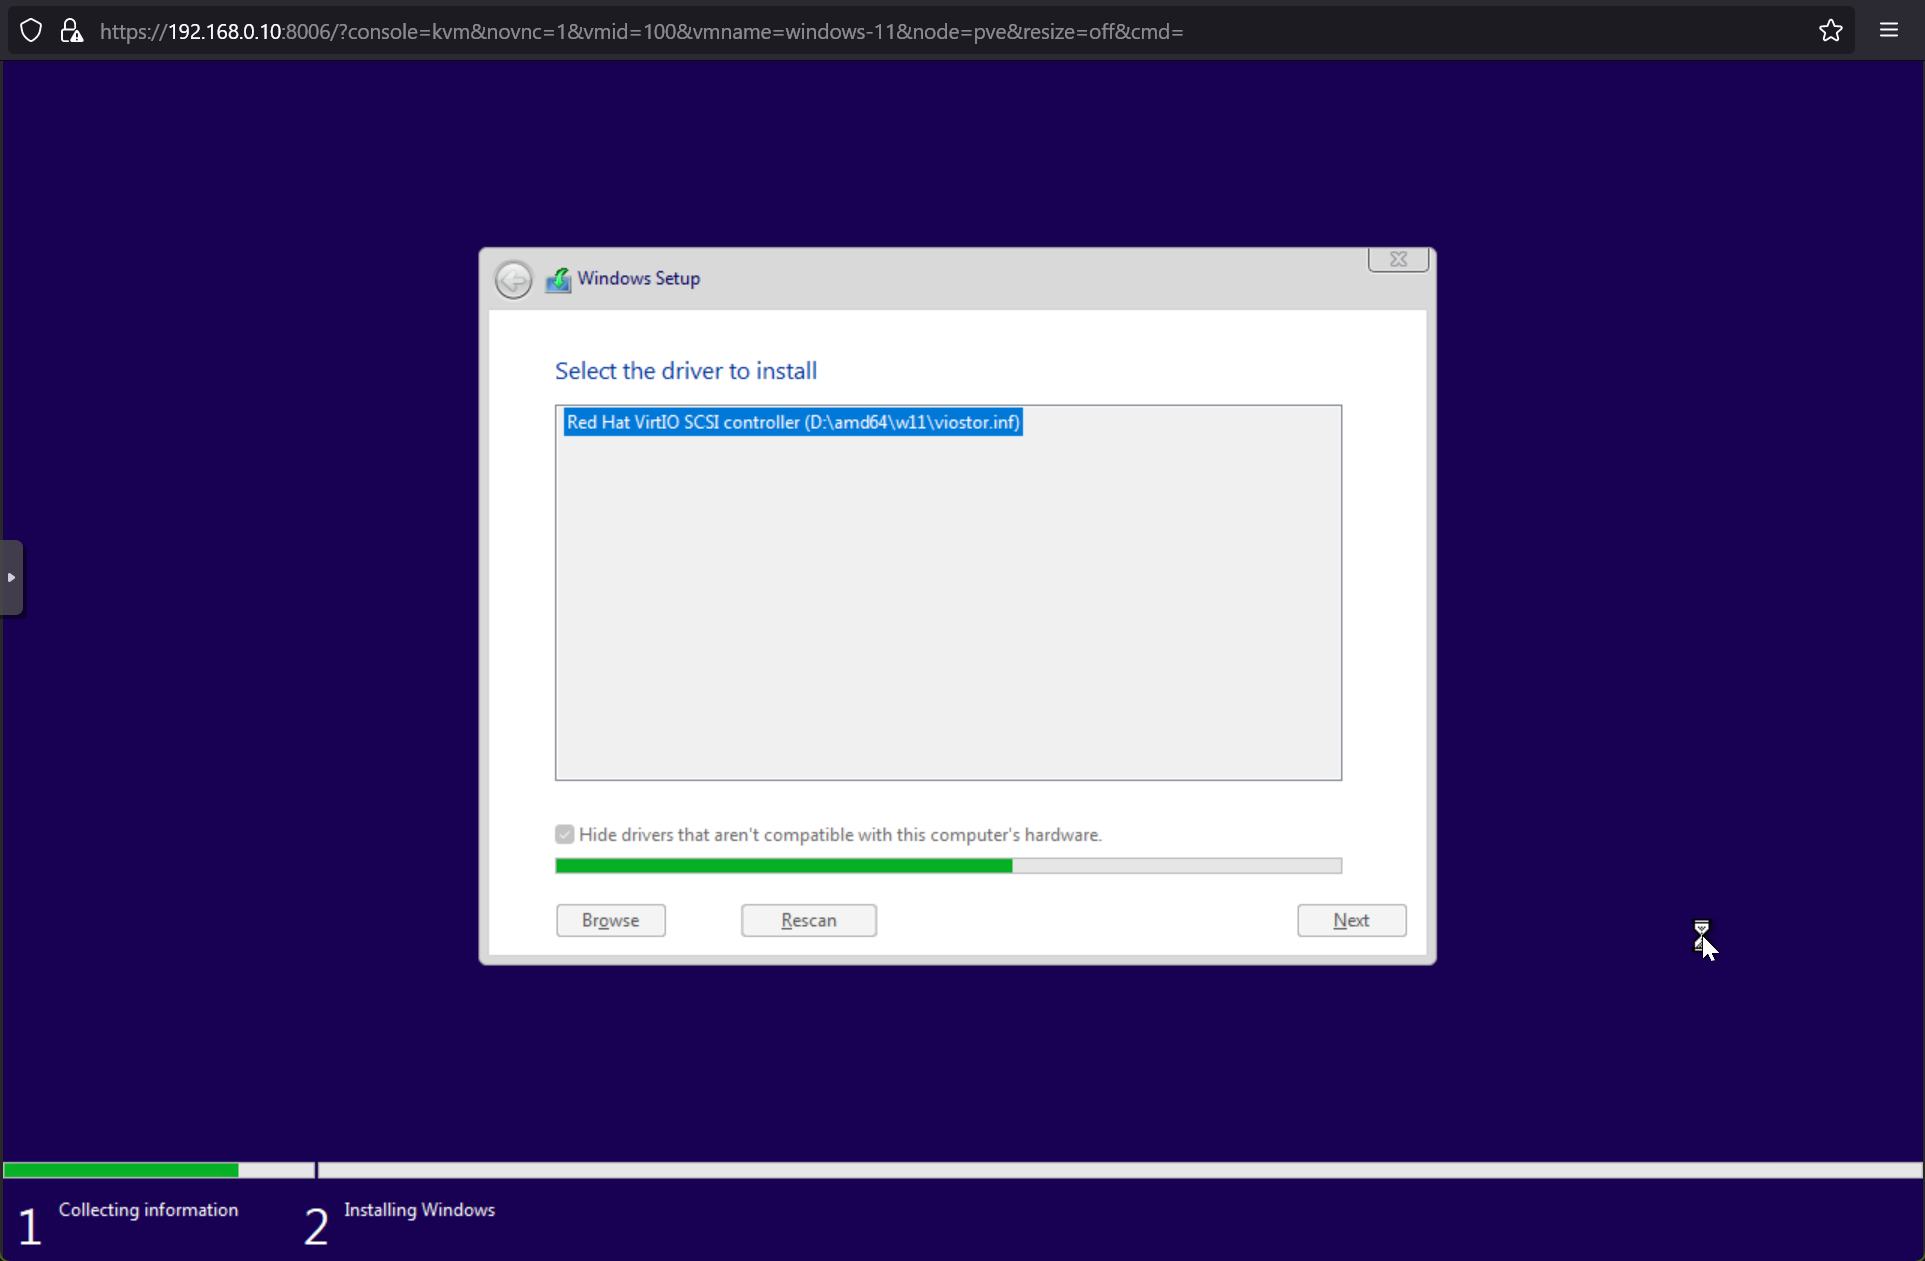
The VirtIO SCSI driver is being installed. It will take a few seconds to complete.
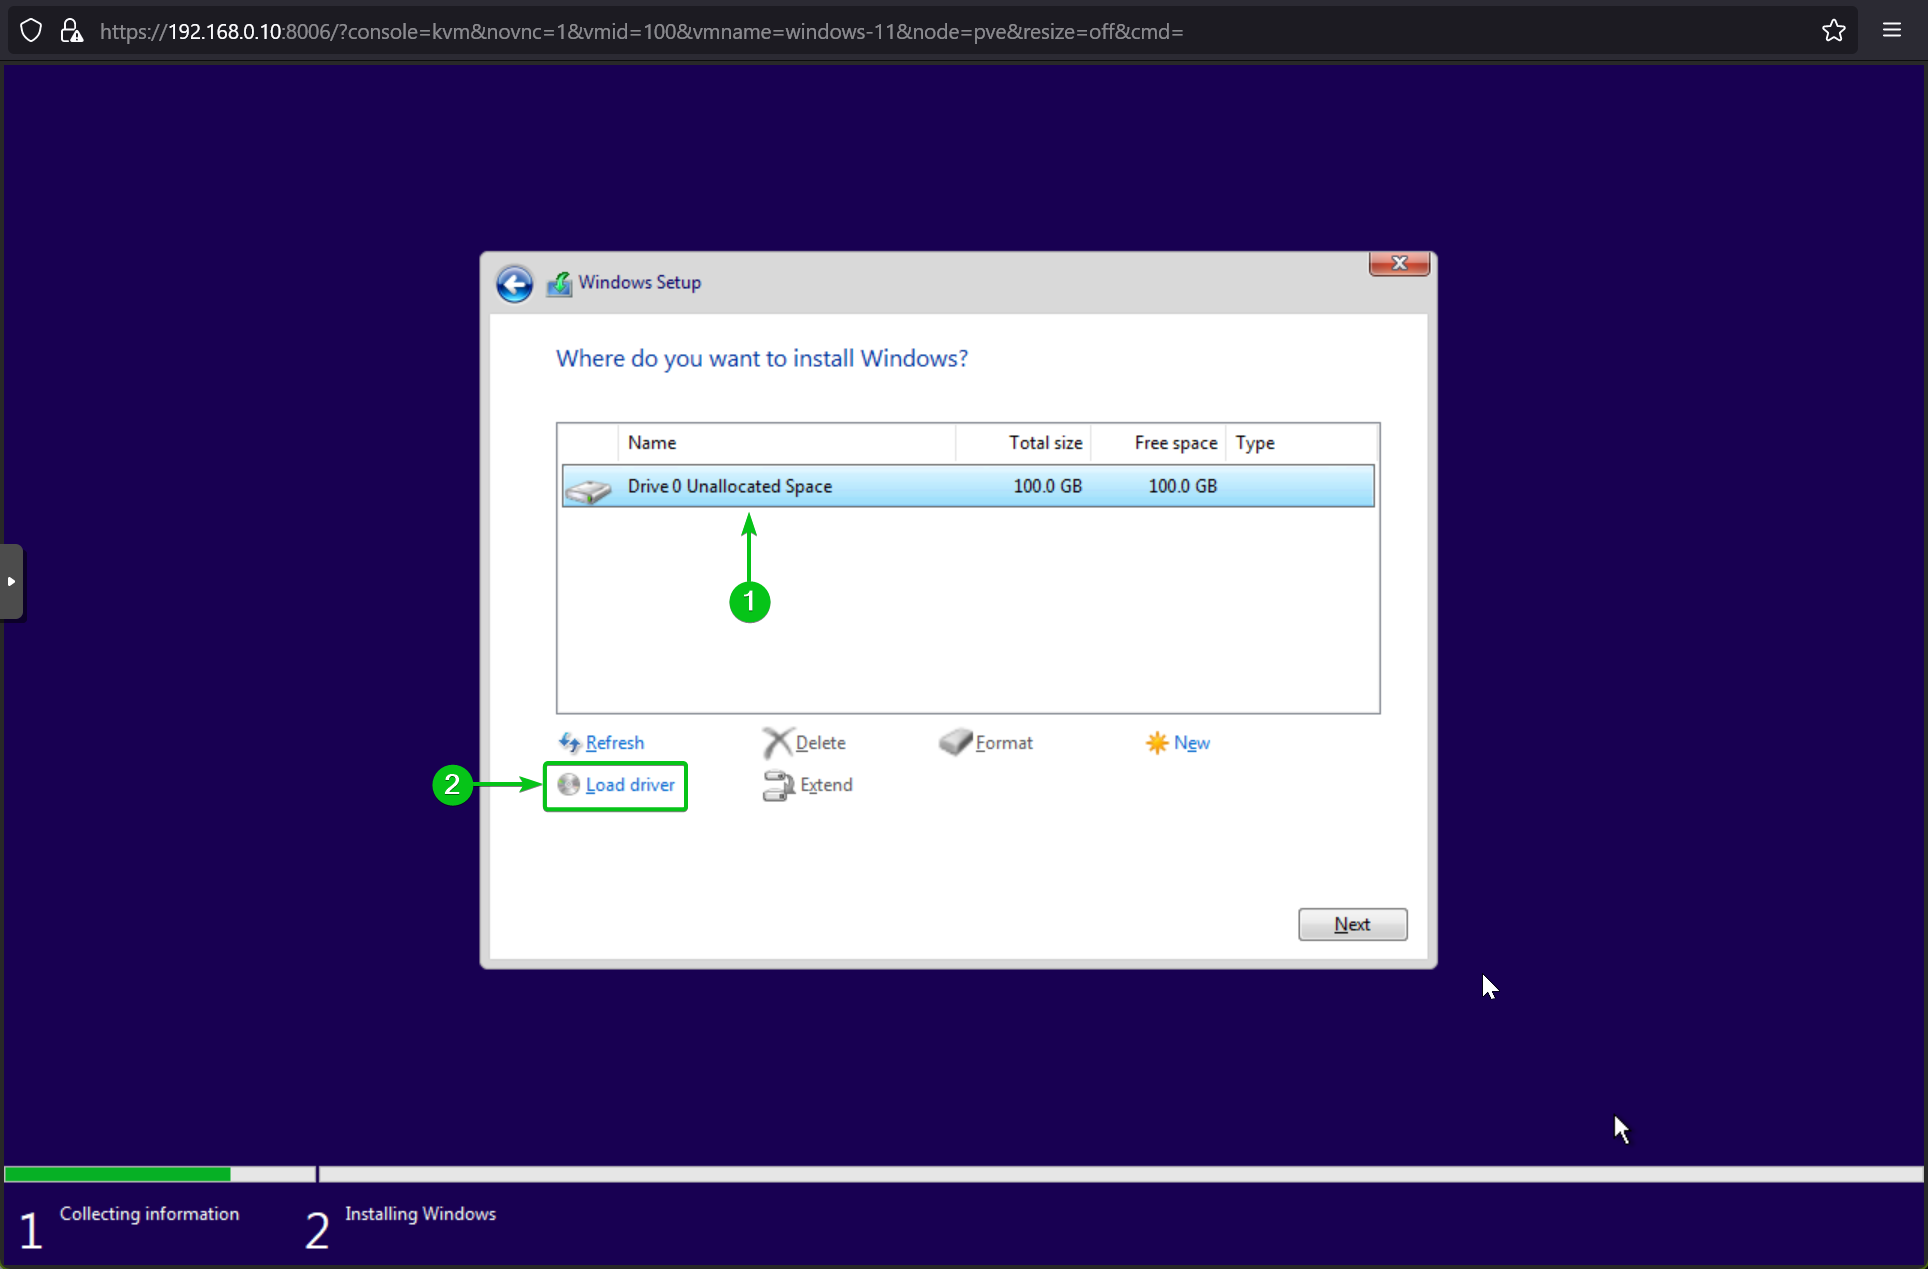
Once the VirtIO SCSI driver is installed, you will see a free disk in your Proxmox VE 8 virtual machine[1].
To install the VirtIO Ethernet driver, click on Load driver again[2].
Click on Browse.
Select CD Drive: virtio-win > NetKVM > w11 > amd64 folder and click on OK as marked in the screenshot below.
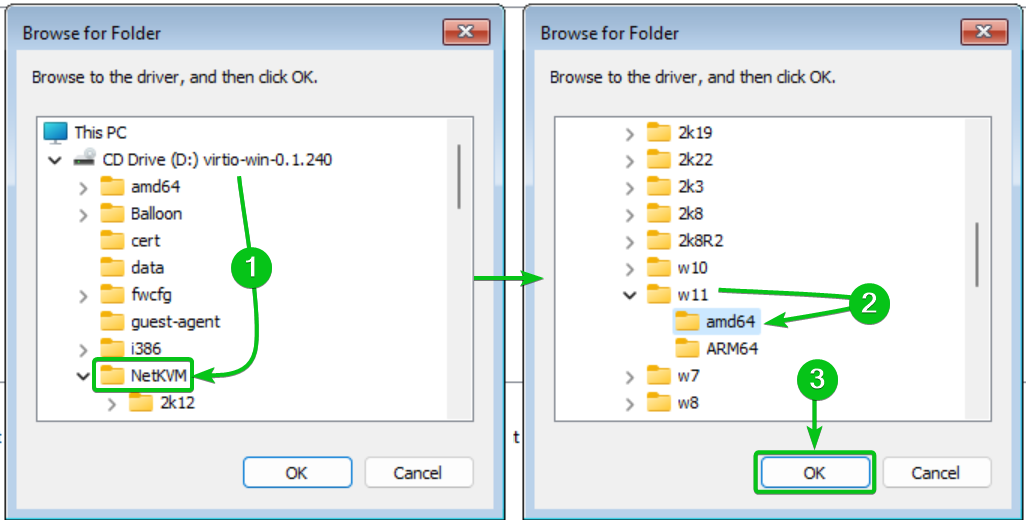
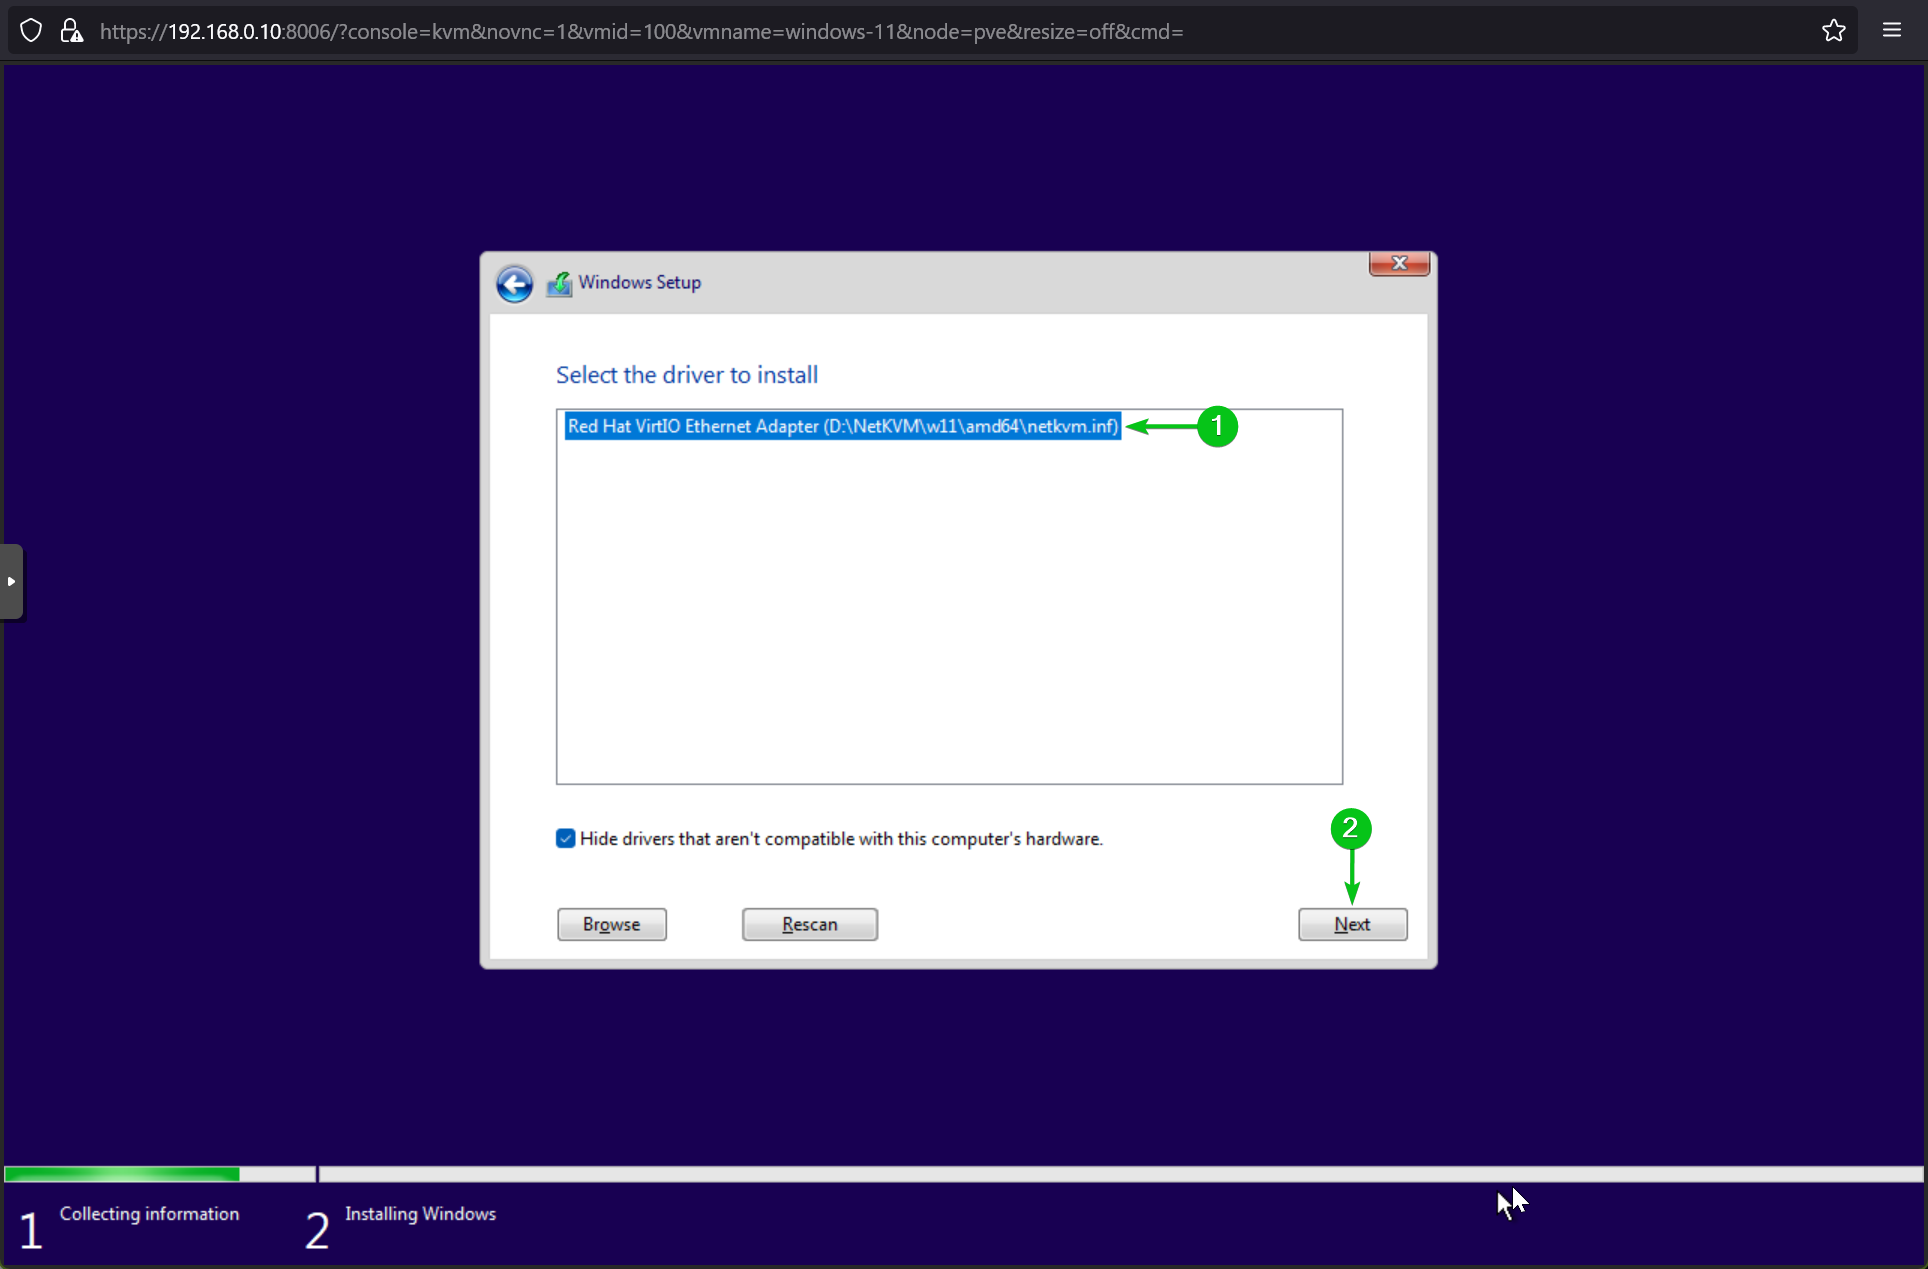
The VirtIO Ethernet driver should be listed.
Select the Red Hat VirtIO Ethernet Adapter driver[1] and click on Next[2].
The VirtIO Ethernet driver is being installed. It will take a few seconds to complete.
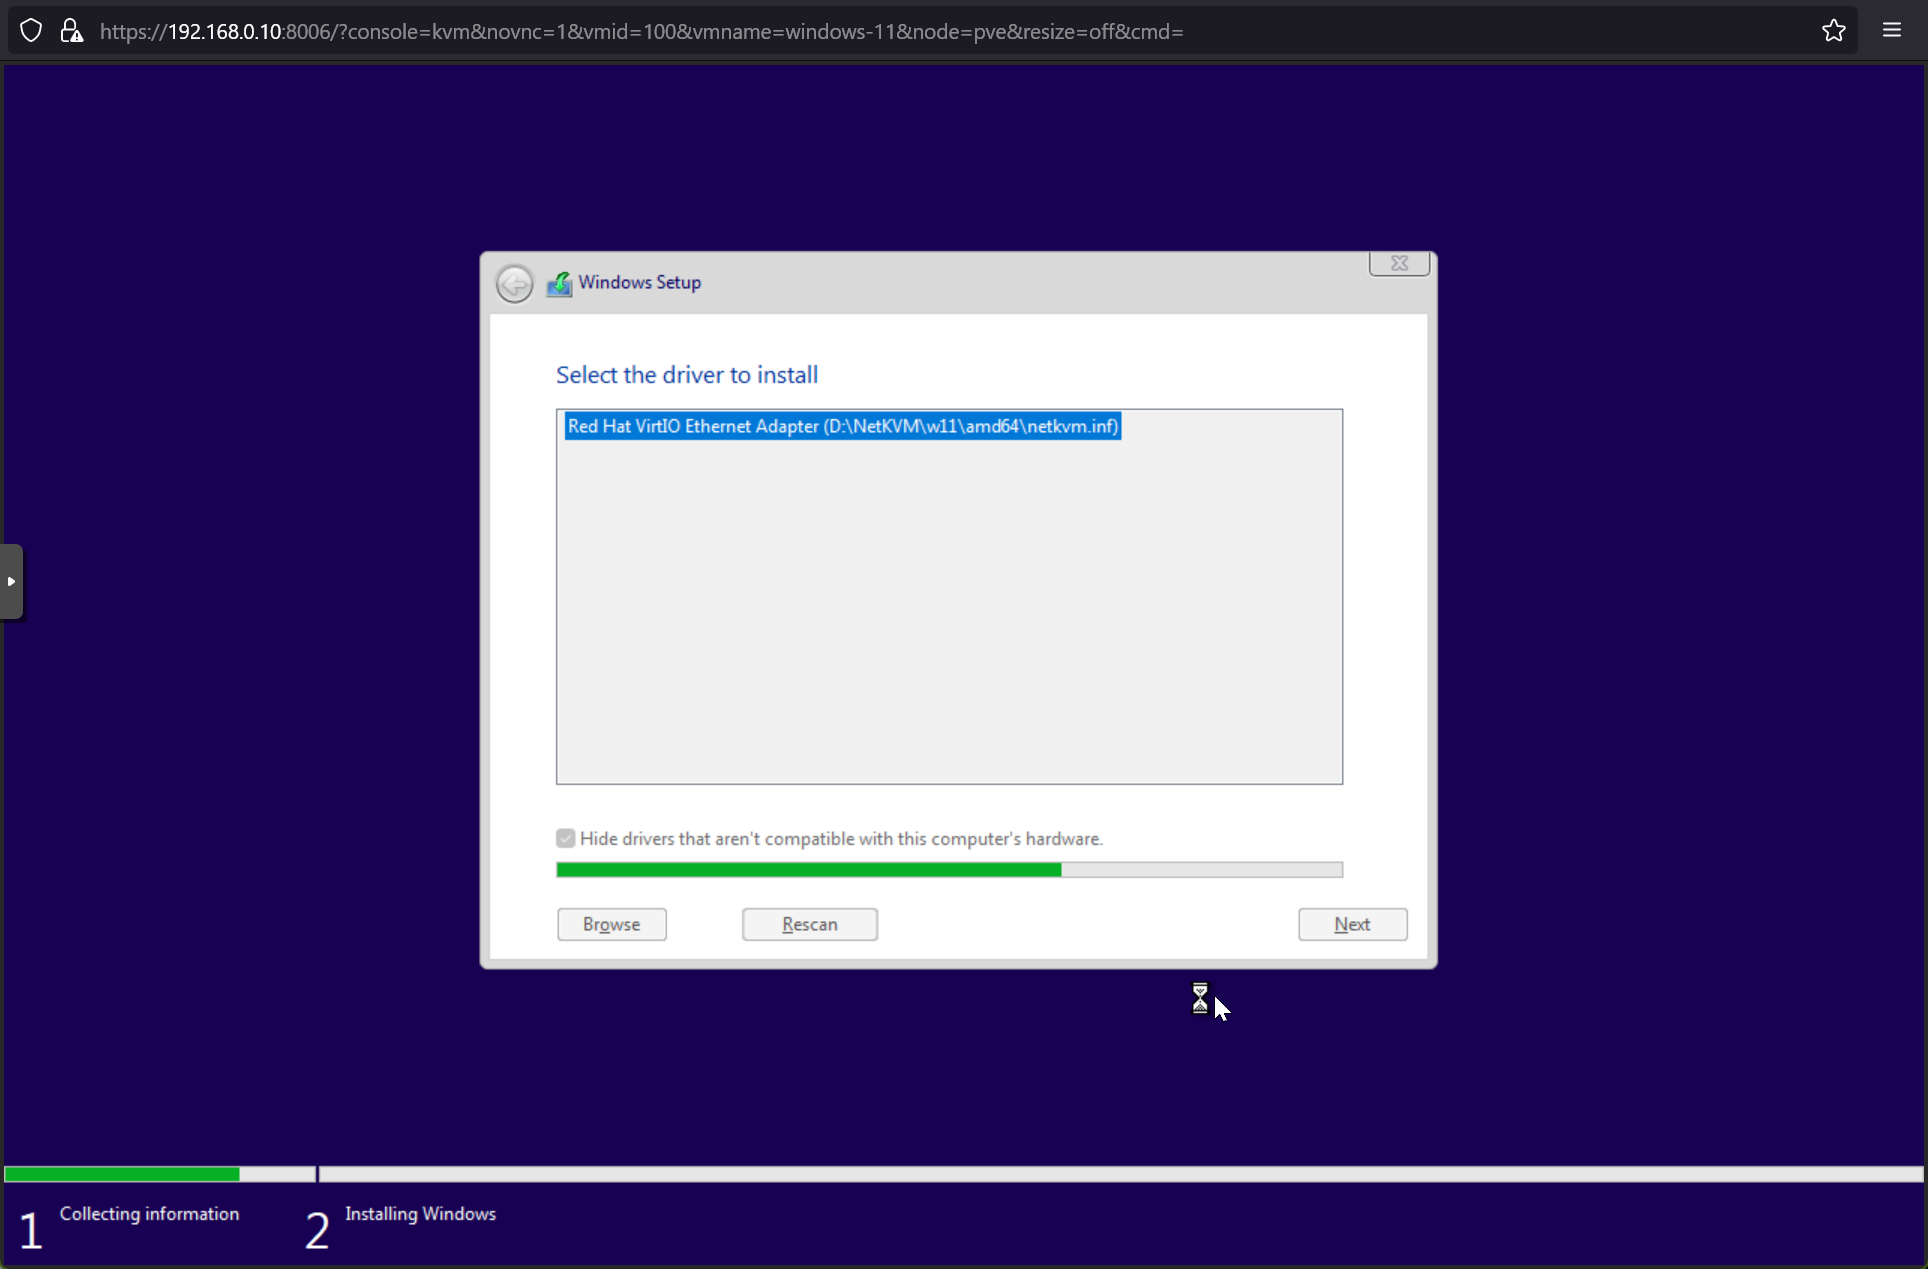
The VirtIO Ethernet driver should be installed.
Once the VirtIO SCSI and VirtIO Ethernet drivers are installed, select the free disk[1] and click on Next[2].
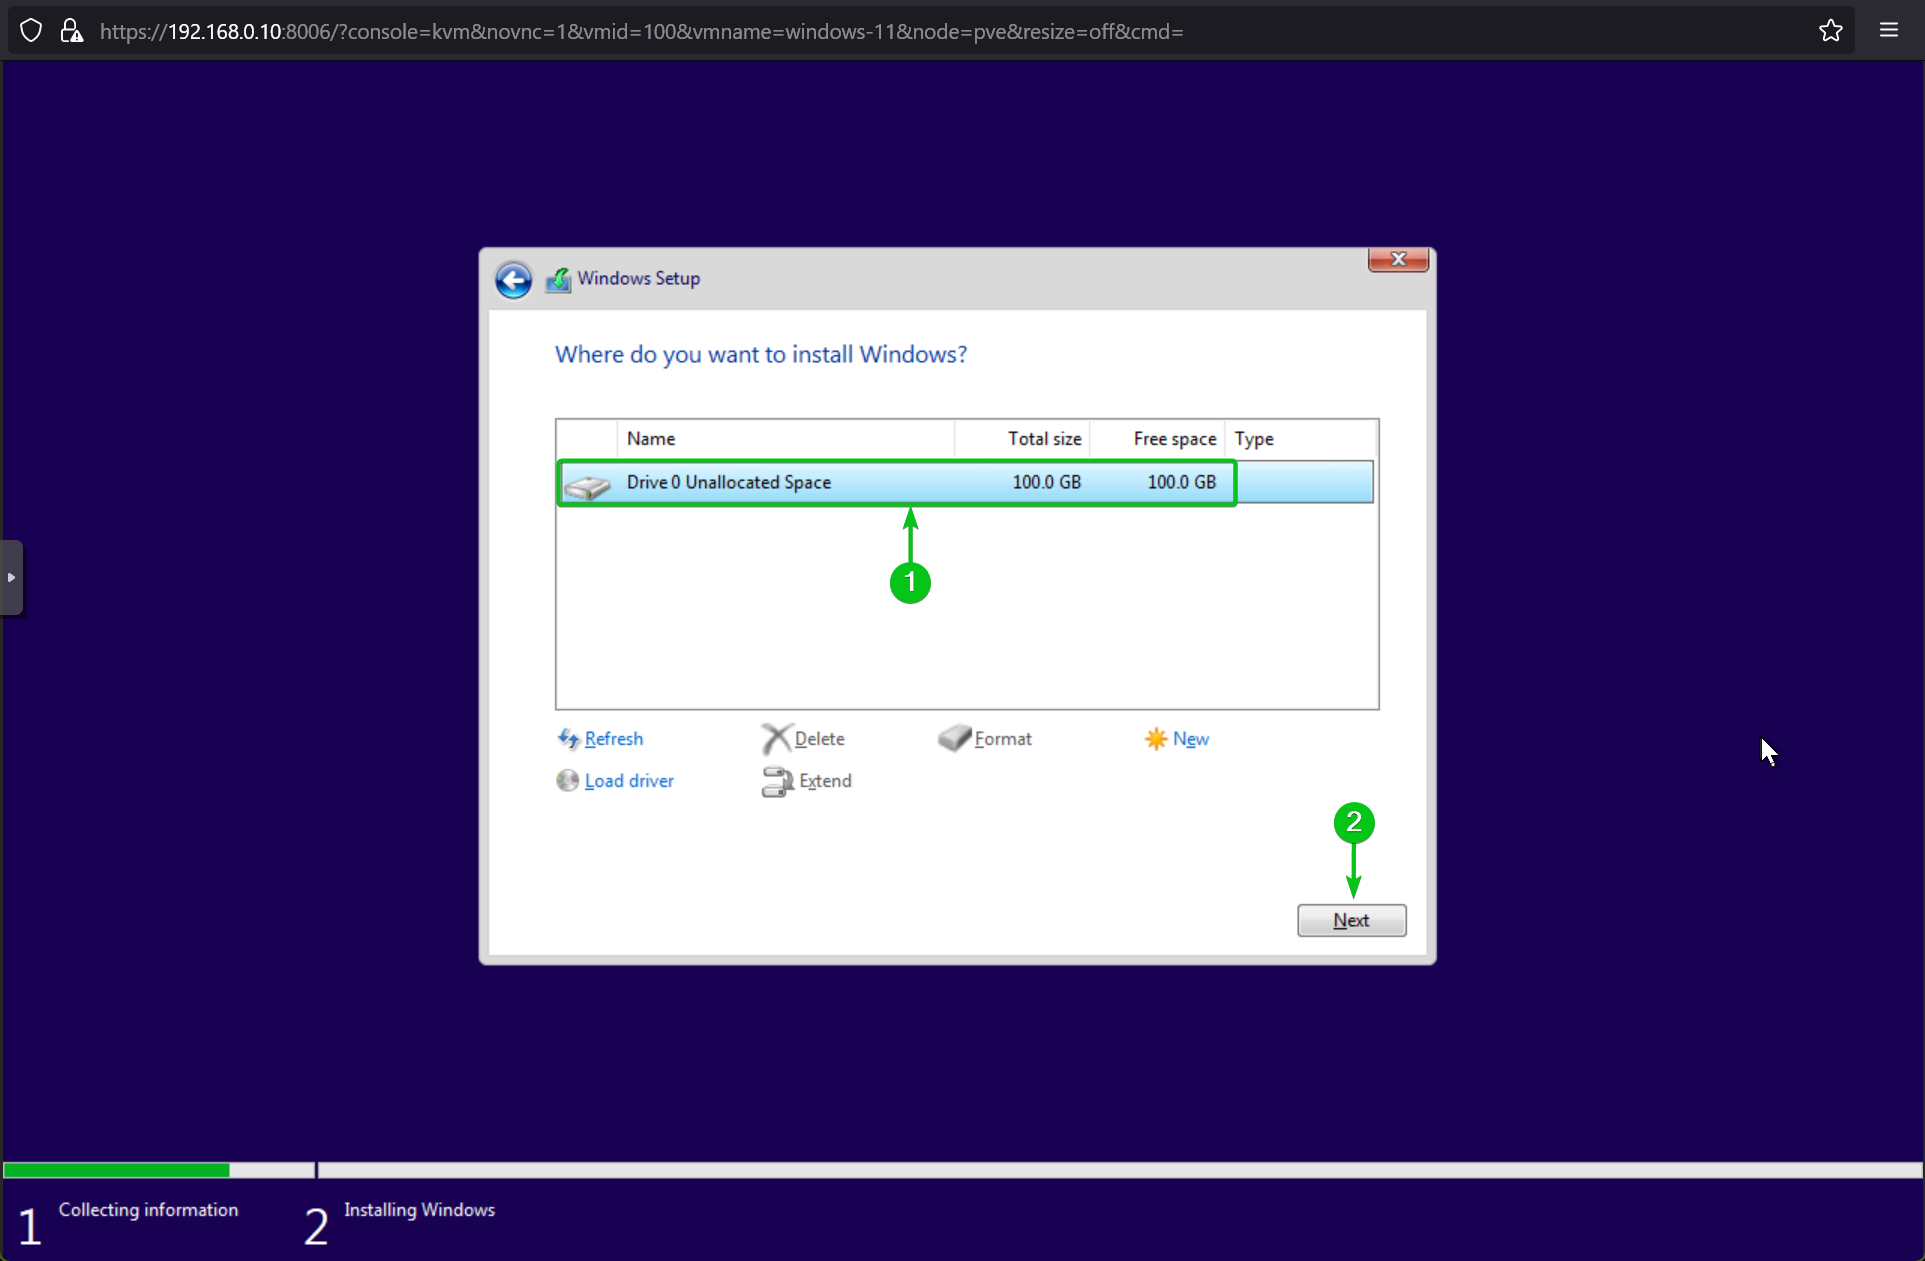
Windows installer should start installing Windows 11 on the disk of the Proxmox VE 8 virtual machine. It will take a few minutes to complete.
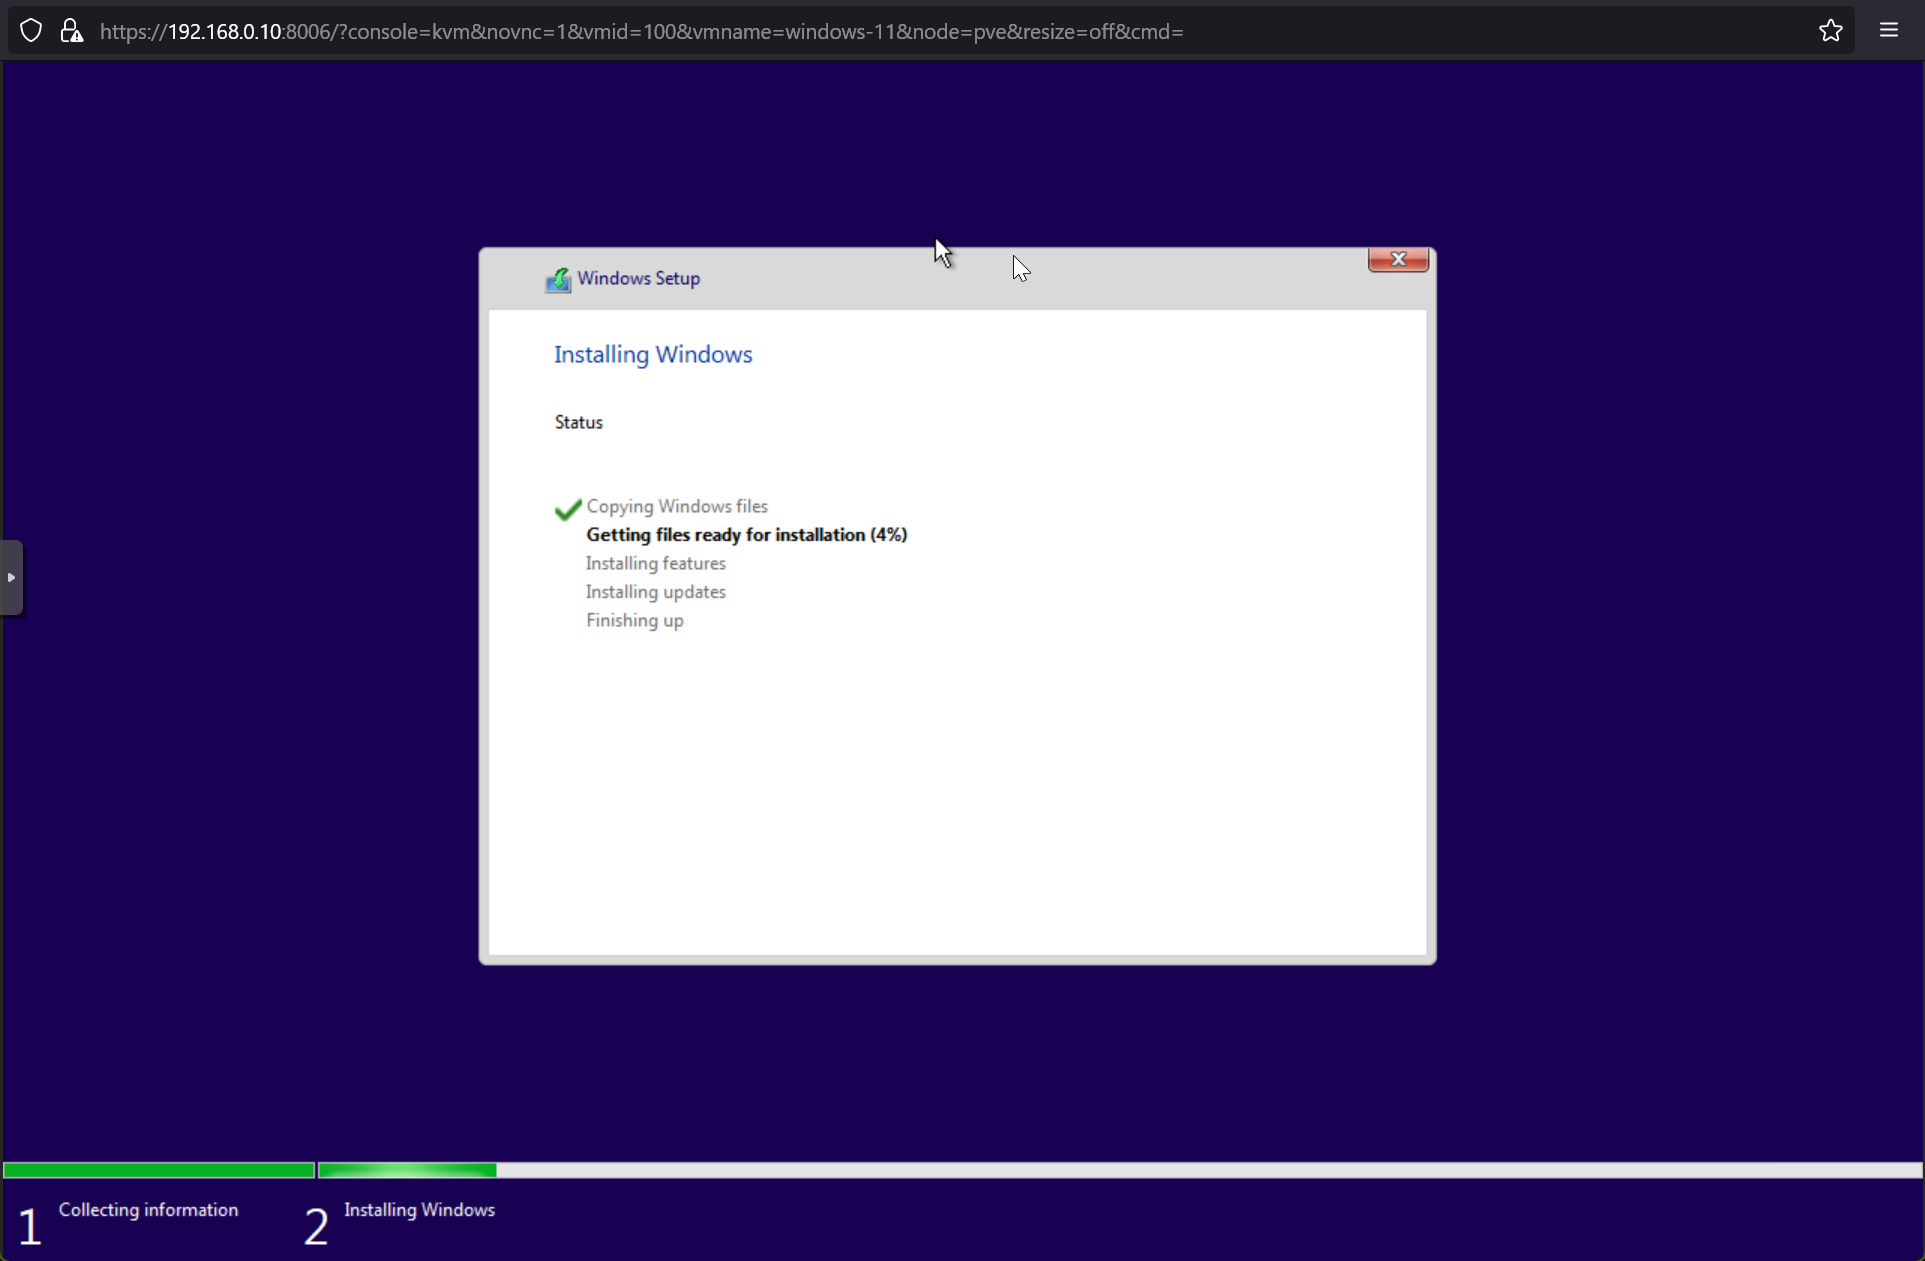
Once the required Windows 11 files are installed on the Proxmox VE 8 virtual machine, the virtual machine will reboot.
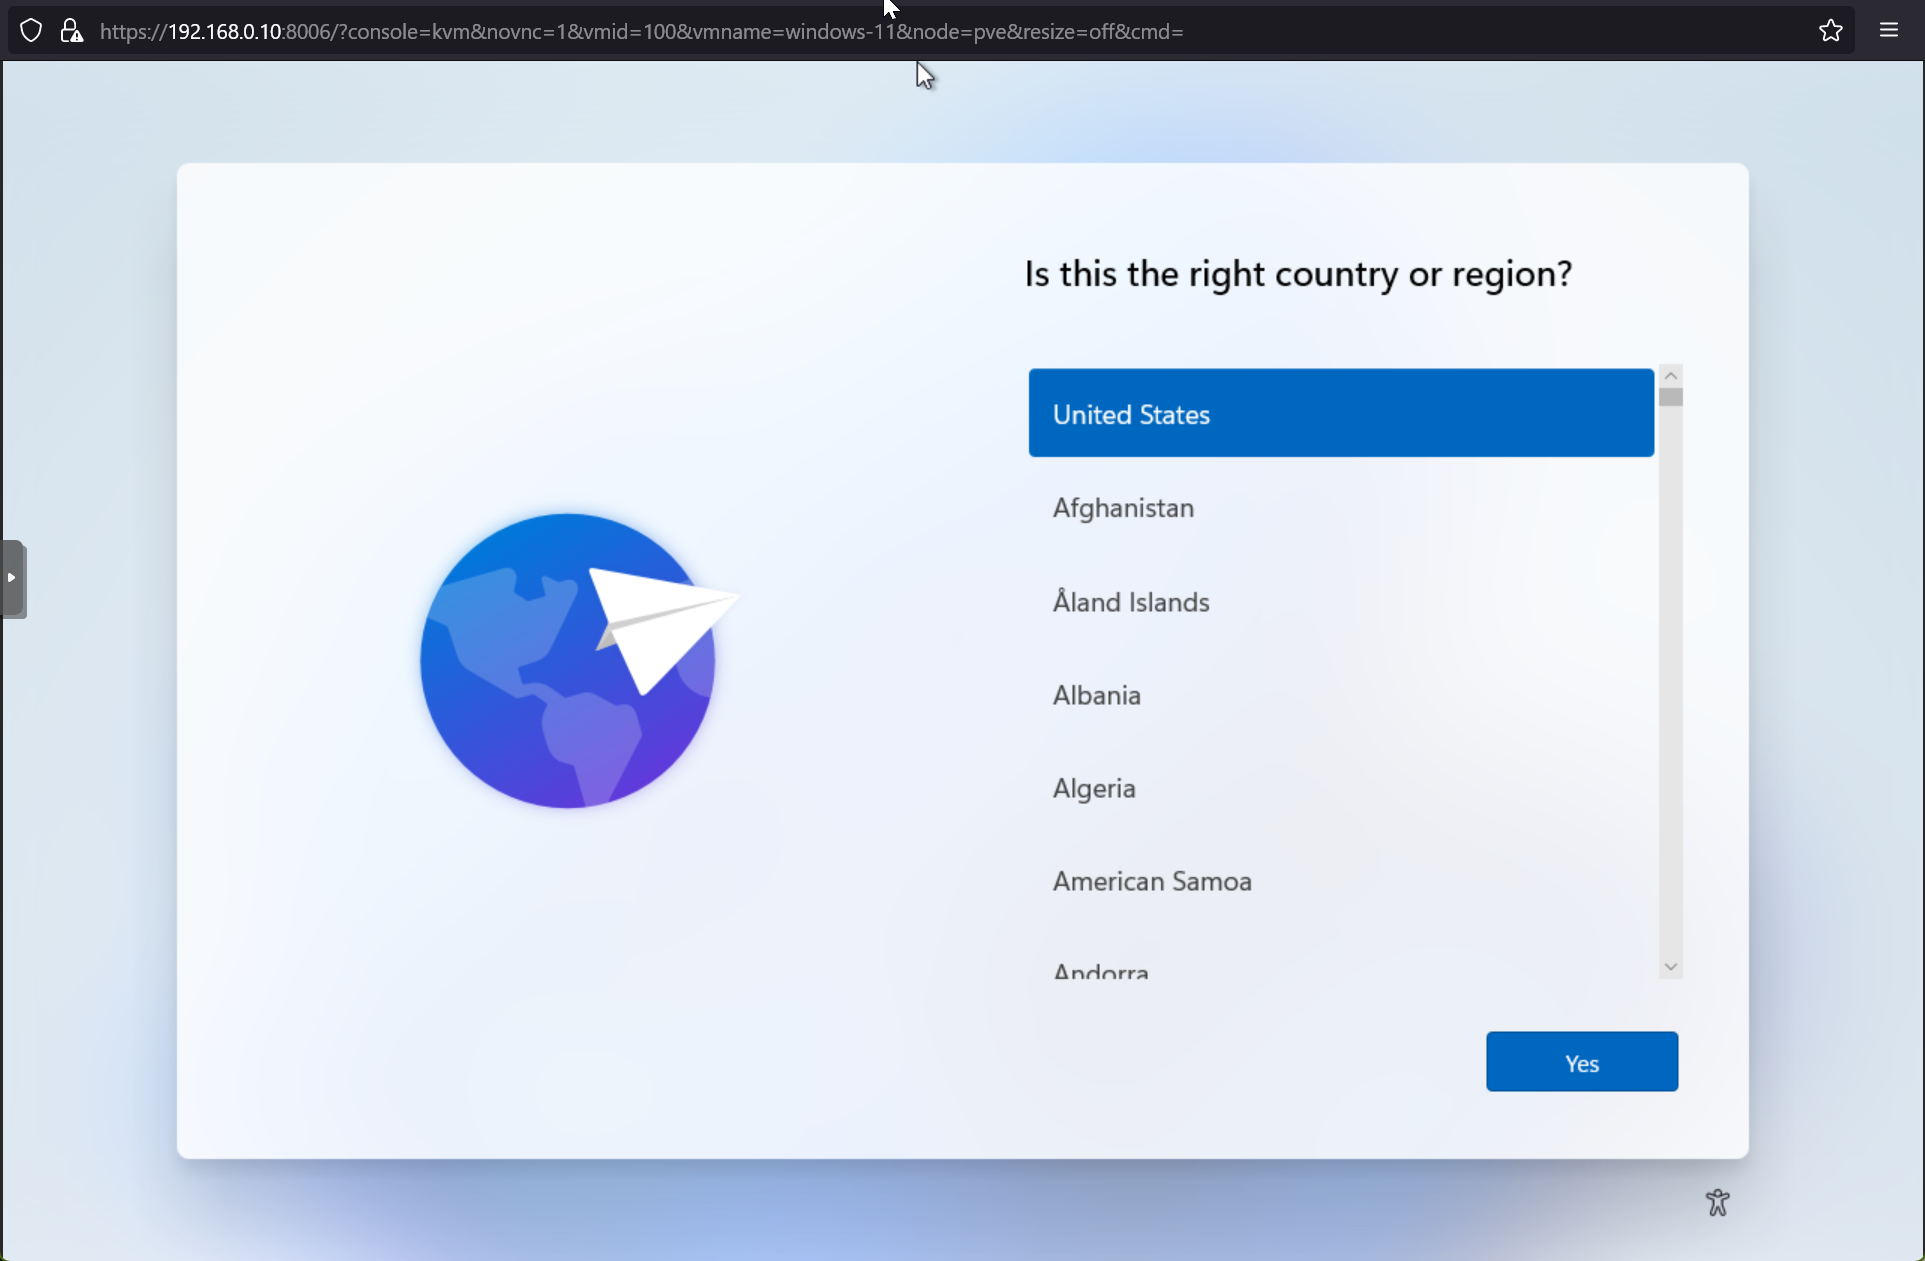
On the next boot, the Windows installer will ask you a few questions to configure Windows 11 for you.
First, select your country/region from the list and click on Yes.
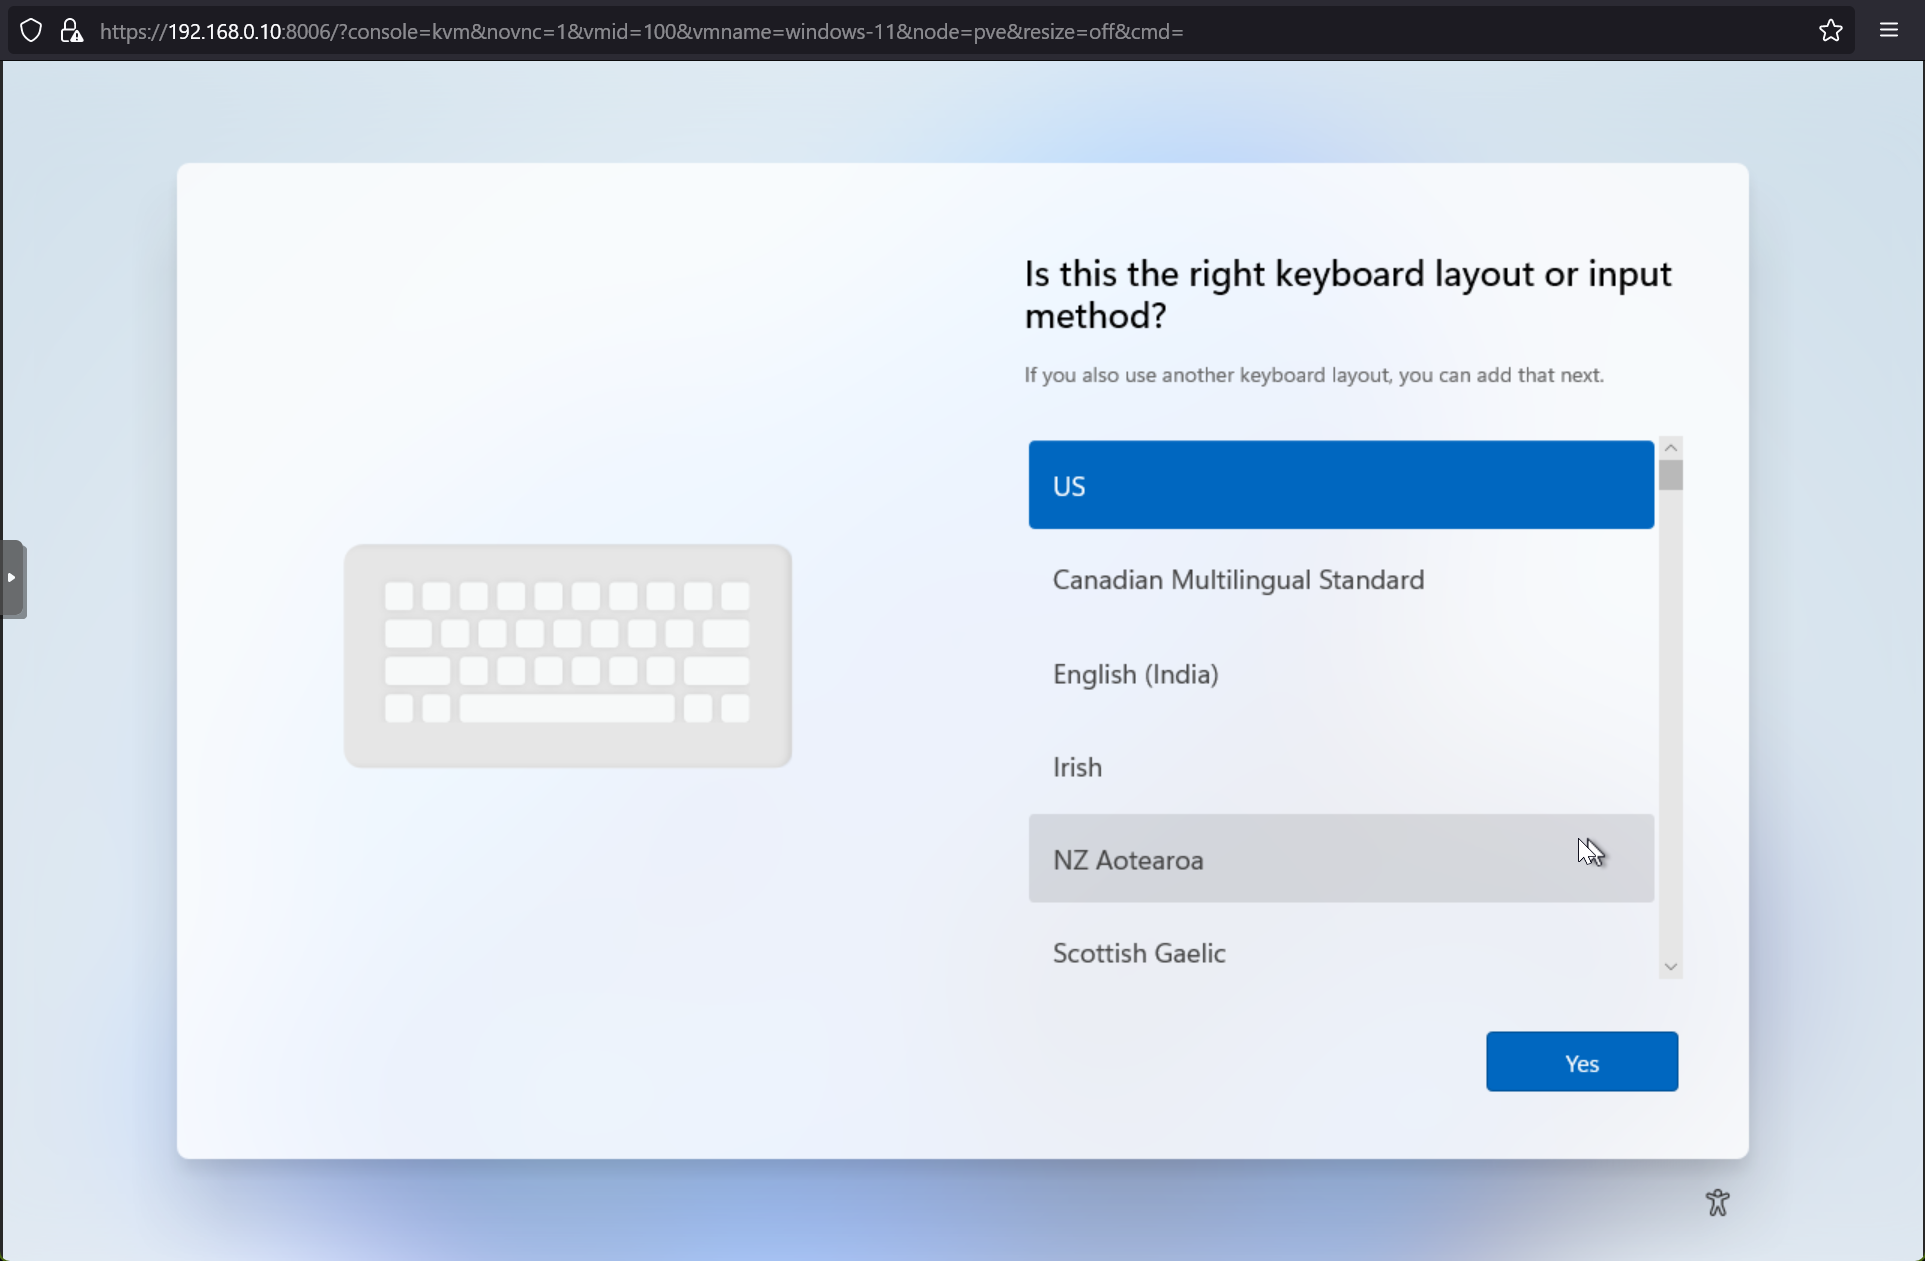
Select a keyboard layout or input method from the list and click on Yes.
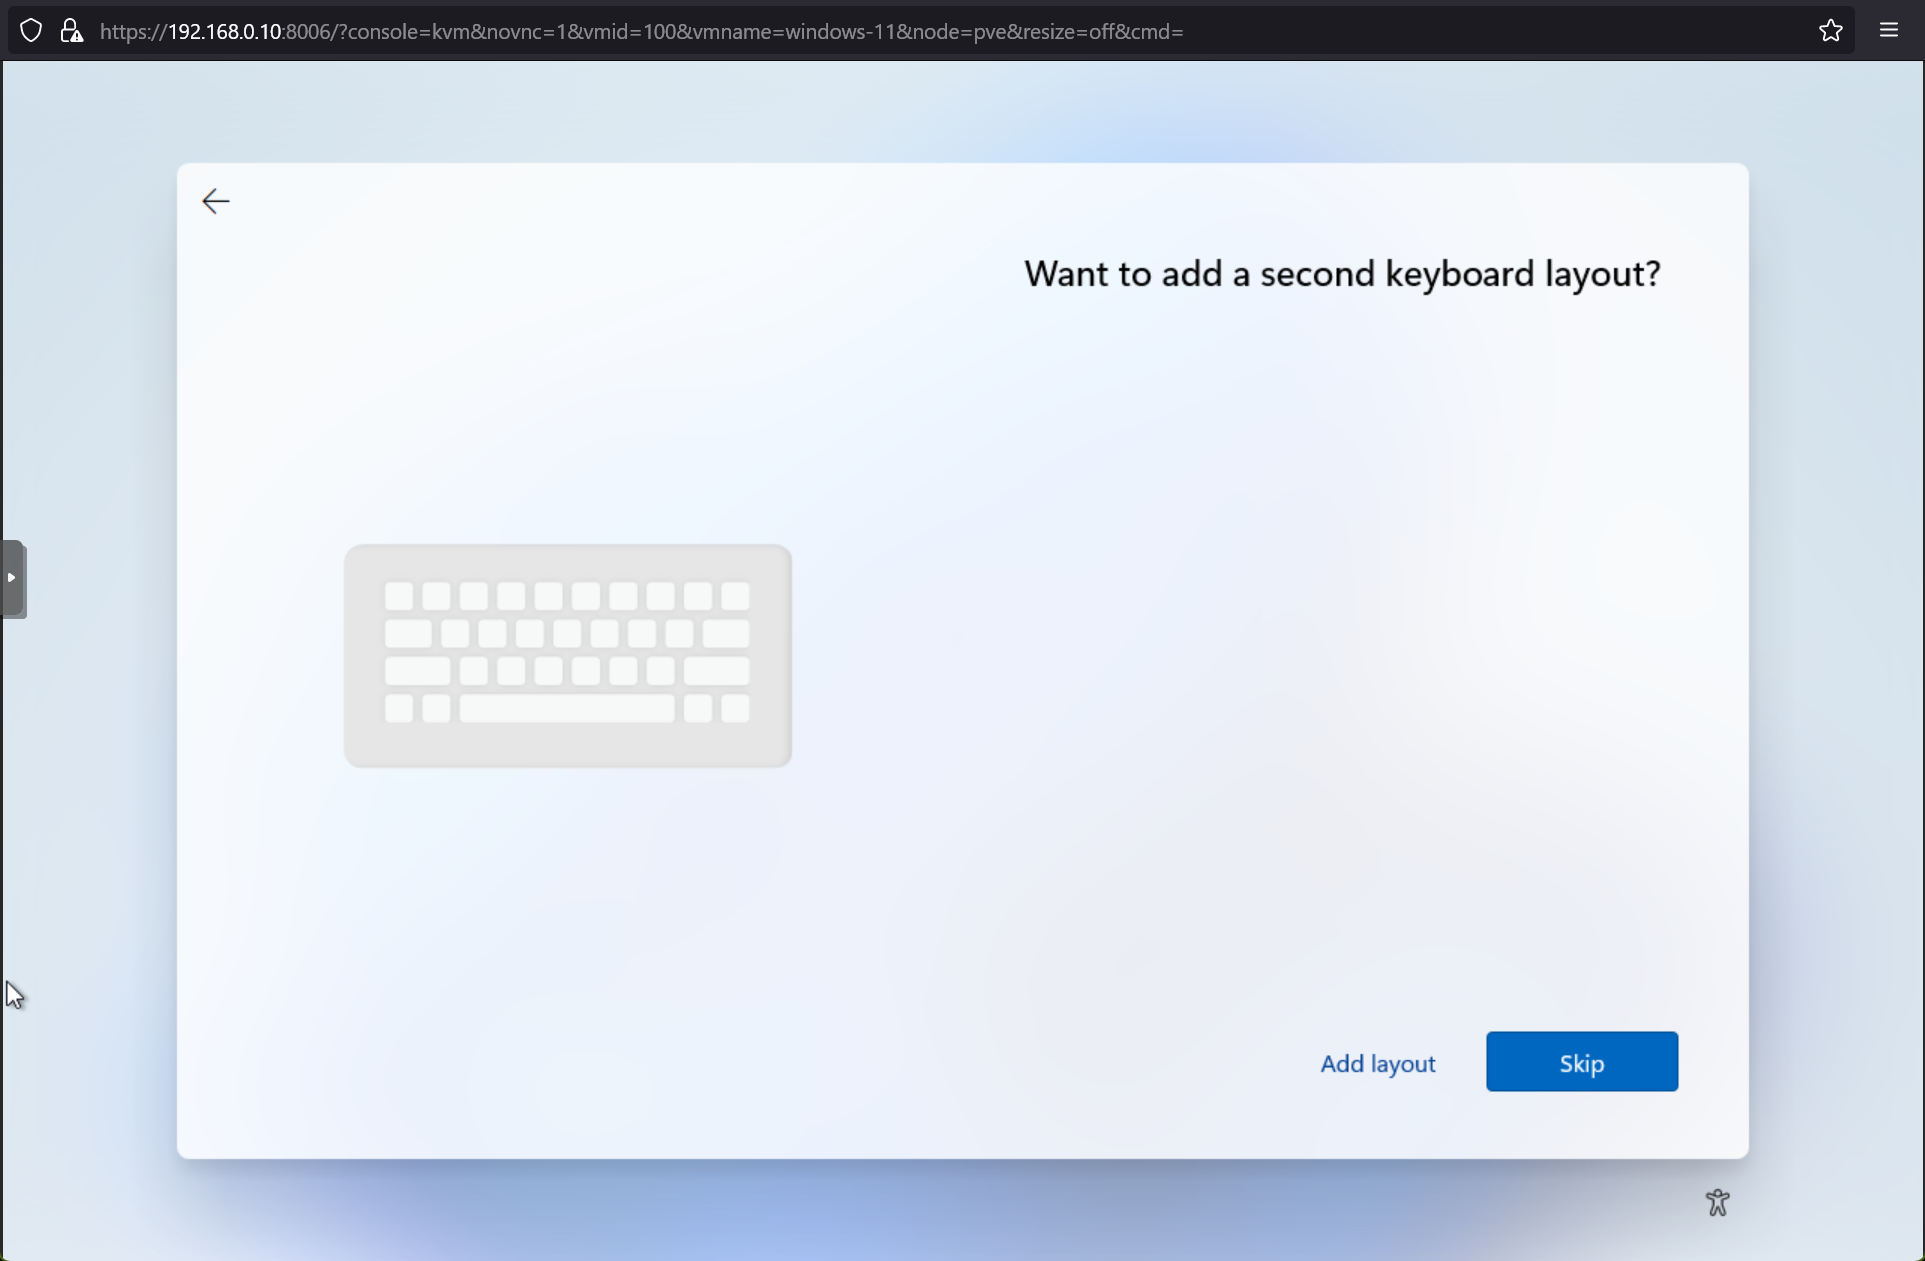
If you want to add another keyboard layout or input method on your Windows 11 installation, click on Add layout and follow the instructions.
If you don’t want to add another keyboard layout or input method, click on Skip.
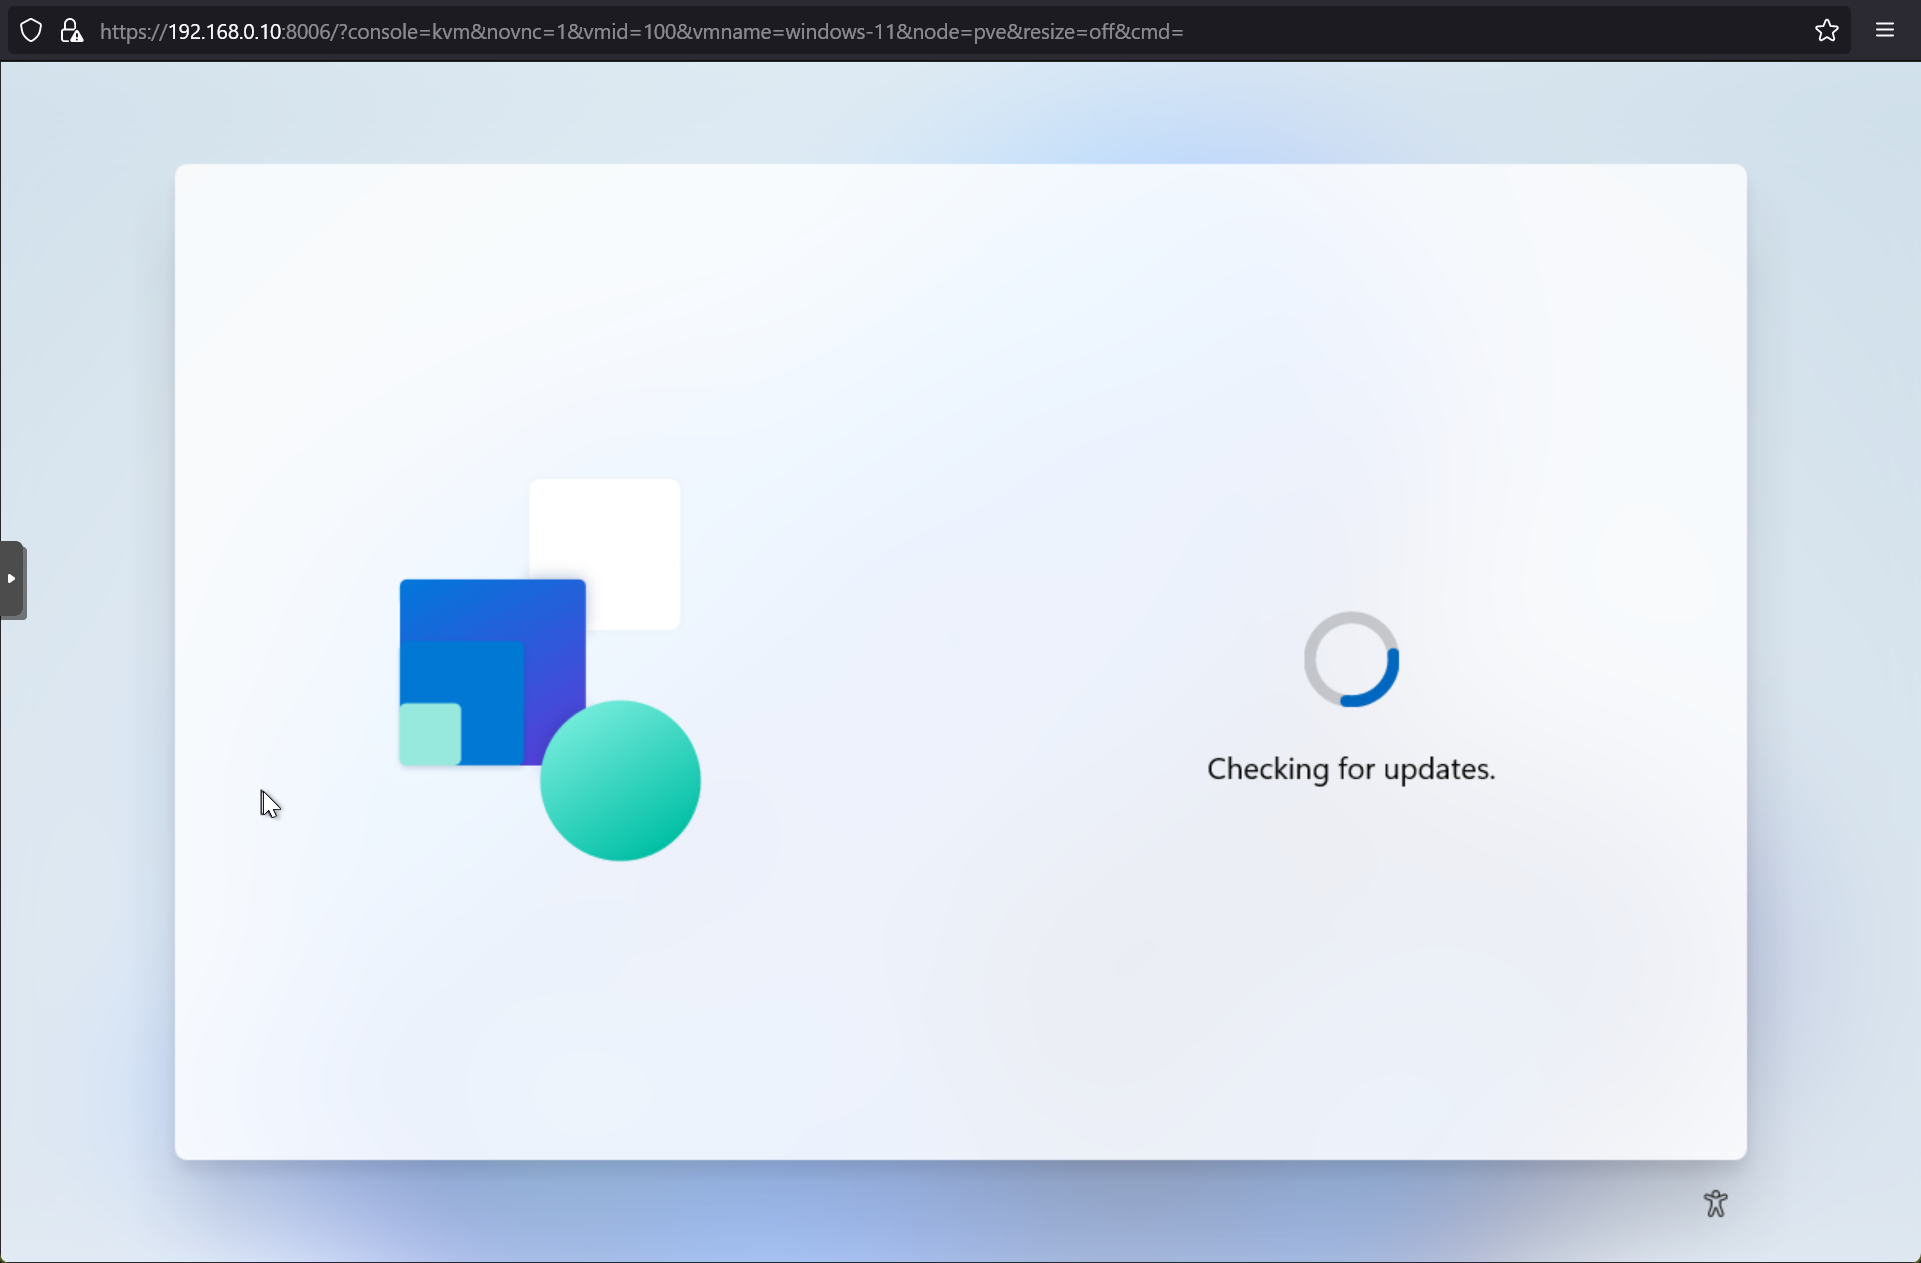
You will need to wait a few minutes for the Windows 11 installer to get ready and show you the next steps.
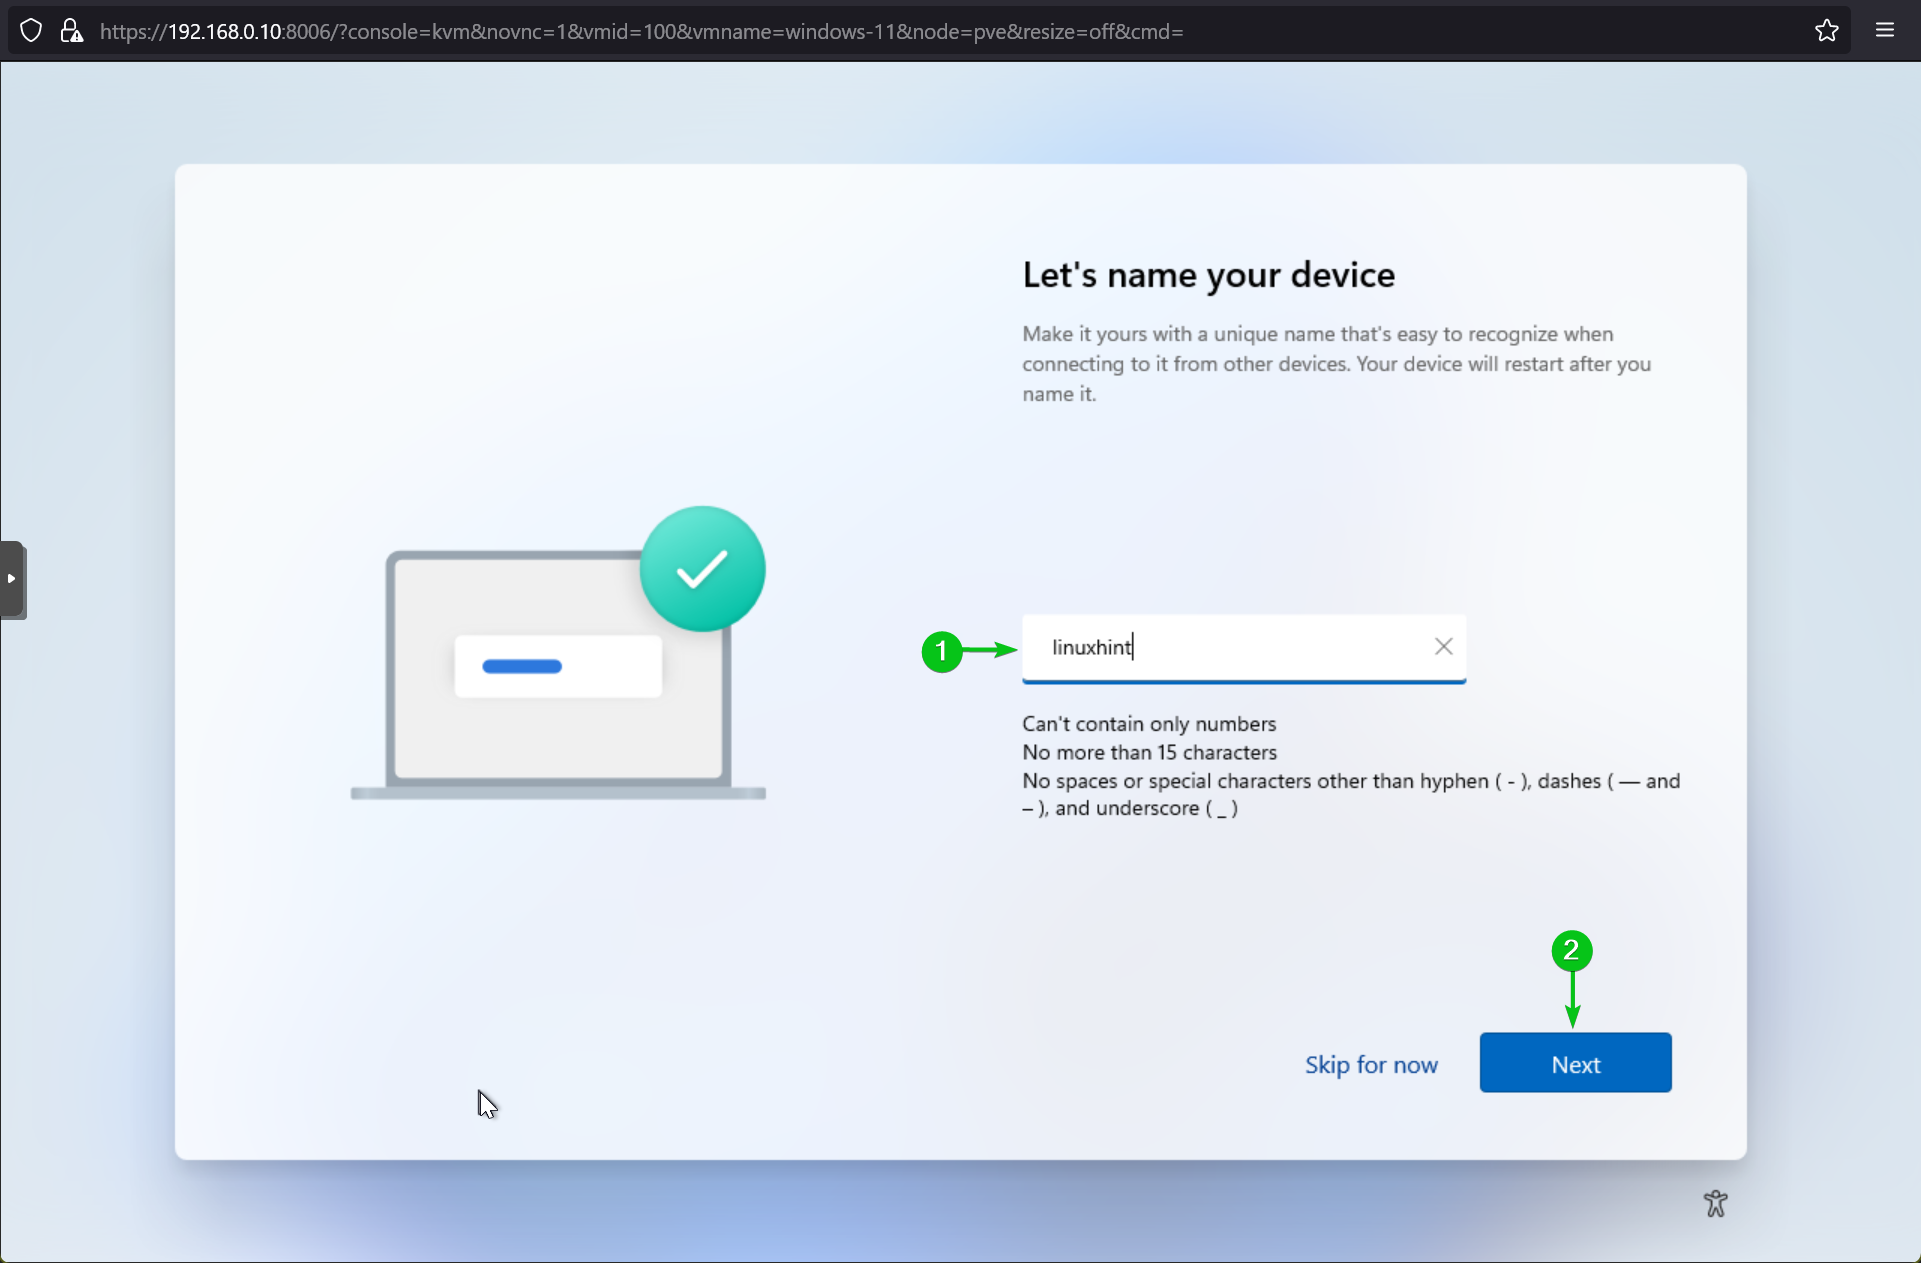
Type in a name for your Windows 11 virtual machine[1] and click on Next[2].
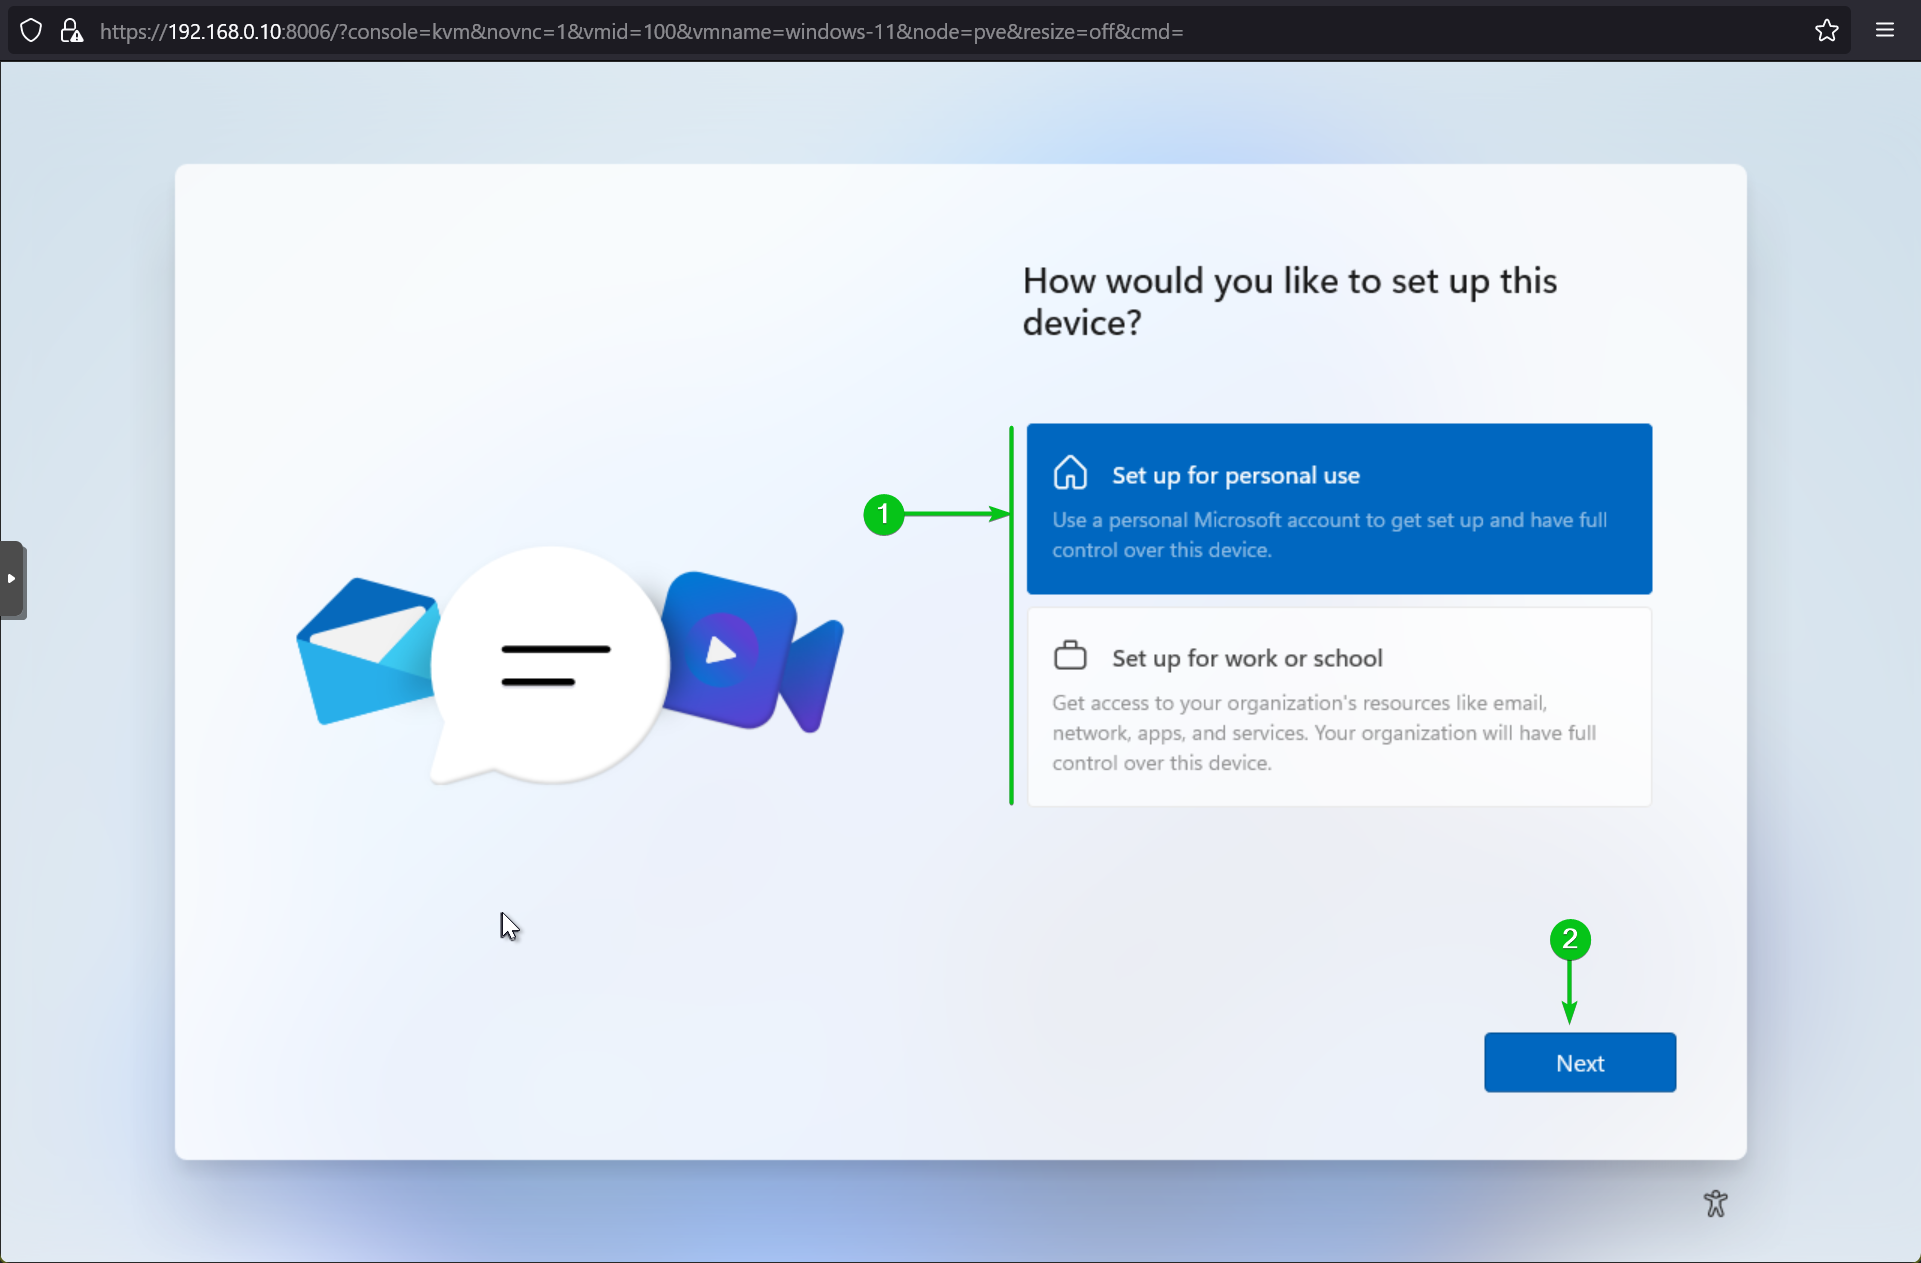
Select how you want this Windows 11 virtual machine set up[1] and click on Next[2].
Depending on what you select from this section, you will see different options later. I am setting up this Windows 11 virtual machine for personal use.
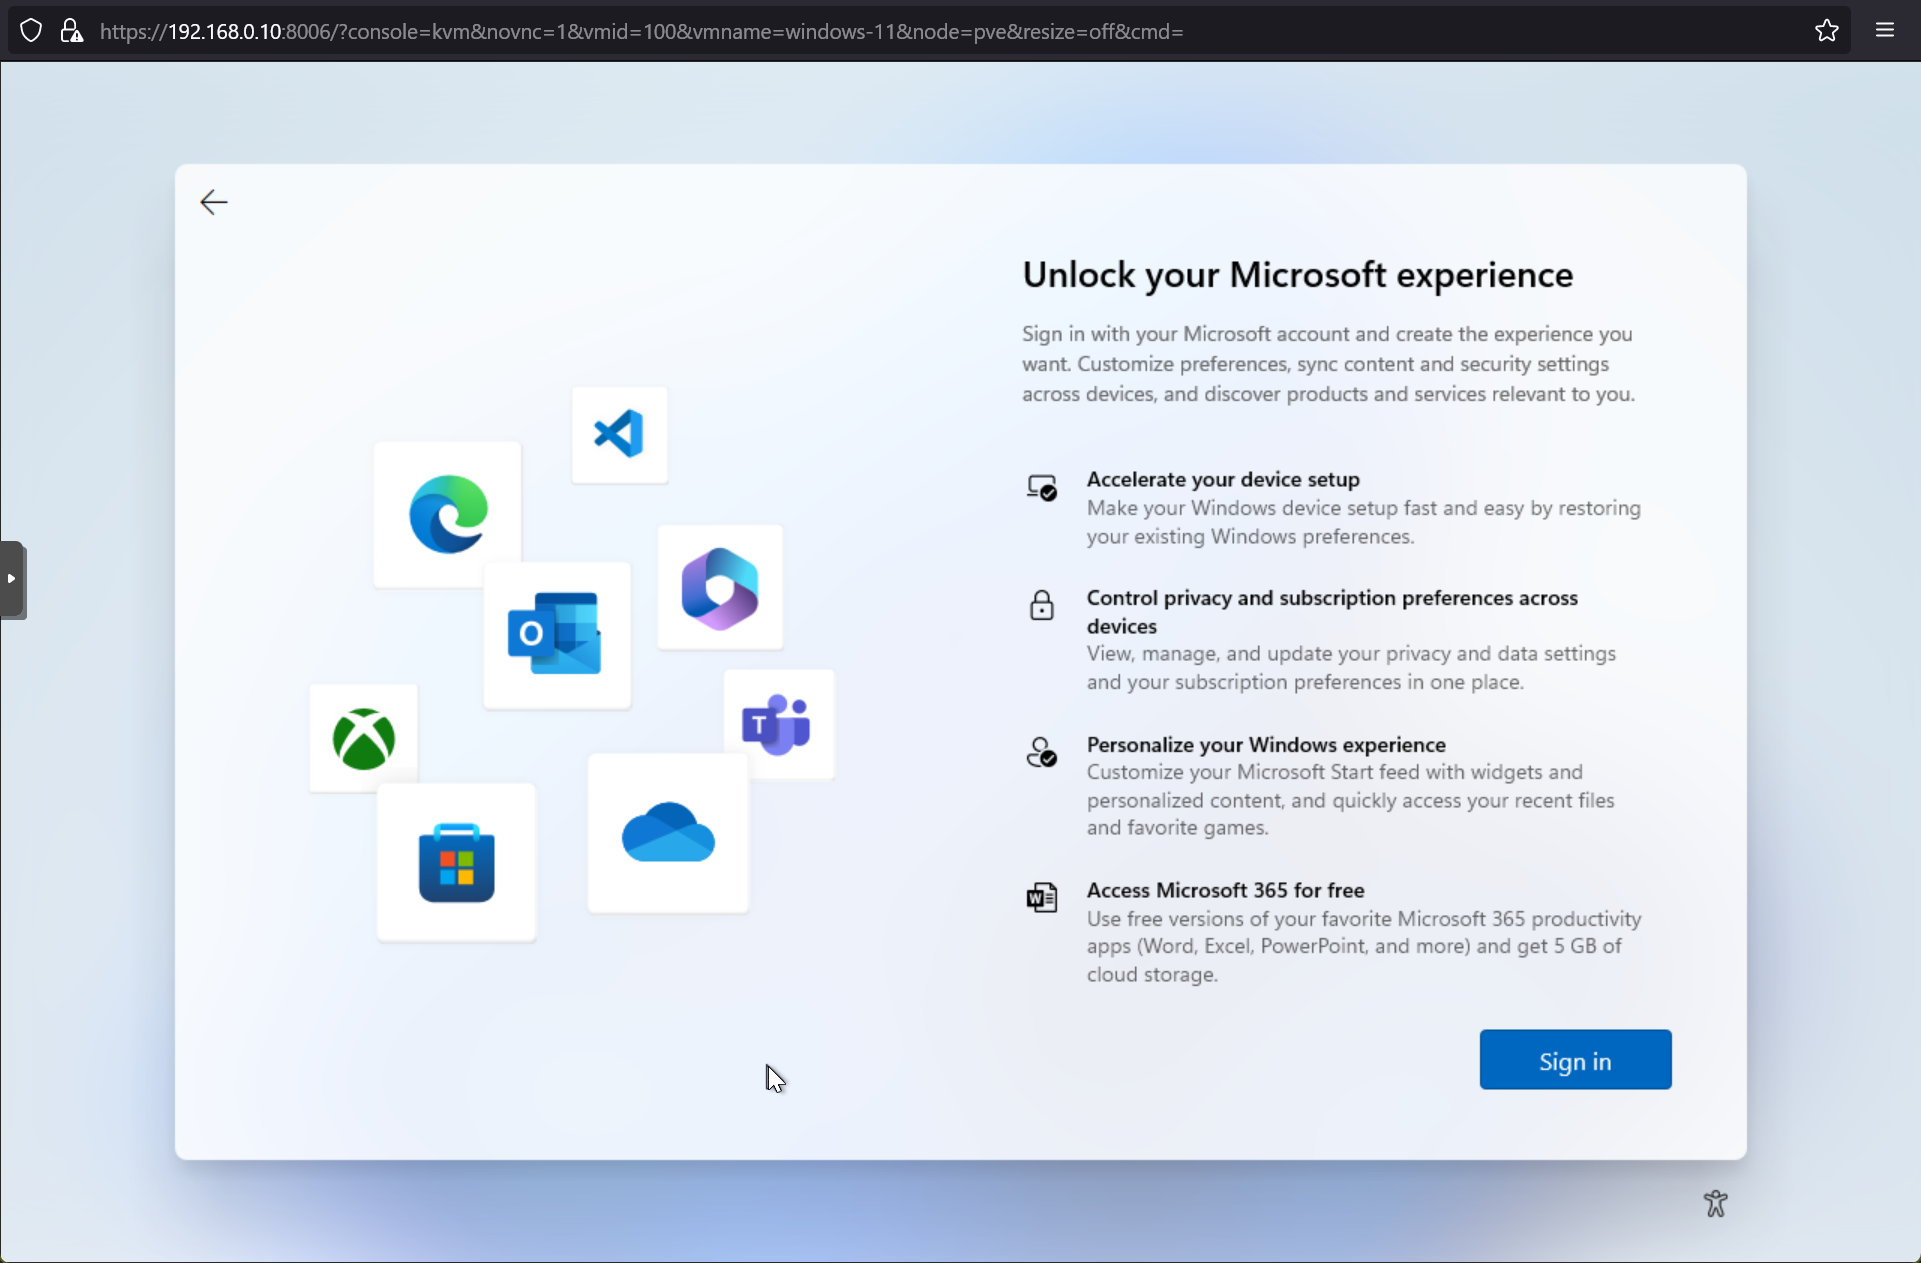
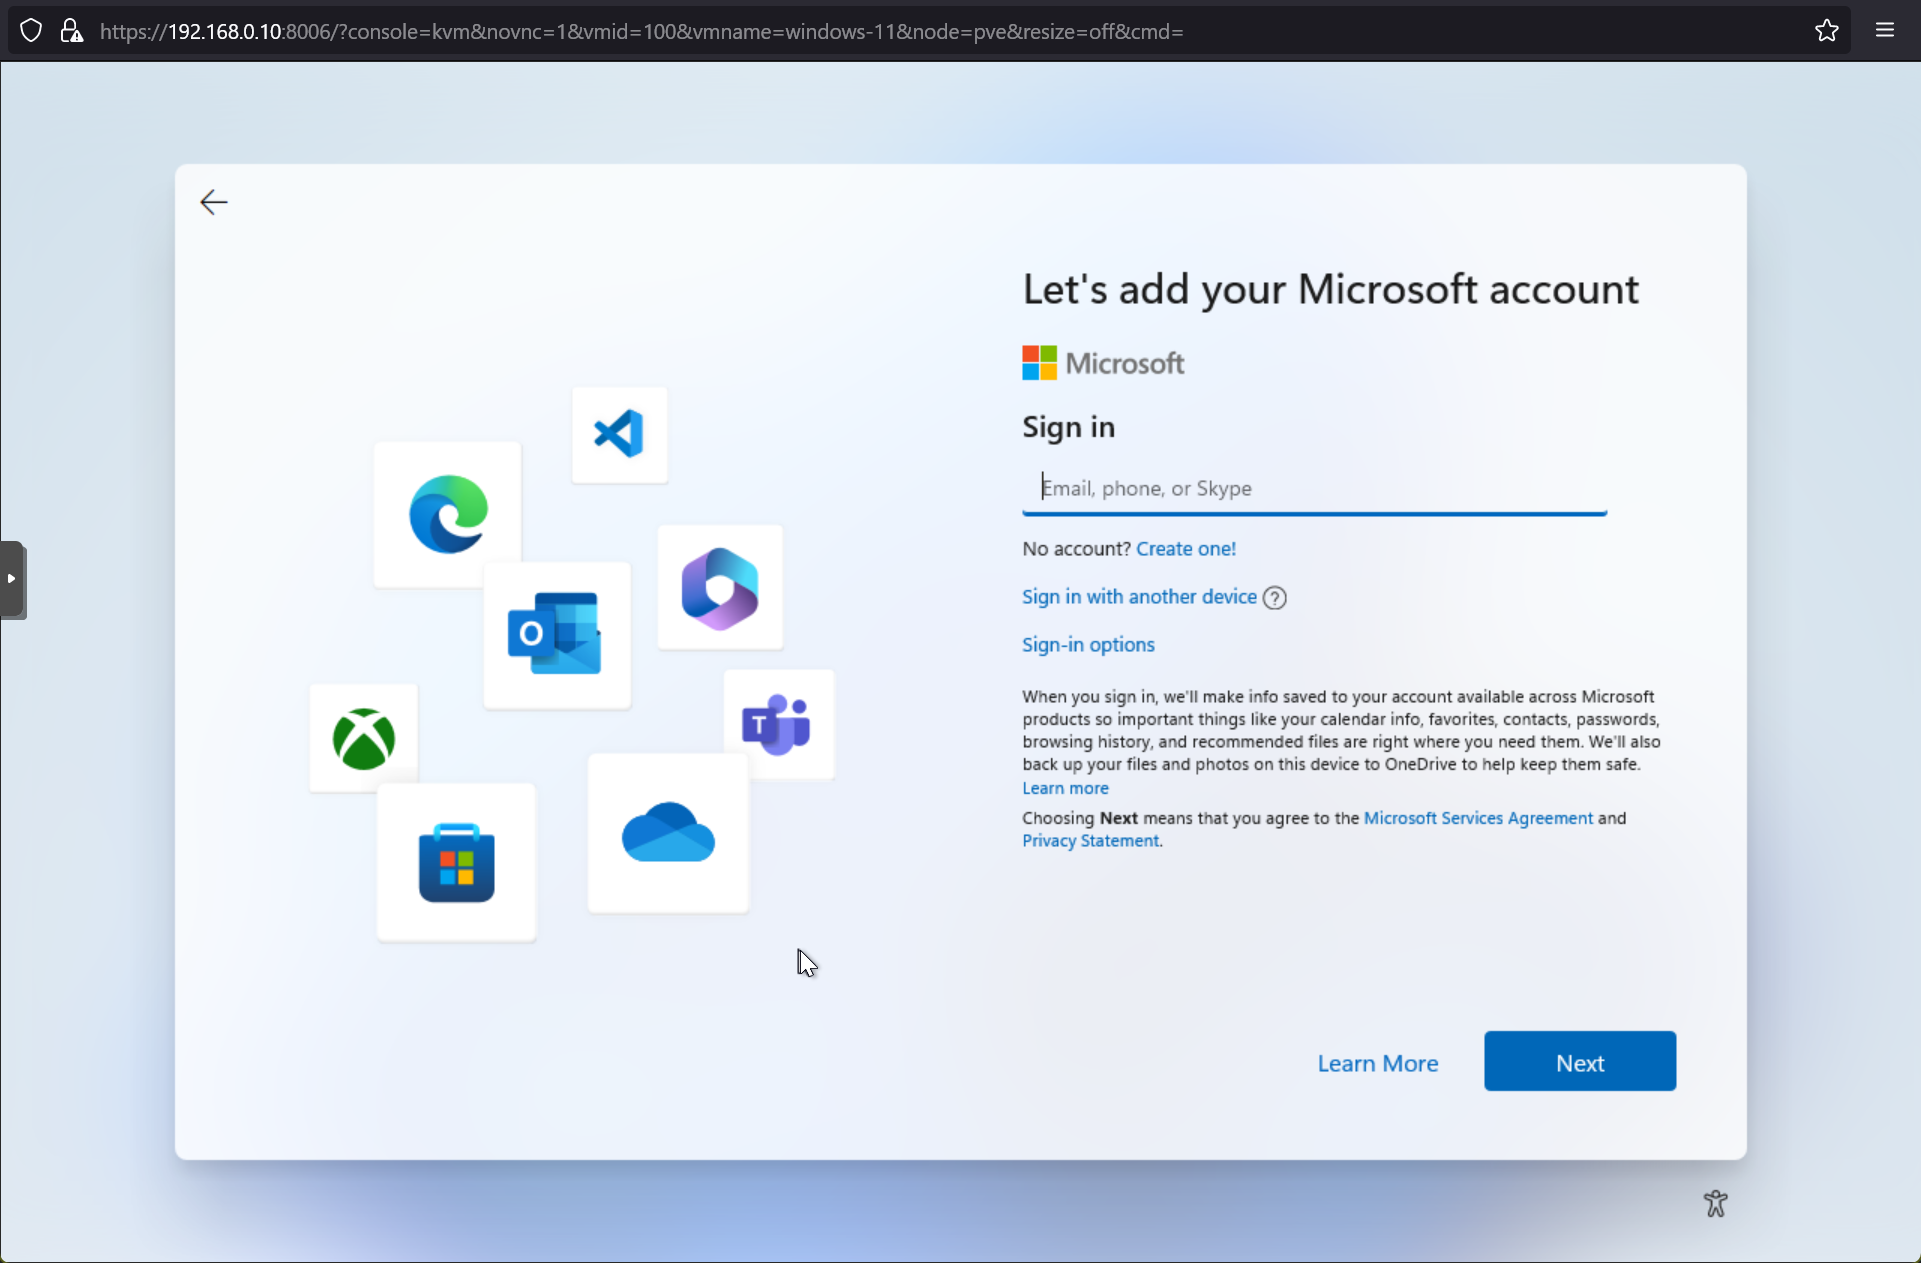
Click on Sign in.
You must have a Microsoft account to install and use Windows 11. If you don’t have a Microsoft account, you can create one from here.
Once you have a Microsoft account, log in to your Microsoft account to continue the Windows 11 installation.
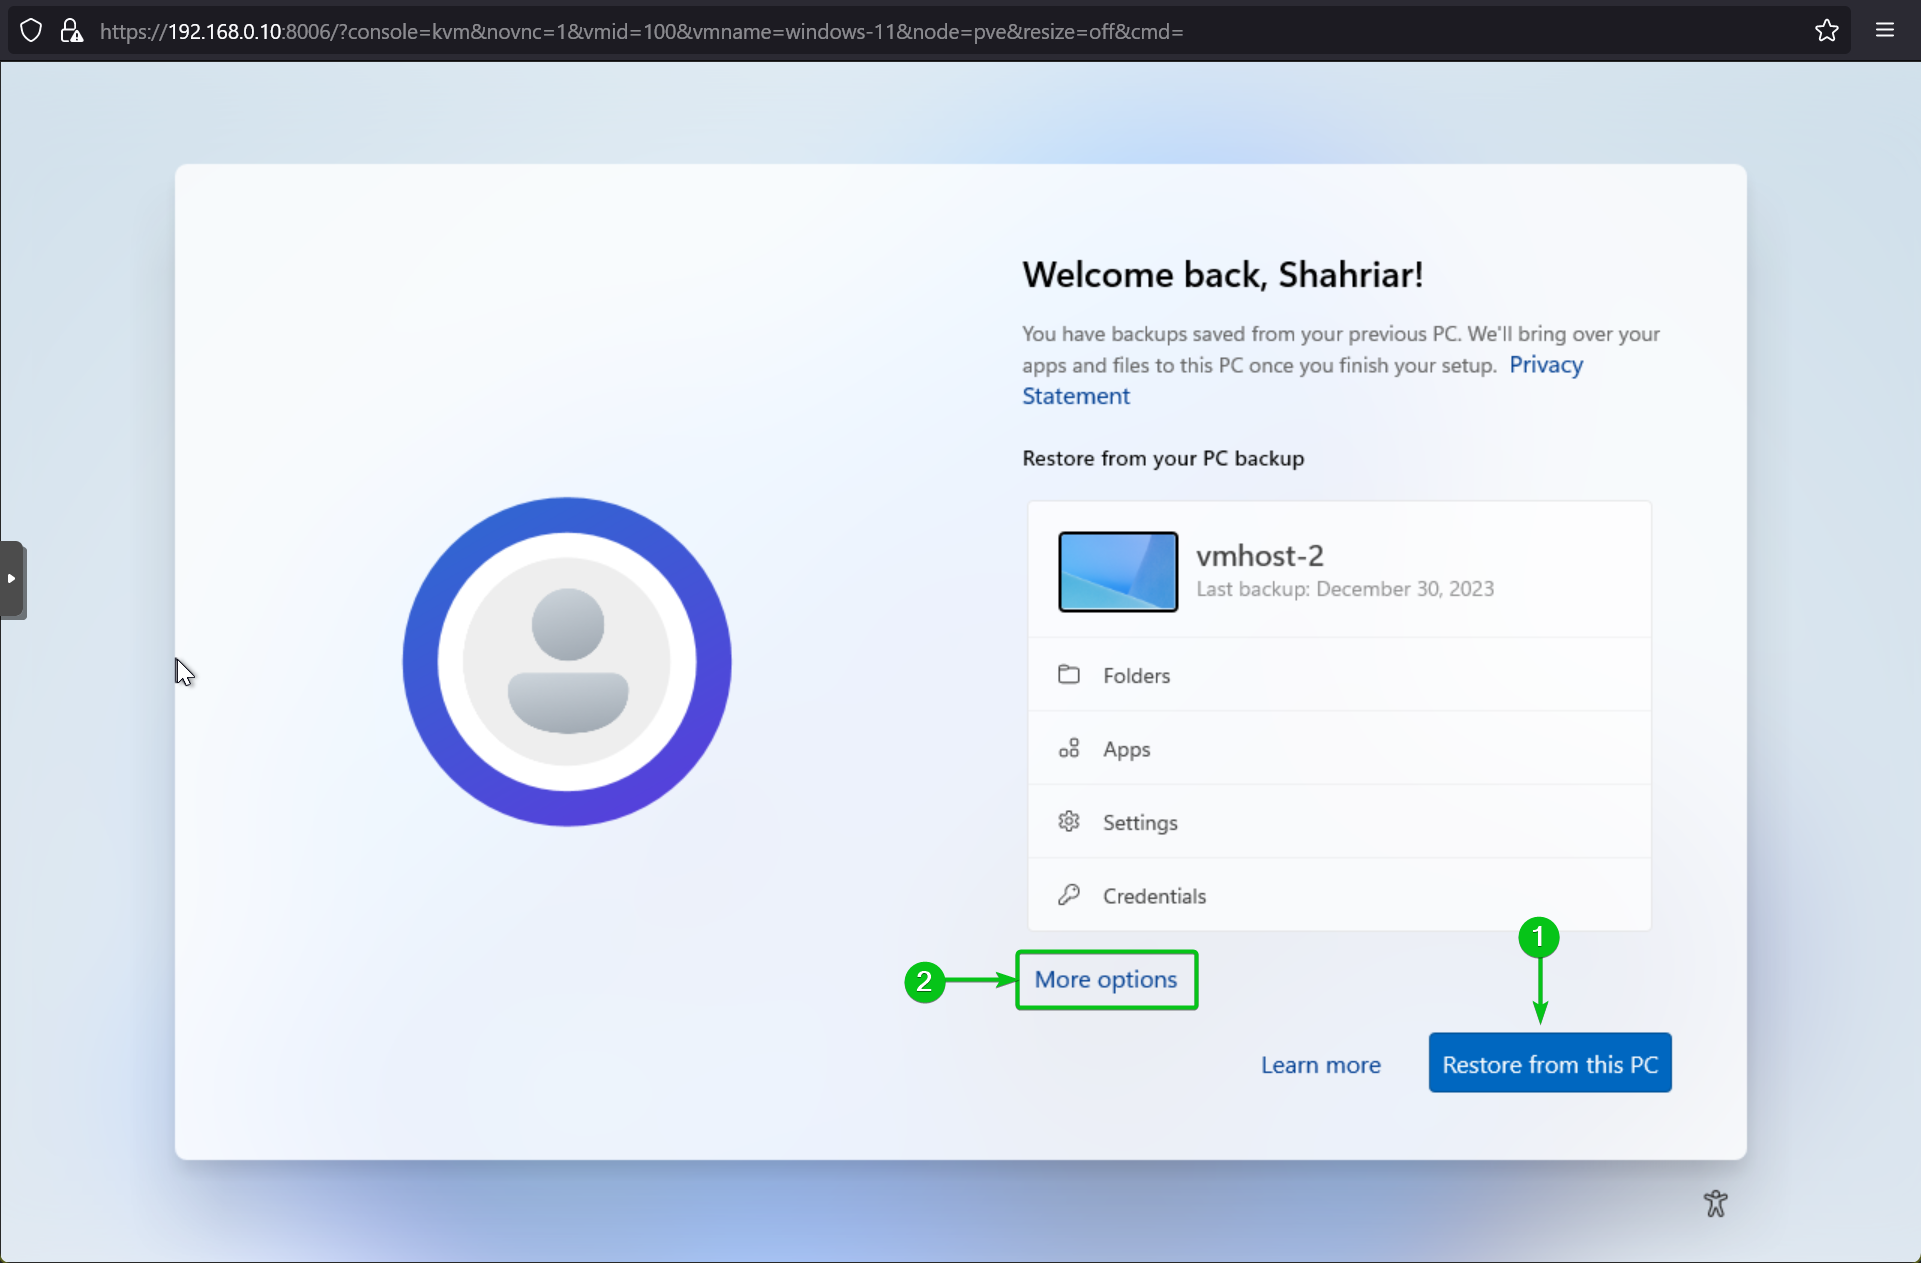
If you’ve used the same Microsoft account on different Windows 10/11 devices, you will be asked to restore data on this virtual machine from the latest backup. To do that, click on Restore from this PC[1].
If the device you want to restore from is not listed or you want to set this virtual machine as a new Windows 11 device, click on More options[2].
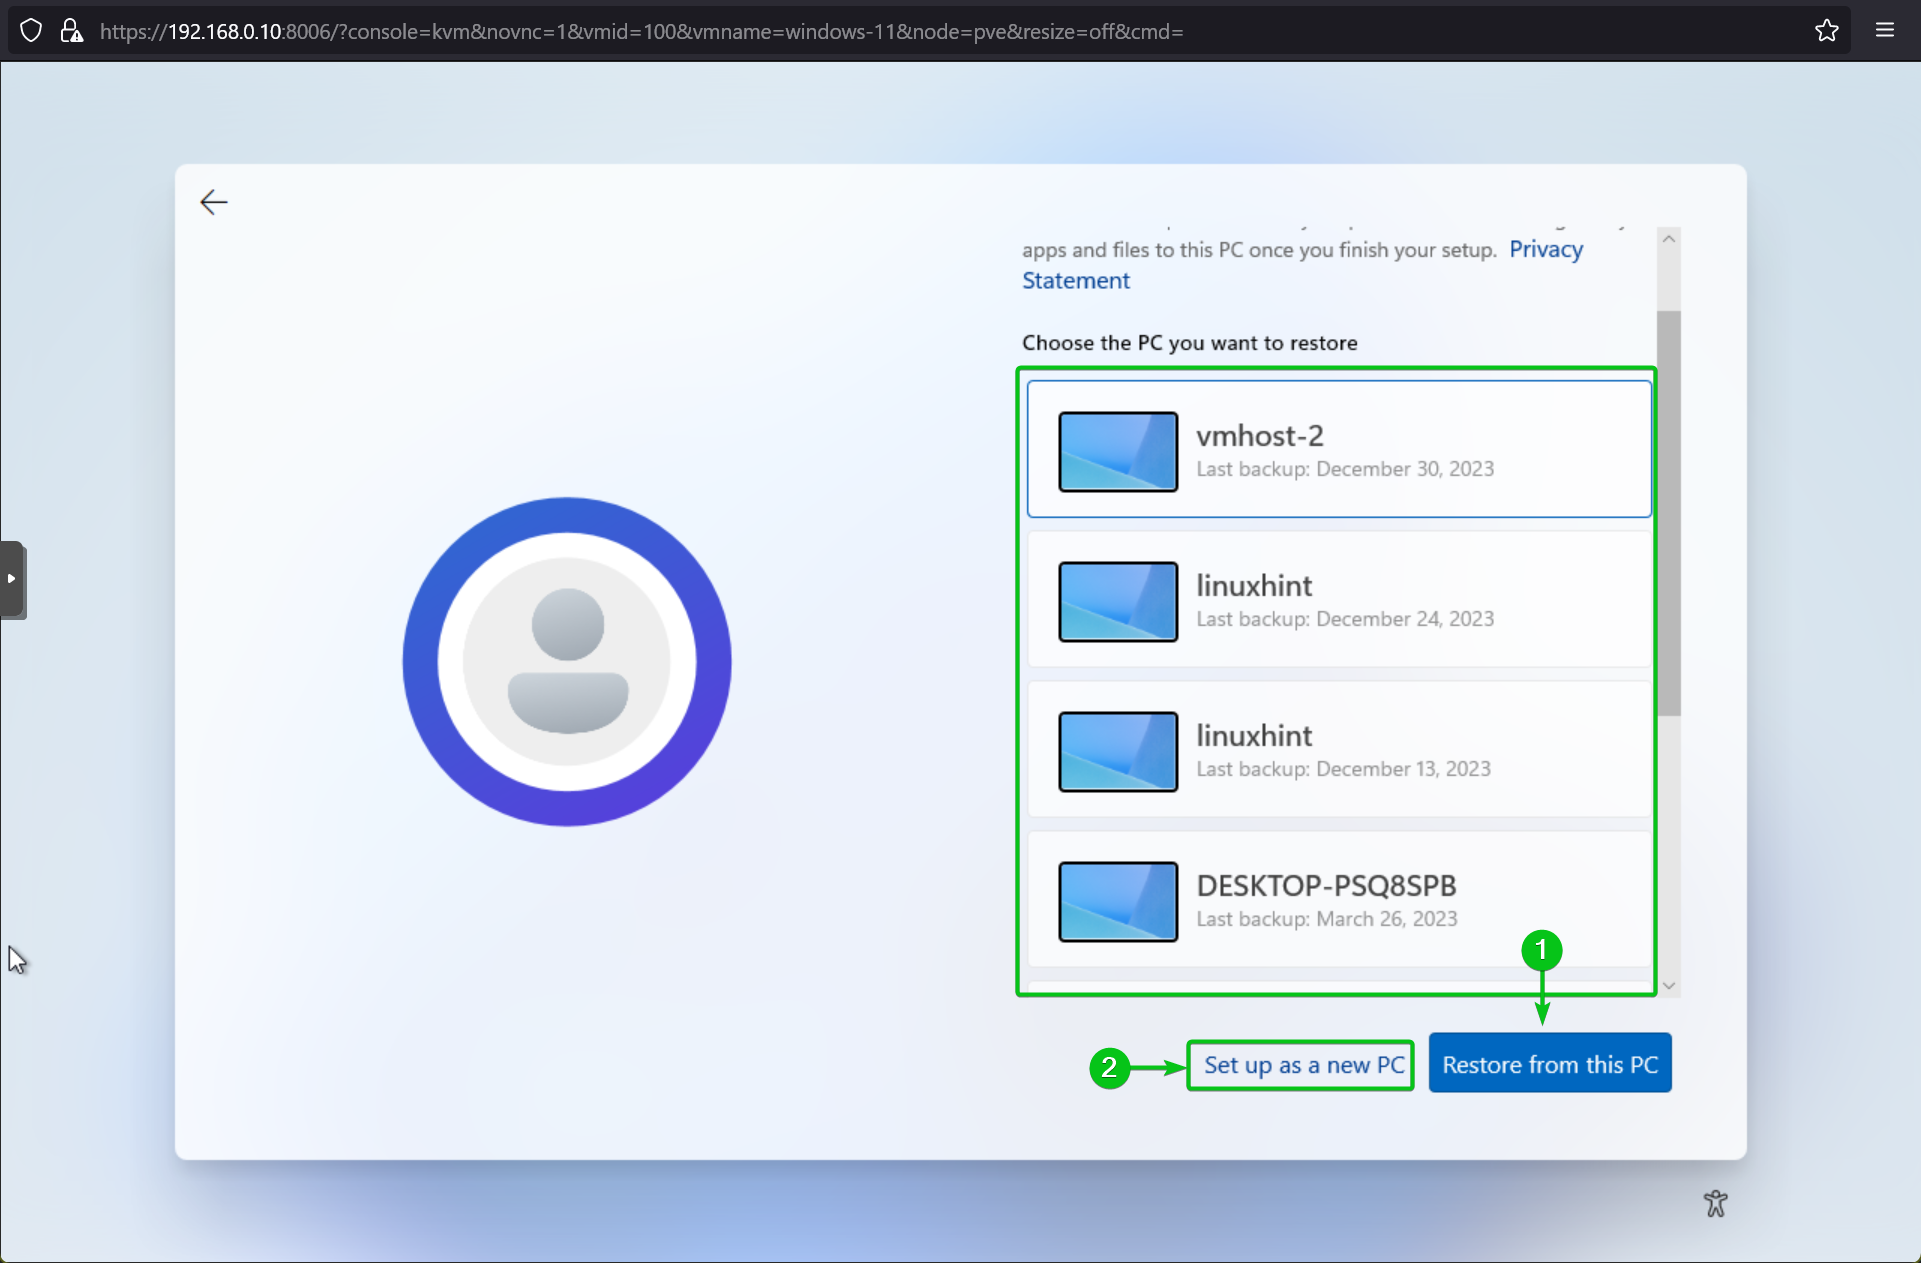
All the Windows 10/11 devices that you’ve connected to this Microsoft account should be listed. You can restore data from any of these devices. Just select your desired Windows 10/11 device from the list and click on Restore from this PC[1].
If you want to set this virtual machine as a new Windows 11 device, click on Set up as a new PC[2].
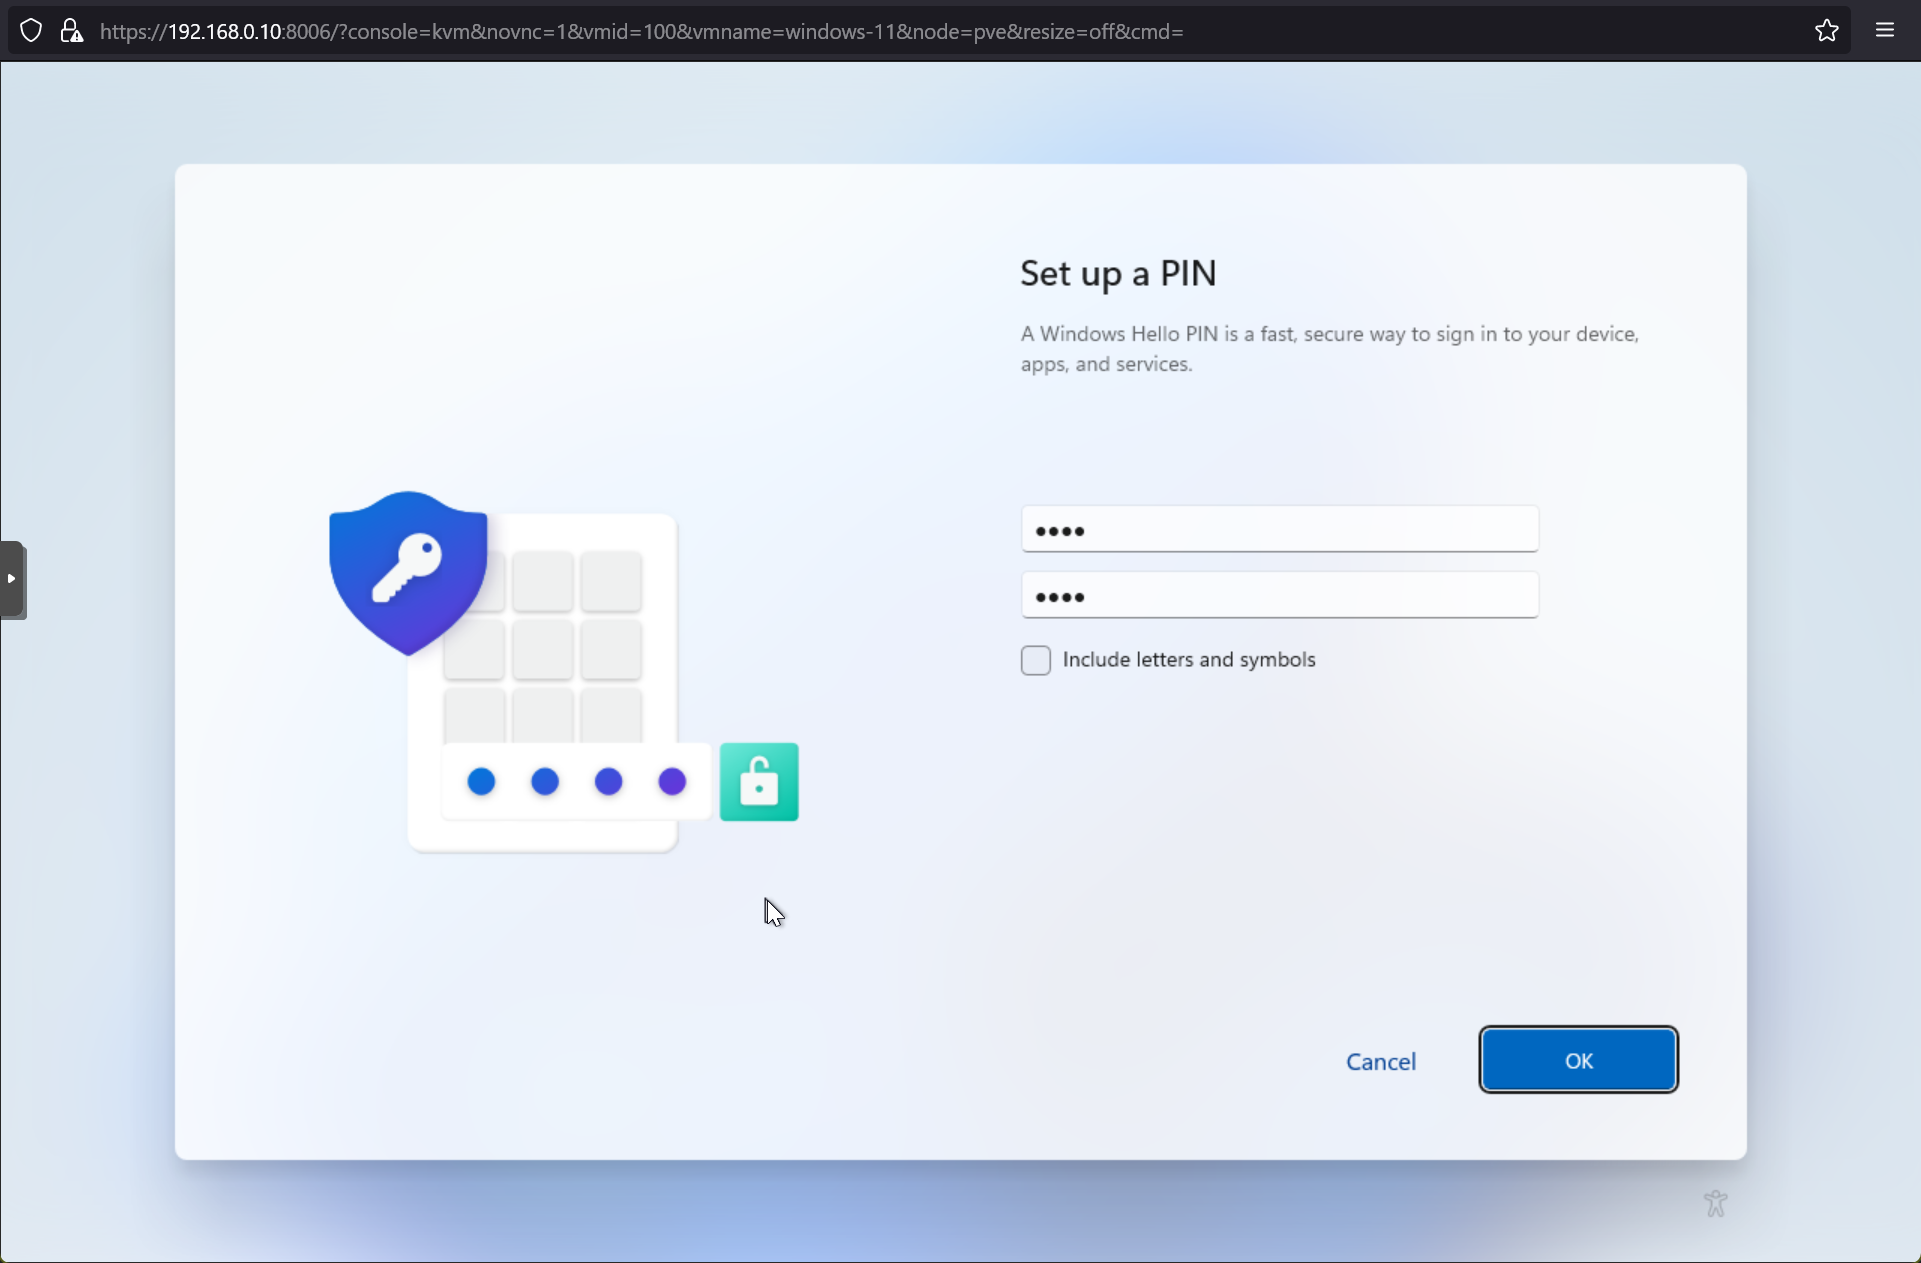
Click on Create PIN.
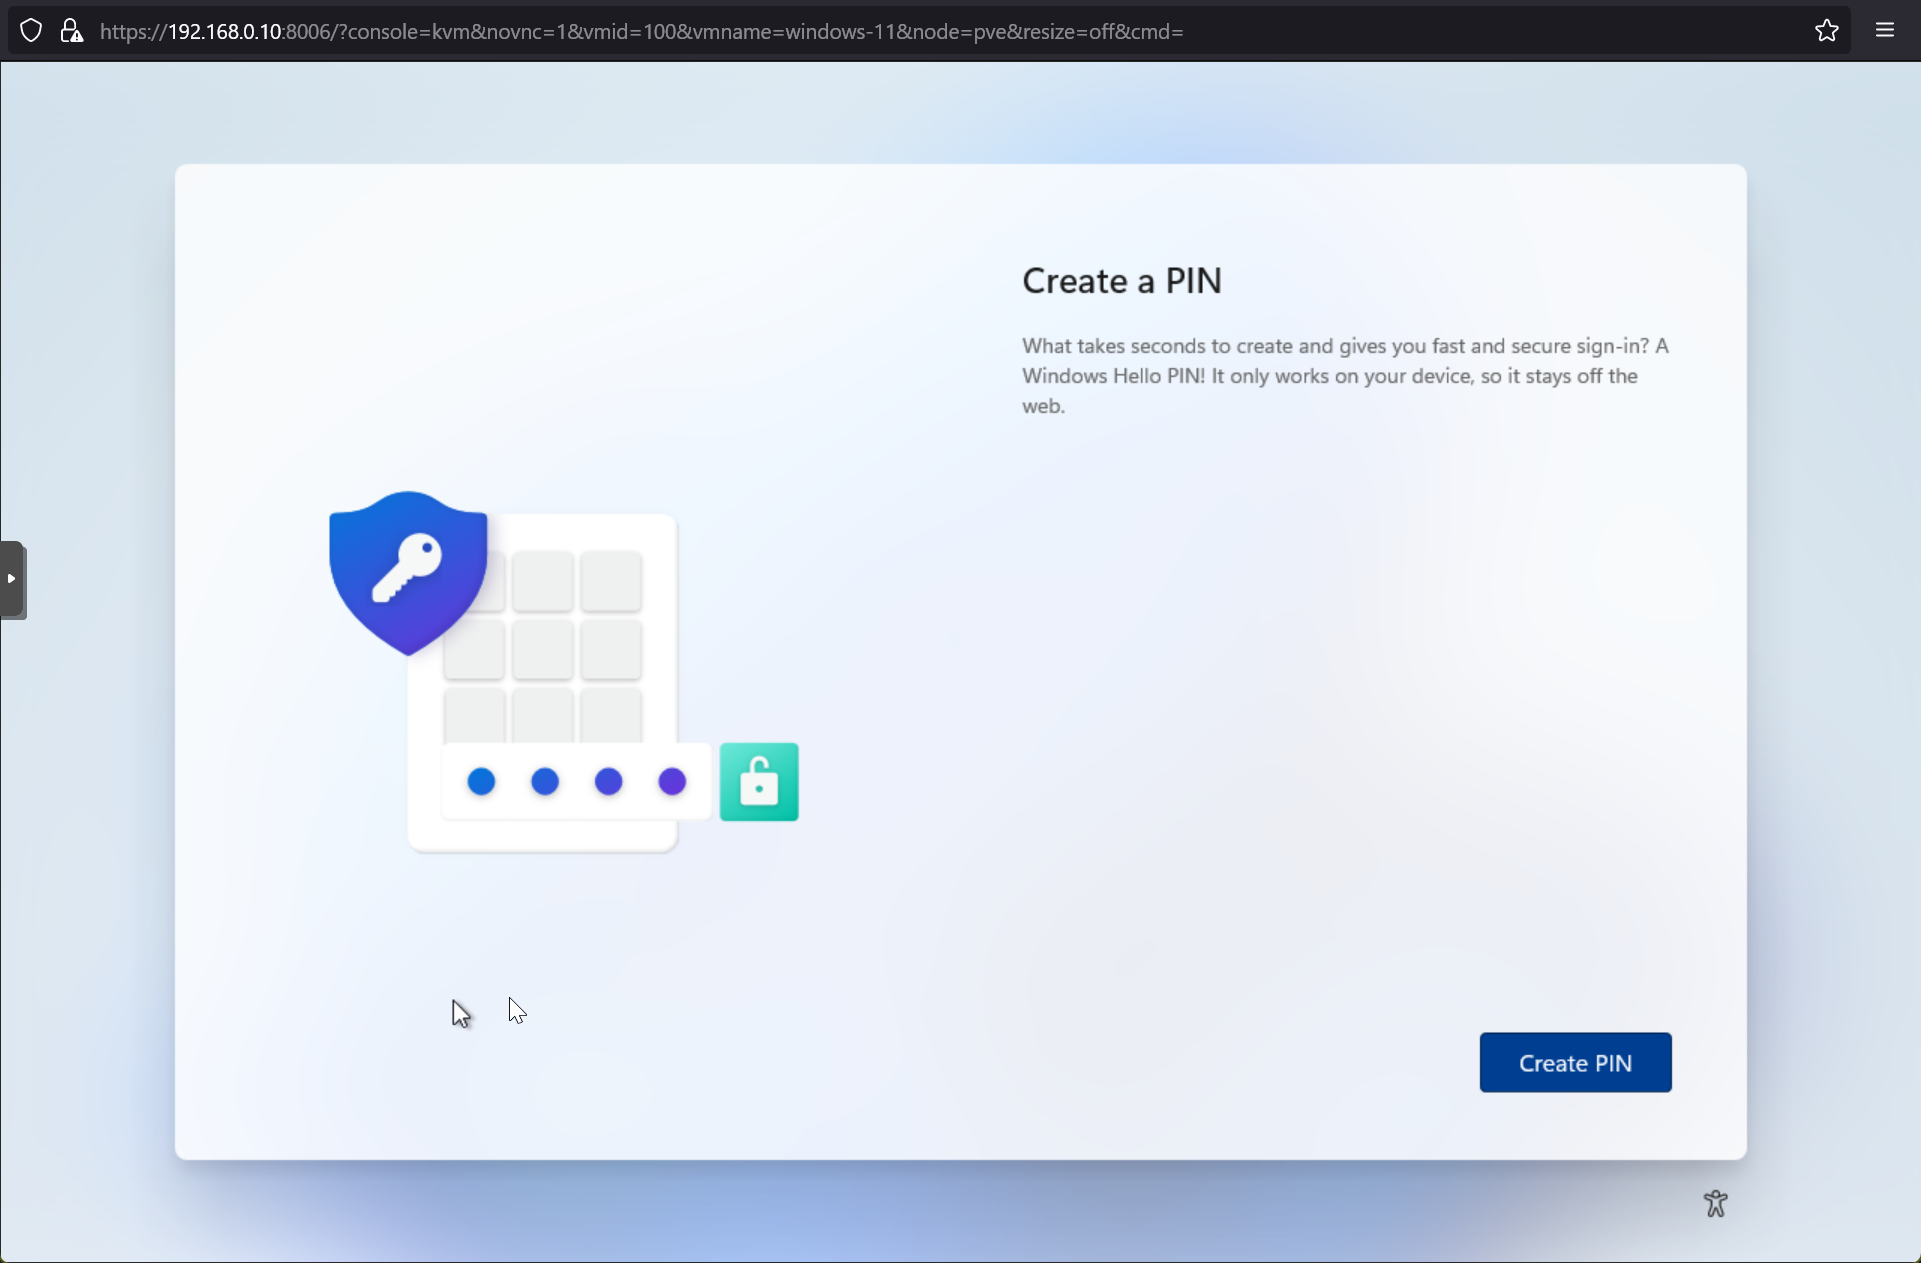
Type in your PIN and click on OK.
Click on Next.

Click on Accept.

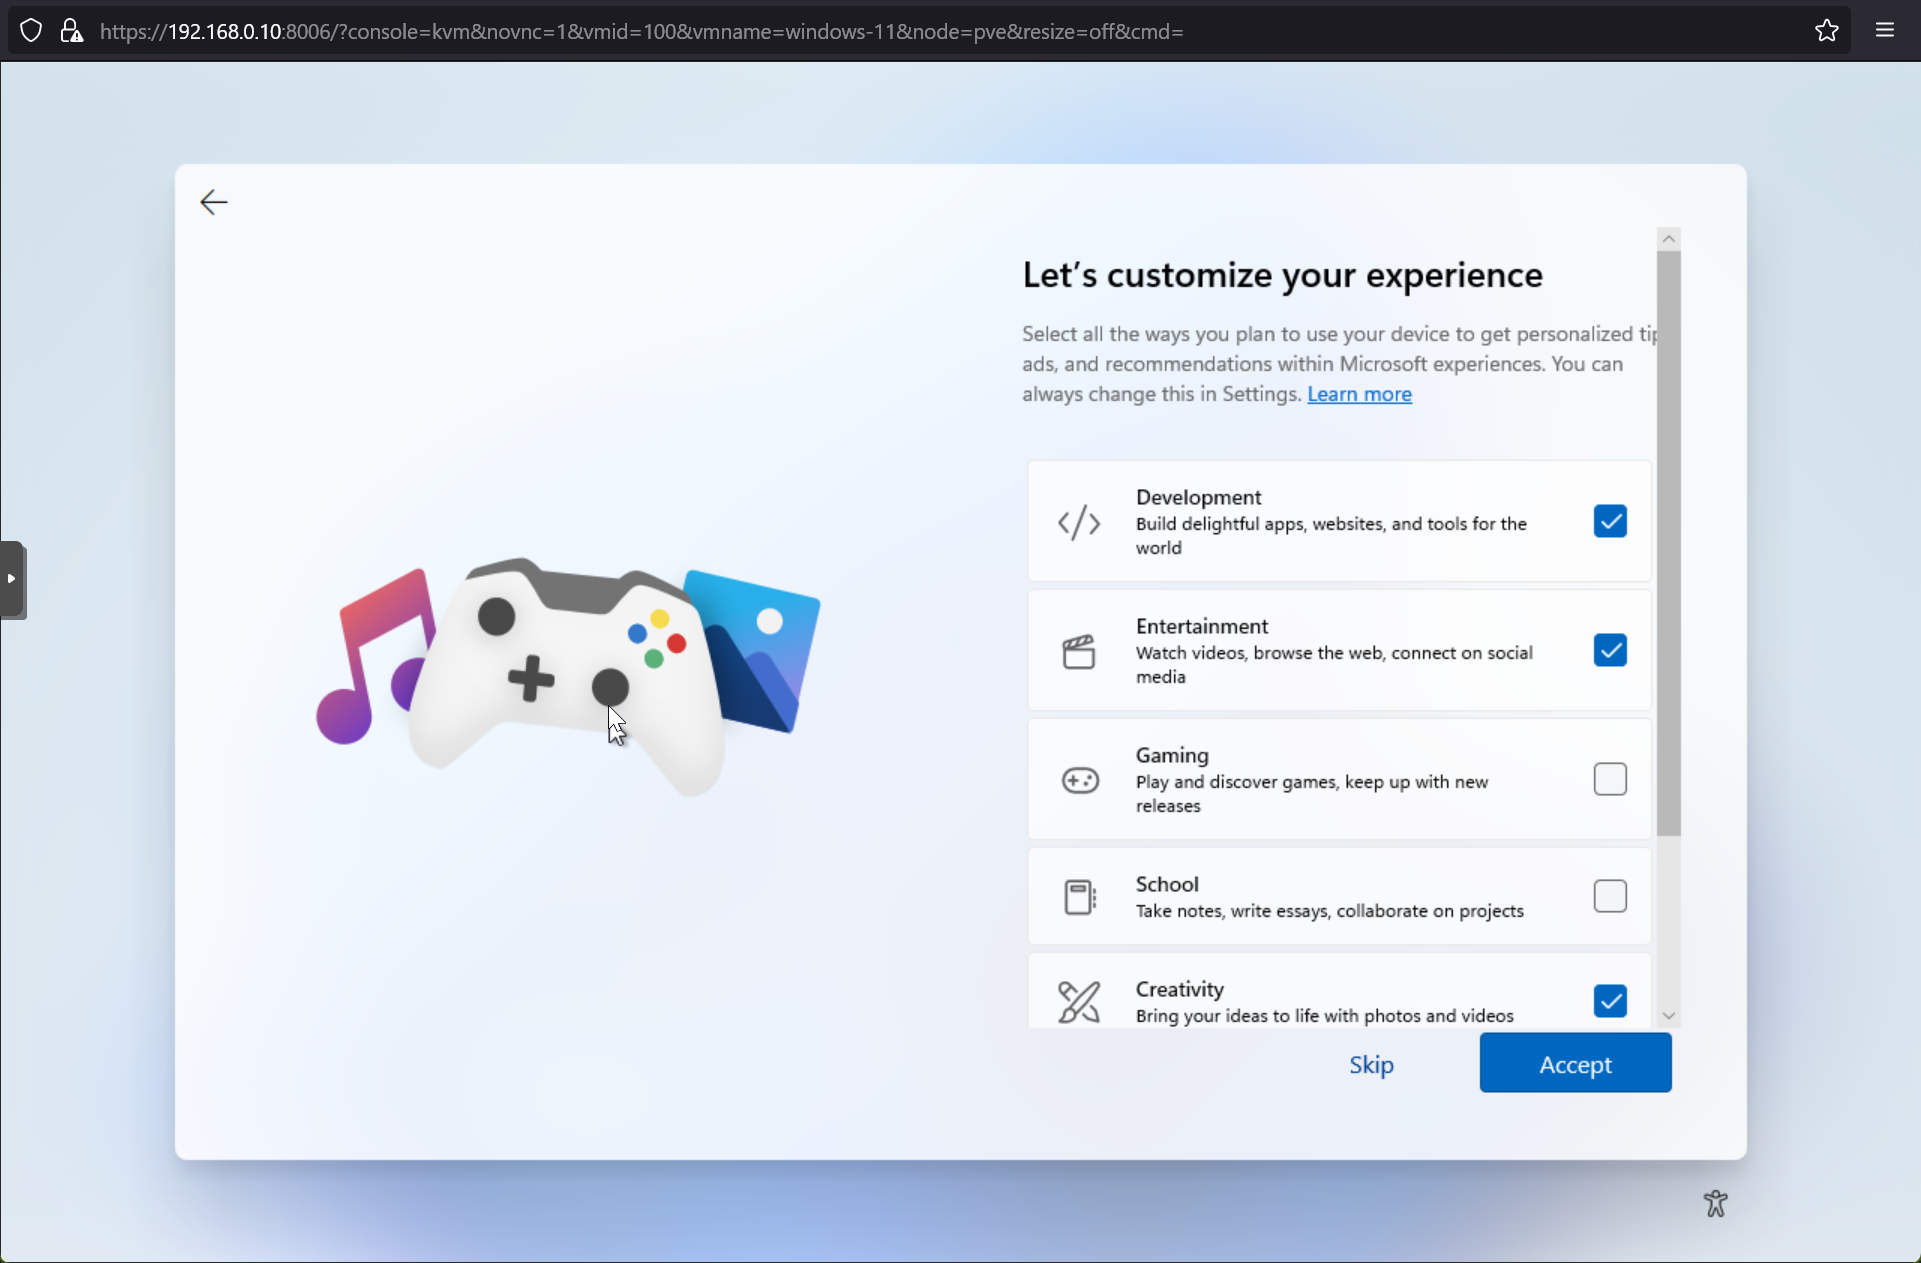
You can select the type of work you want to do in this virtual machine from the list and click on Accept so that Windows 11 can customize it for you.
If you don’t want to answer it now, click on Skip.
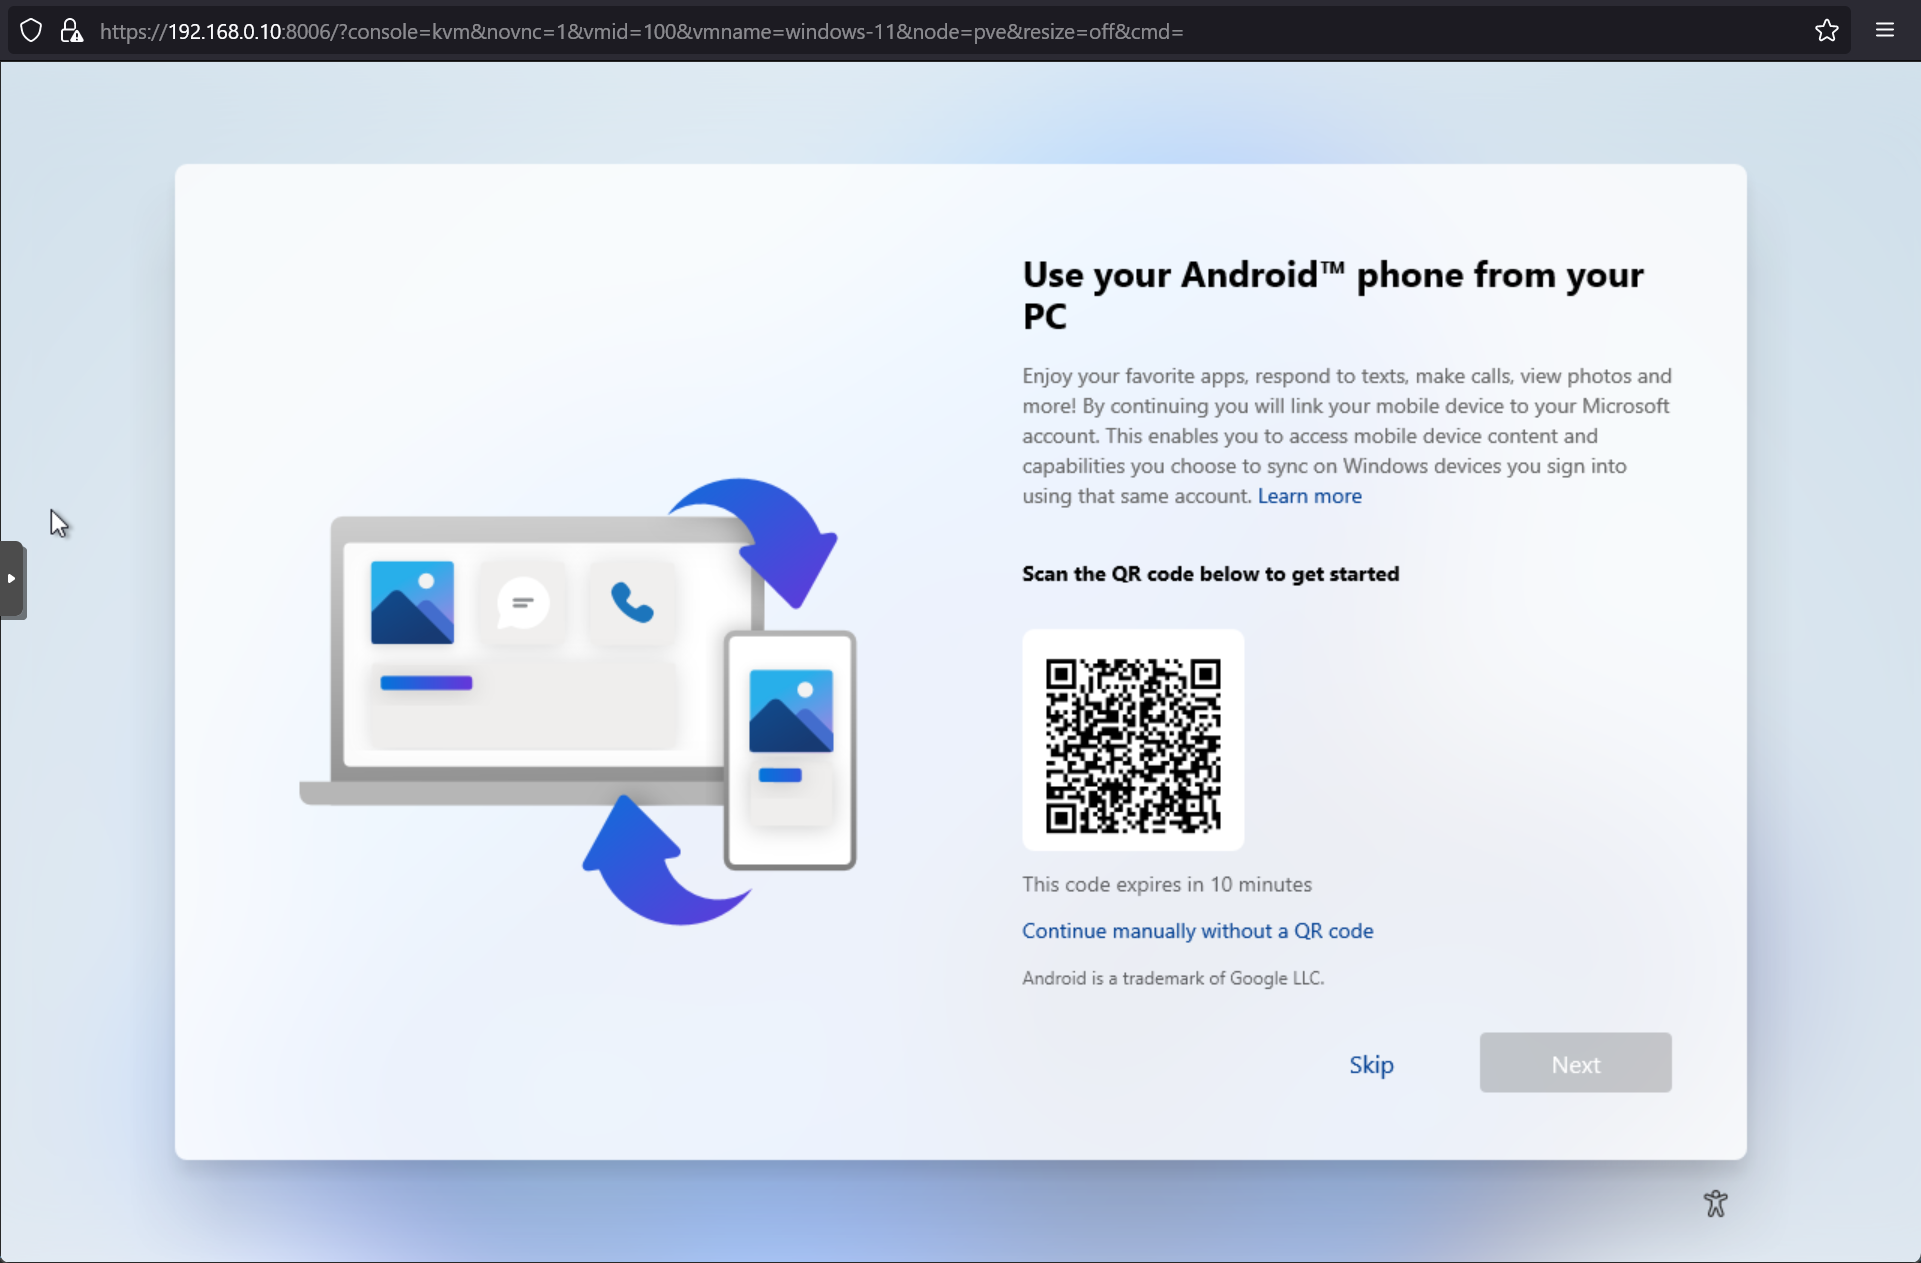
You will be asked to connect your Android phone to Windows 11. You can do that later. So, click on Skip to simplify the Windows 11 installation.
You will be asked to import the browsing data from your Microsoft account. If you’re a Microsoft Edge user, this will be helpful. So, click on Accept and follow the procedures.
If you don’t want to import the browsing data from your Microsoft account, click on Not now. To simplify the Windows 11 installation, I have selected this option.

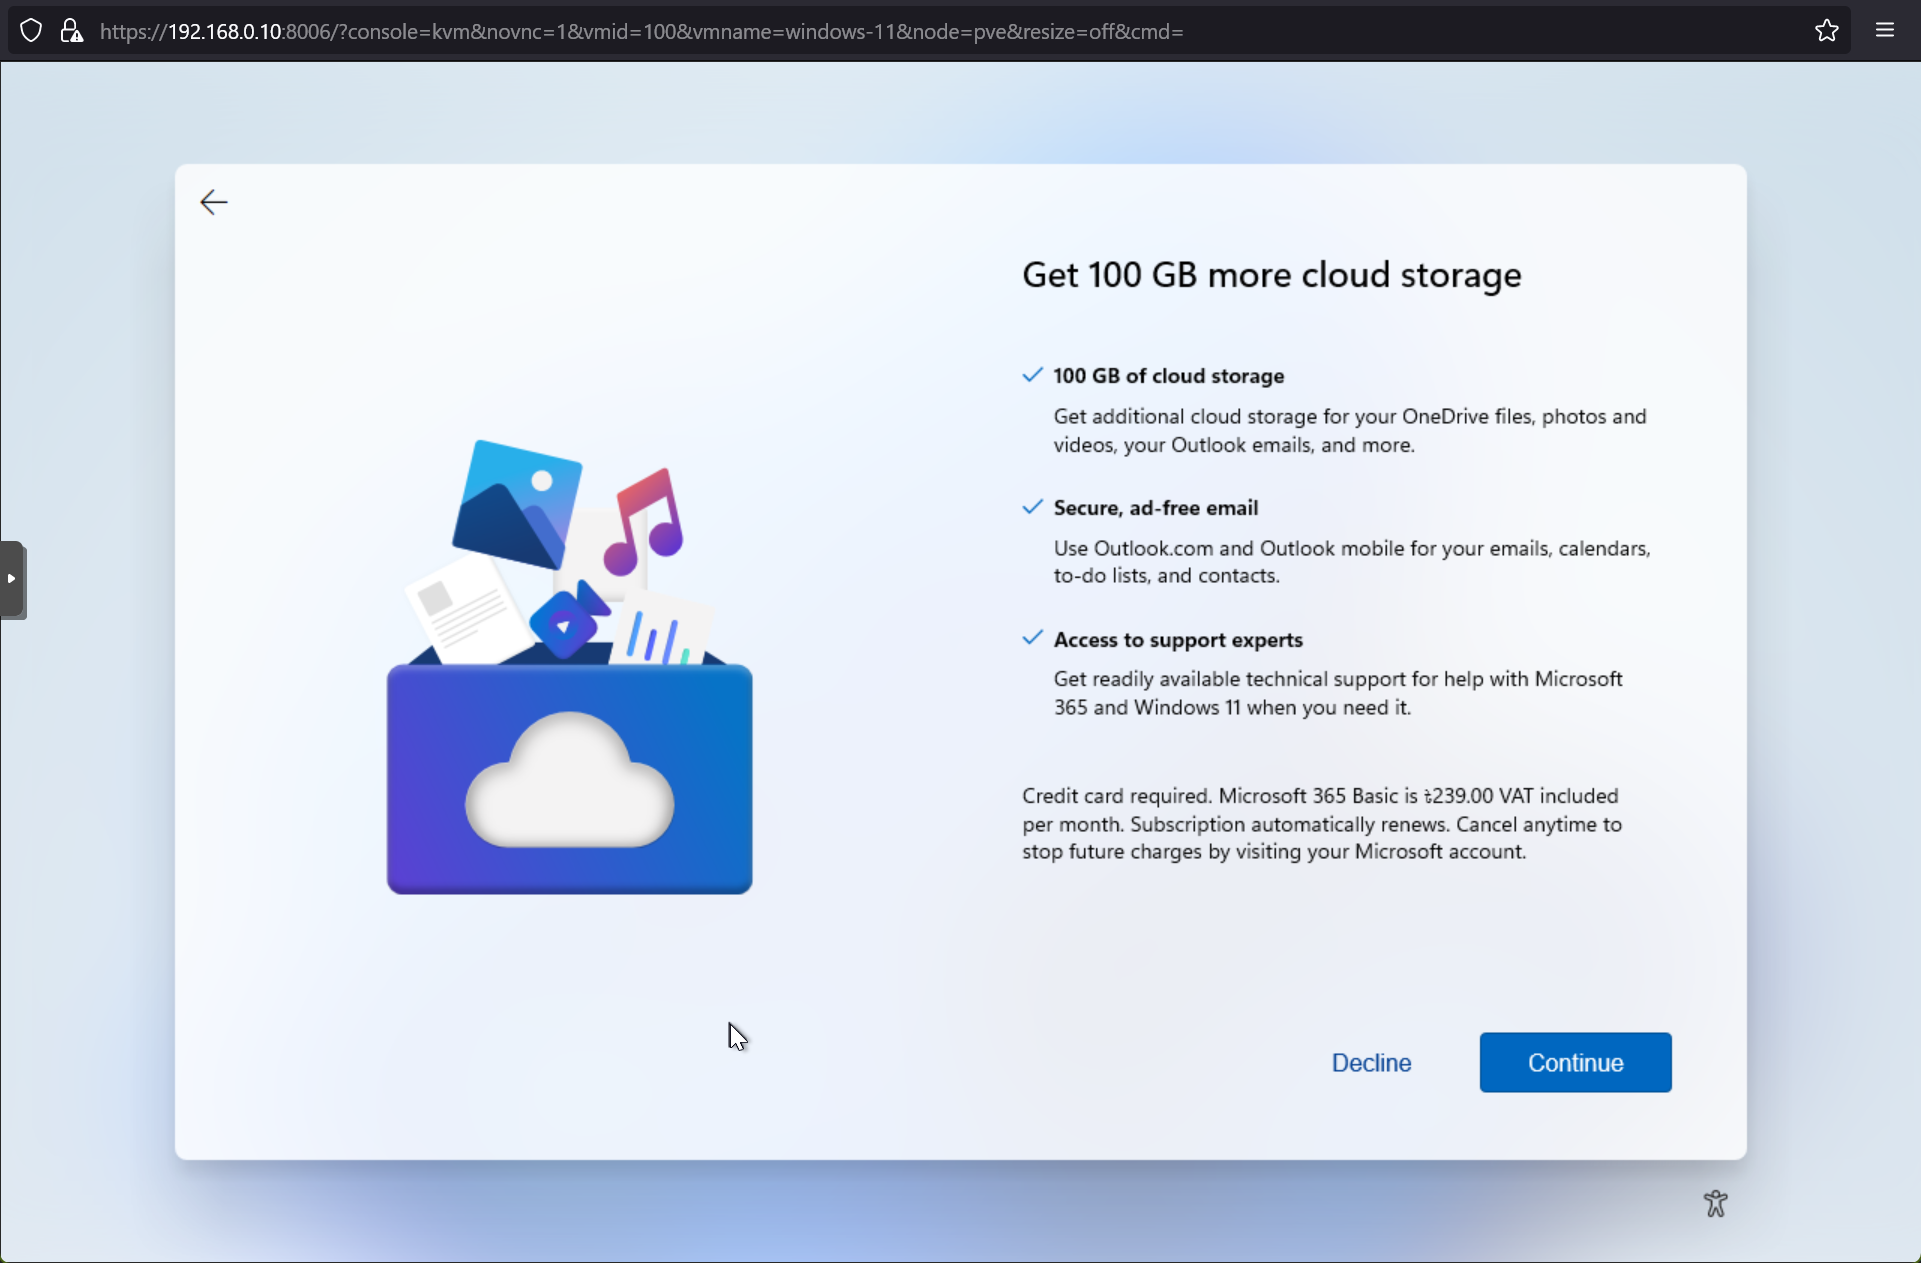
Click on Decline to simplify the Windows 11 installation.
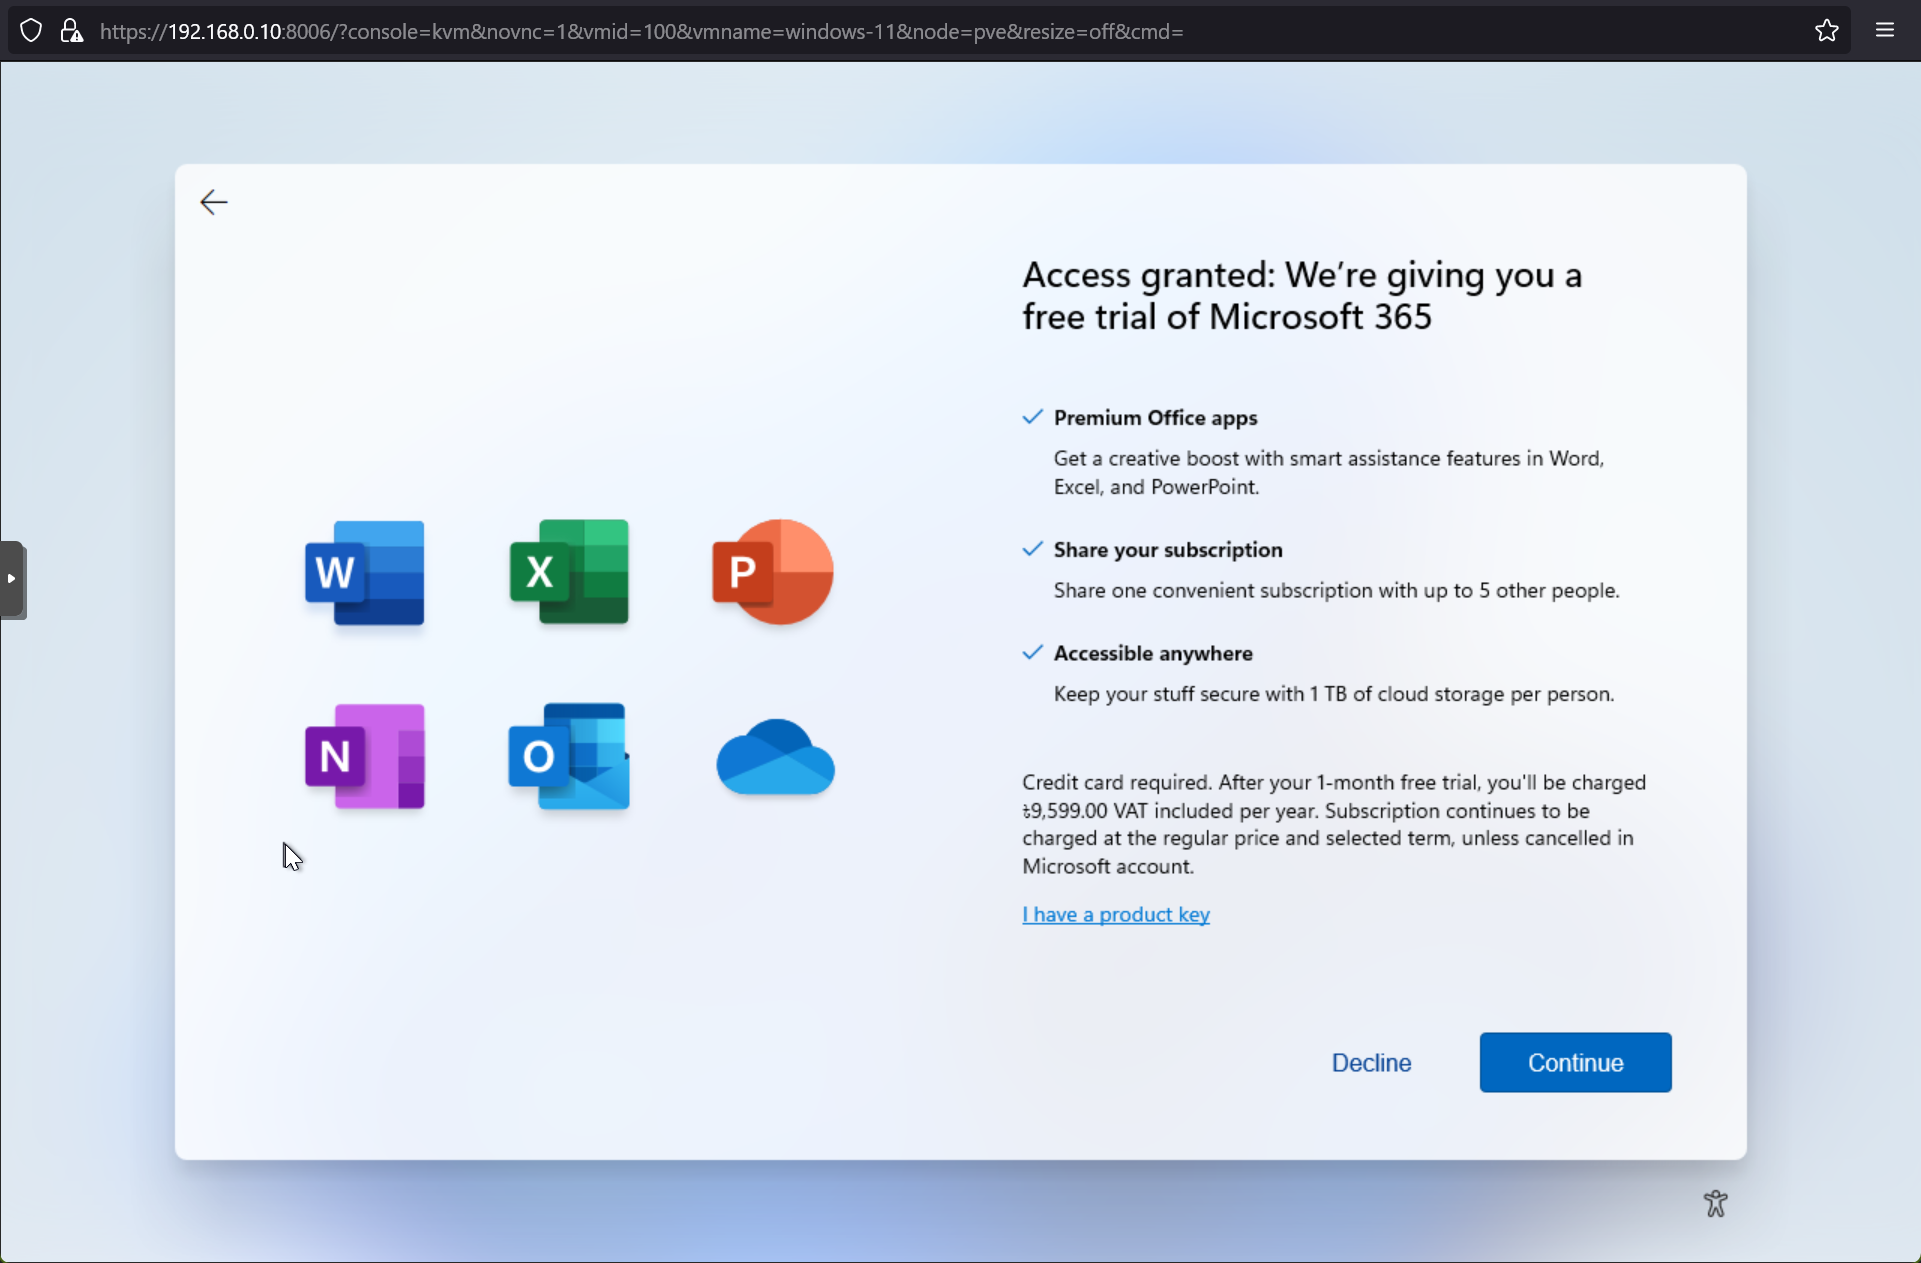
Click on Decline.
Windows 11 should be ready to use in a few minutes.
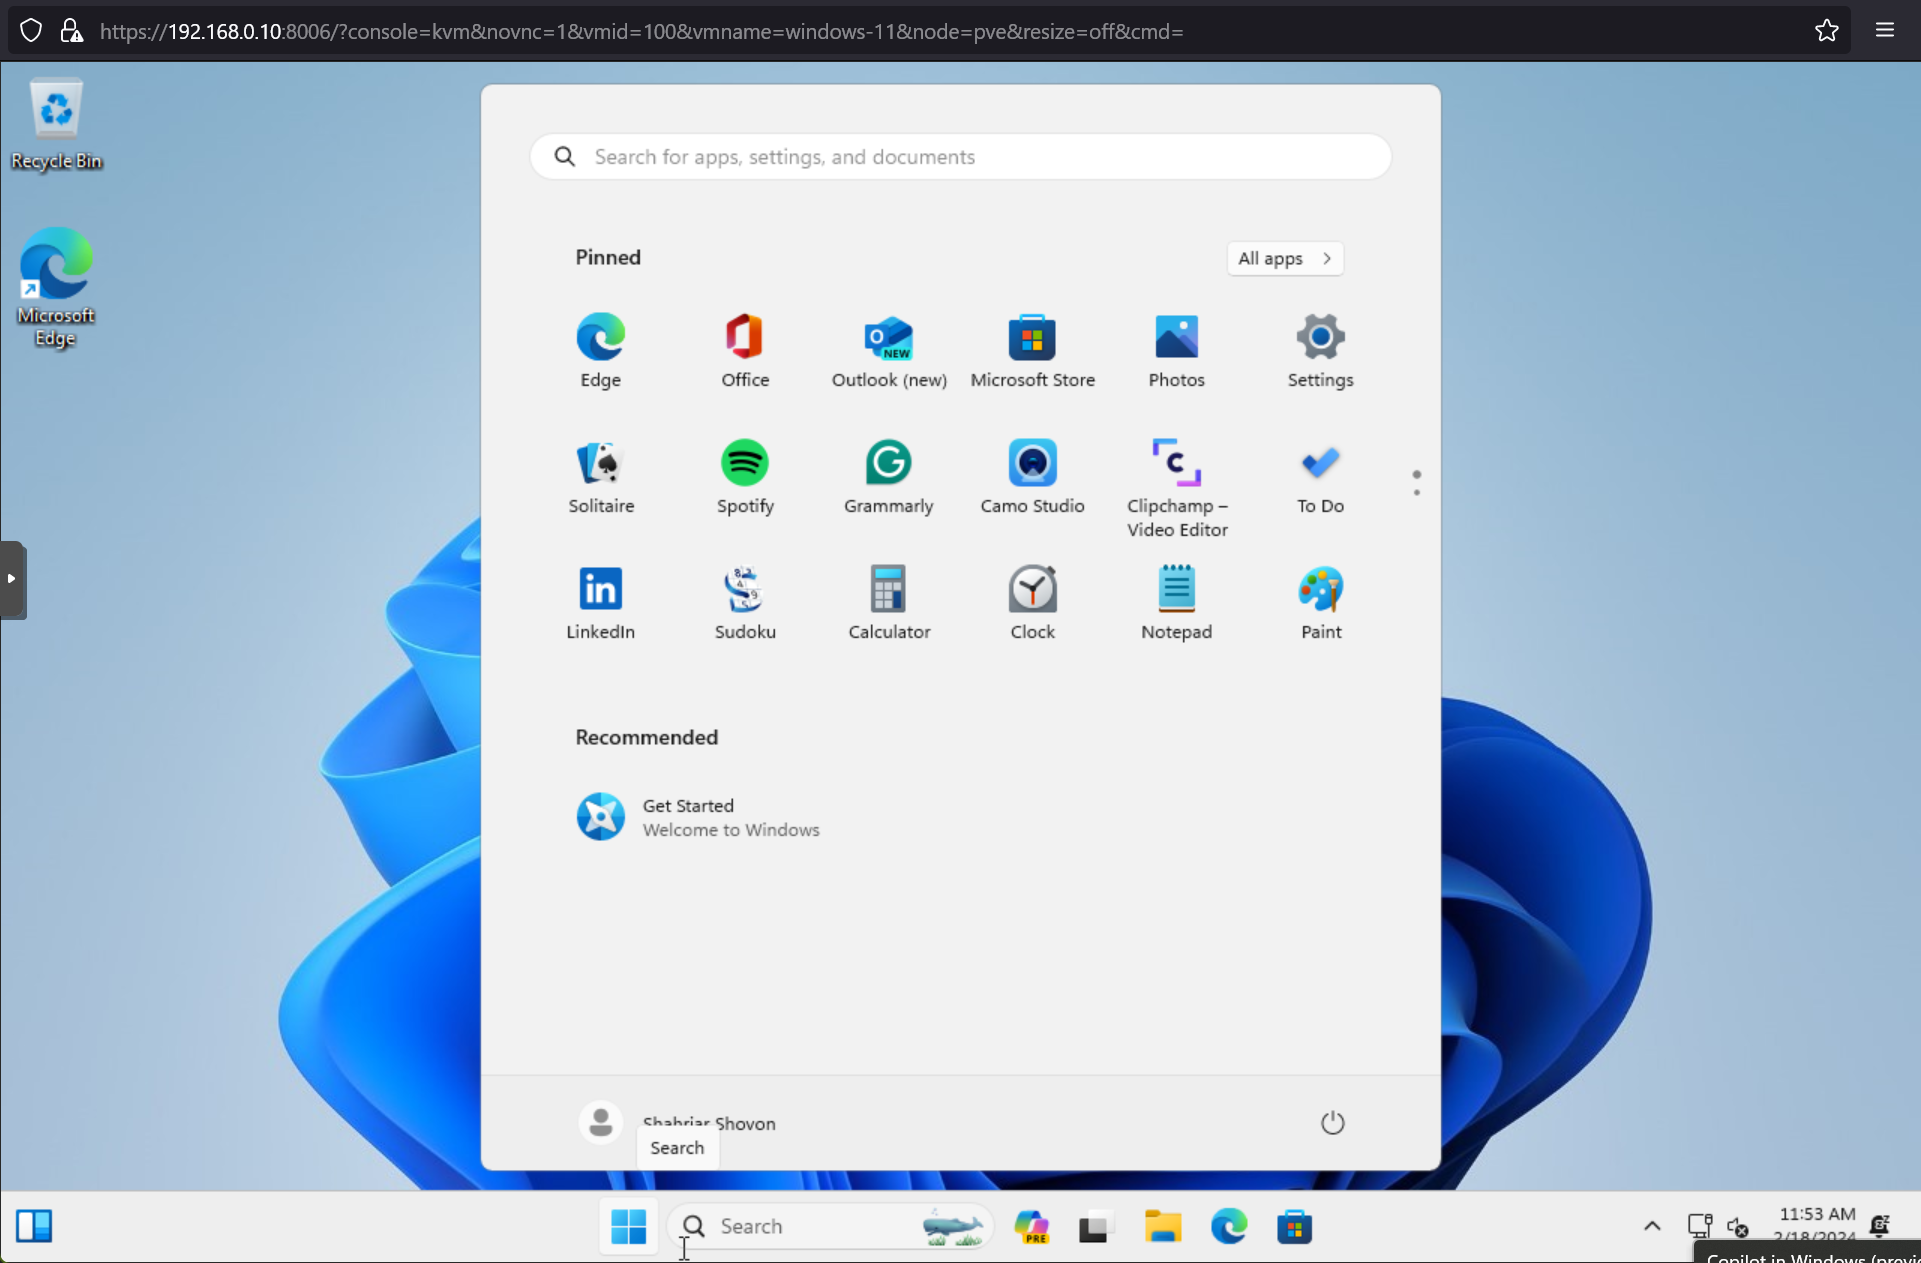
Windows 11 should be installed on the Proxmox VE 8 virtual machine.
Installing VirtIO Drivers and QEMU Guest Agent on the Windows 11 Proxmox VE 8 Virtual Machine (VM)
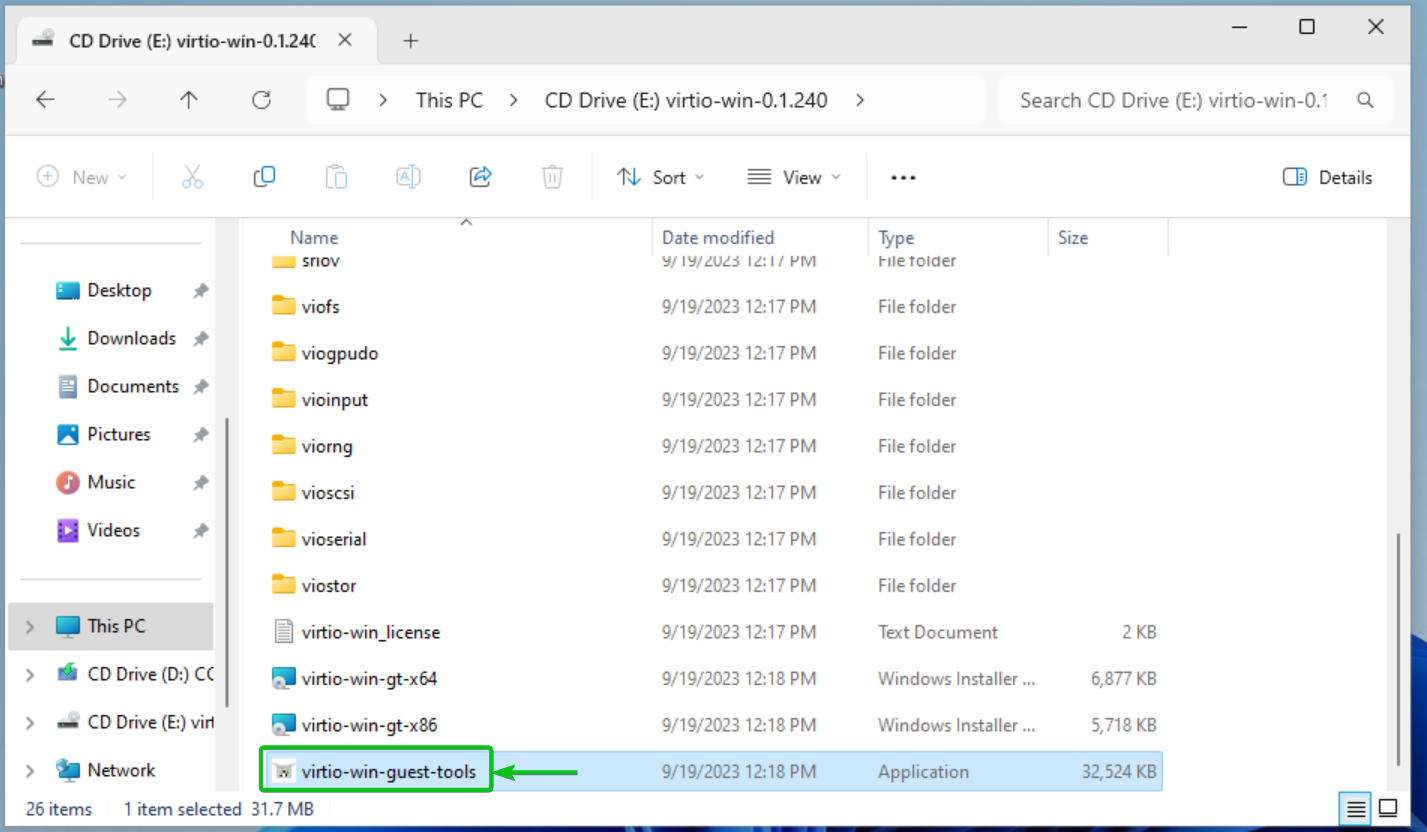
To install all the VirtIO drivers and QEMU quest agent on the Windows 11 Proxmox VE 8 virtual machine, double-click (LMB) on the VirtIO driver CD (CD Drive virtio-win-) from the File Explorer of Windows 11.

Double-click (LMB) on the virtio-win-guest-tools installer file as marked in the screenshot below.
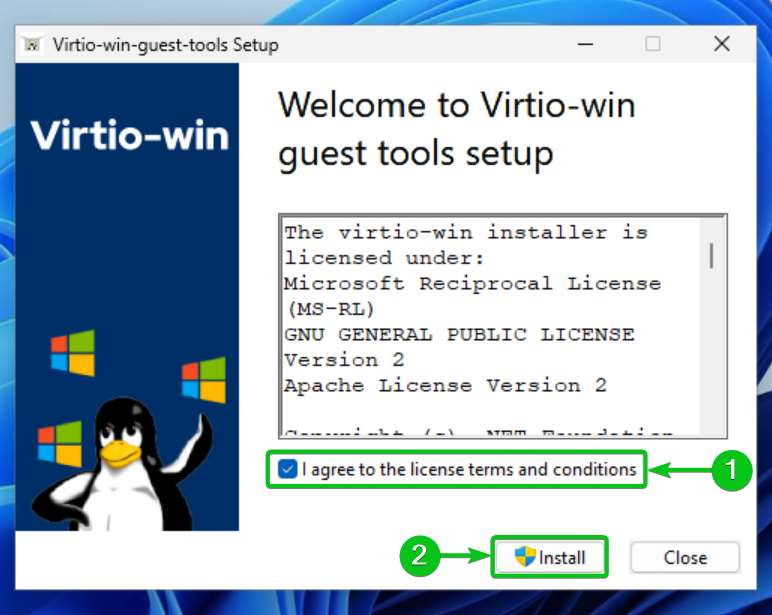
The VirtIO Guest Tools installer window should be displayed.
Check I agree to the license terms and conditions[1] and click on Install[2].
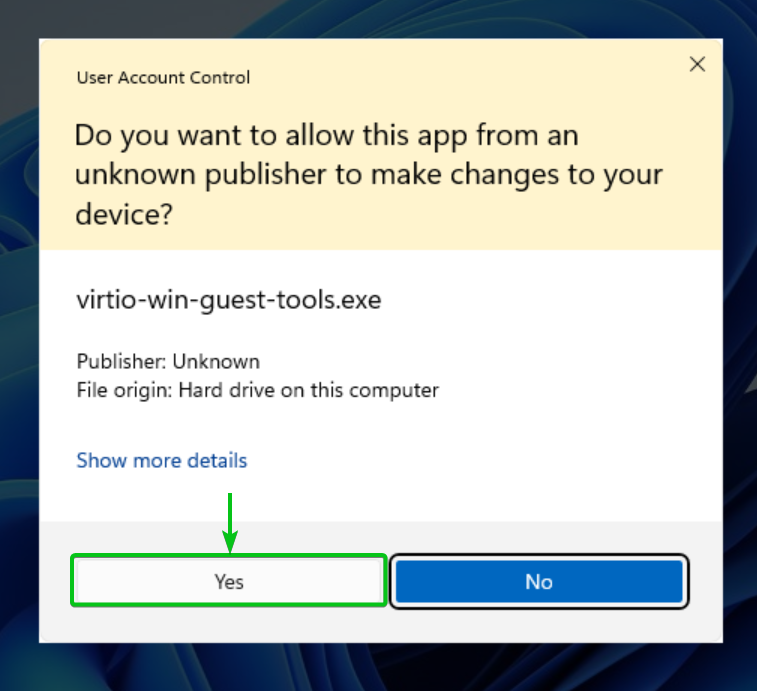
Click on Yes.
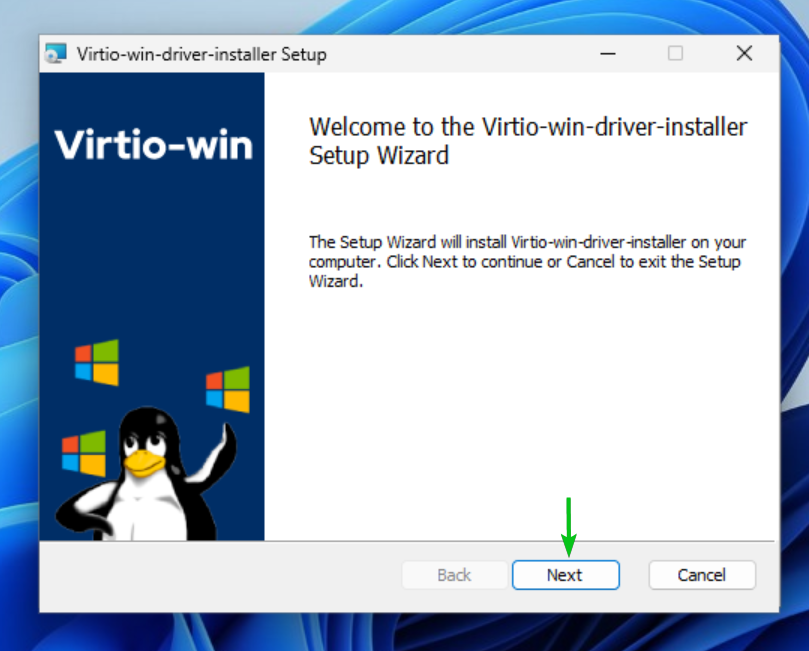
Click on Next.
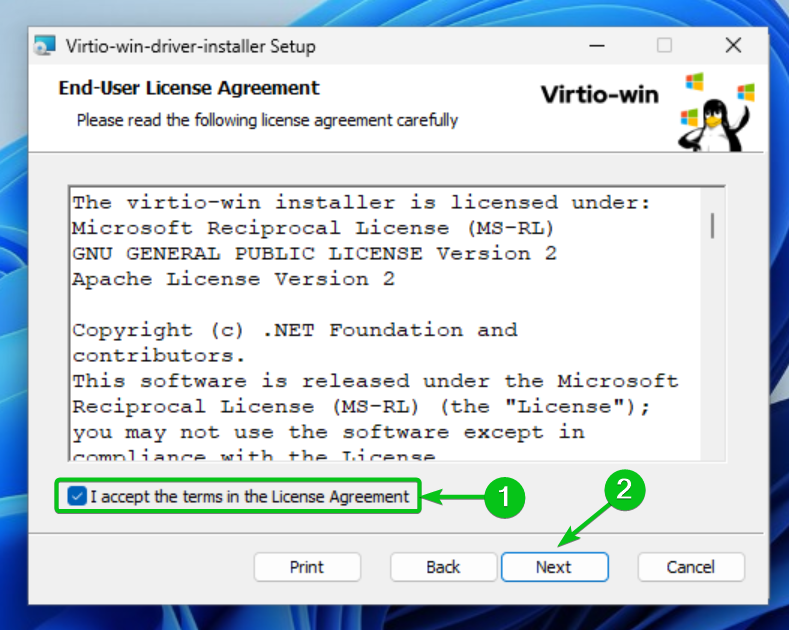
Check I accept the terms in the License Agreement[1] and click on Next[2].
Click on Next.

Click on Install.

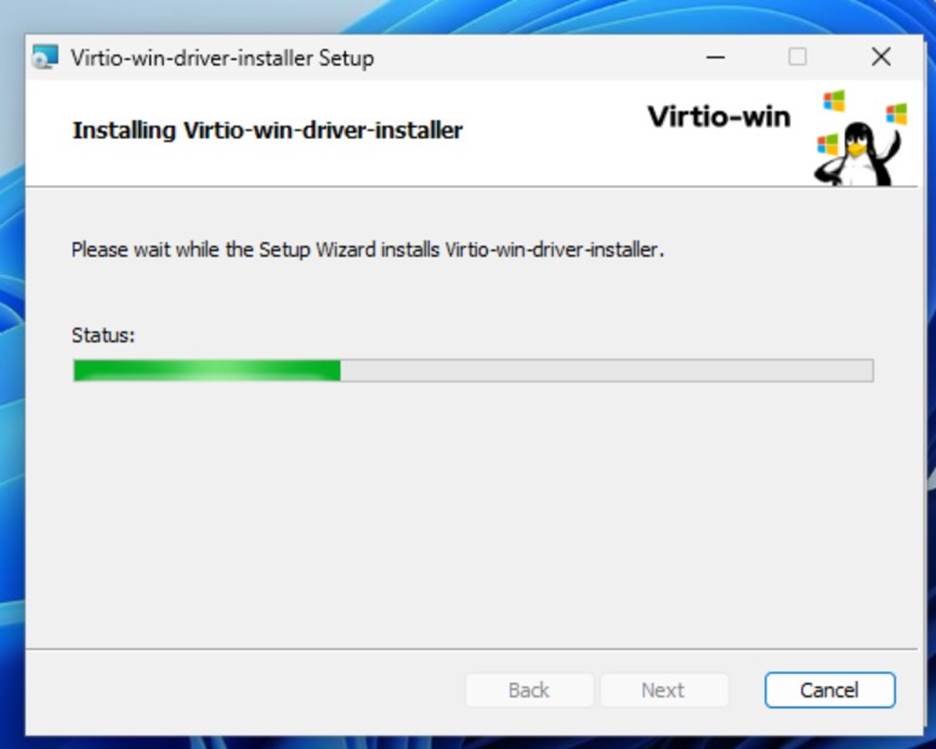
The VirtIO drivers are being installed. It will take a few seconds to complete.
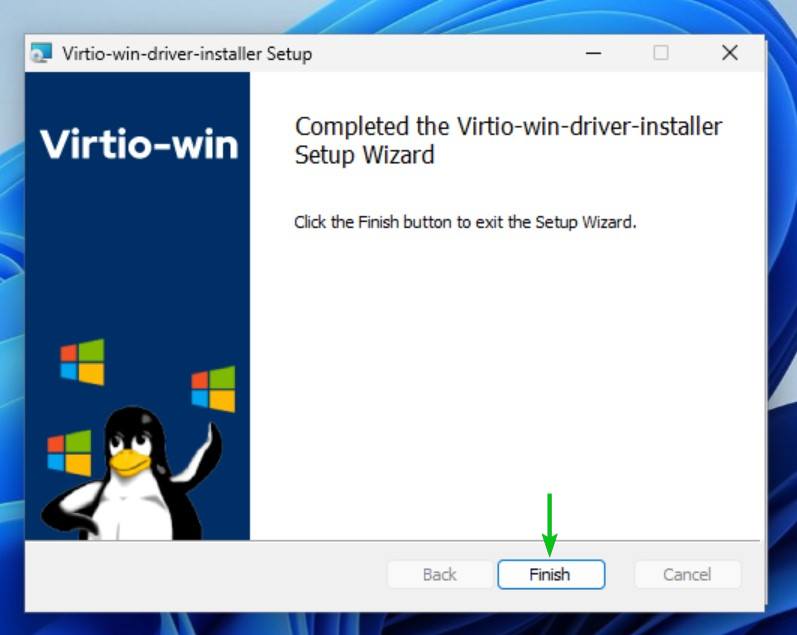
Once the VirtIO drivers are installed on the Windows 11 Proxmox VE virtual machine, click on Finish.
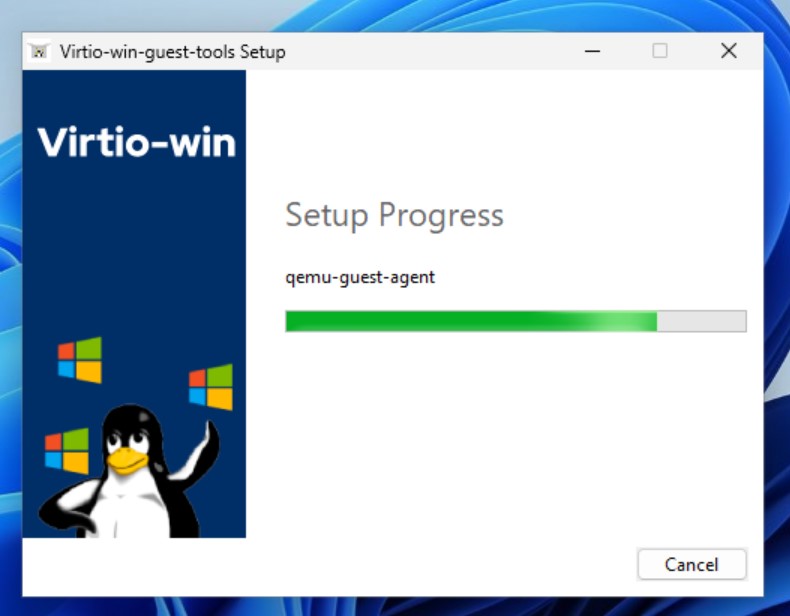
After the VirtIO drivers are installed, the QEMU Guest Agent should start installing. It will take a few seconds to complete.
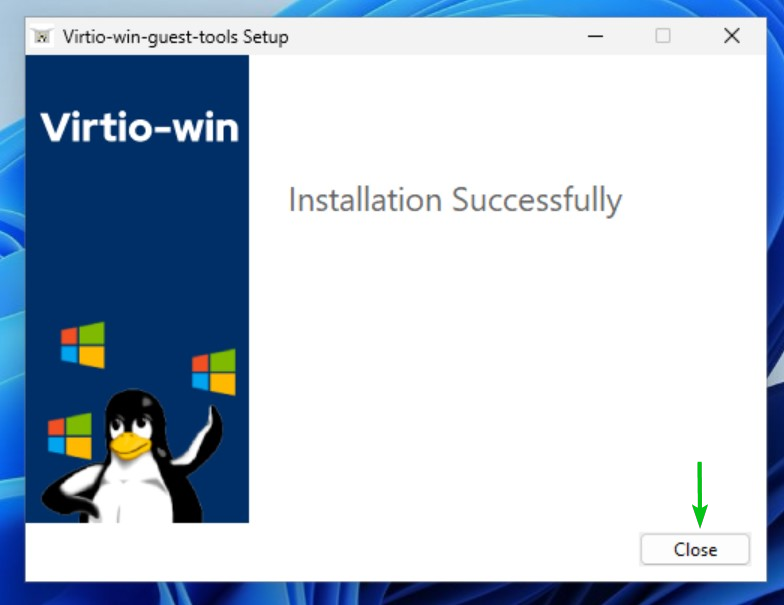
Once the QEMU Guest Agent is installed, click on Close.
Removing the Windows 11 and VirtIO Drivers ISO Images from the Windows 11 Proxmox VE 8 Virtual Machine (VM)
Once you’ve installed Windows 11 on the Proxmox VE 8 virtual machine, you can remove the Windows 11 and VirtIO drivers ISO images from the Windows 11 virtual machine.
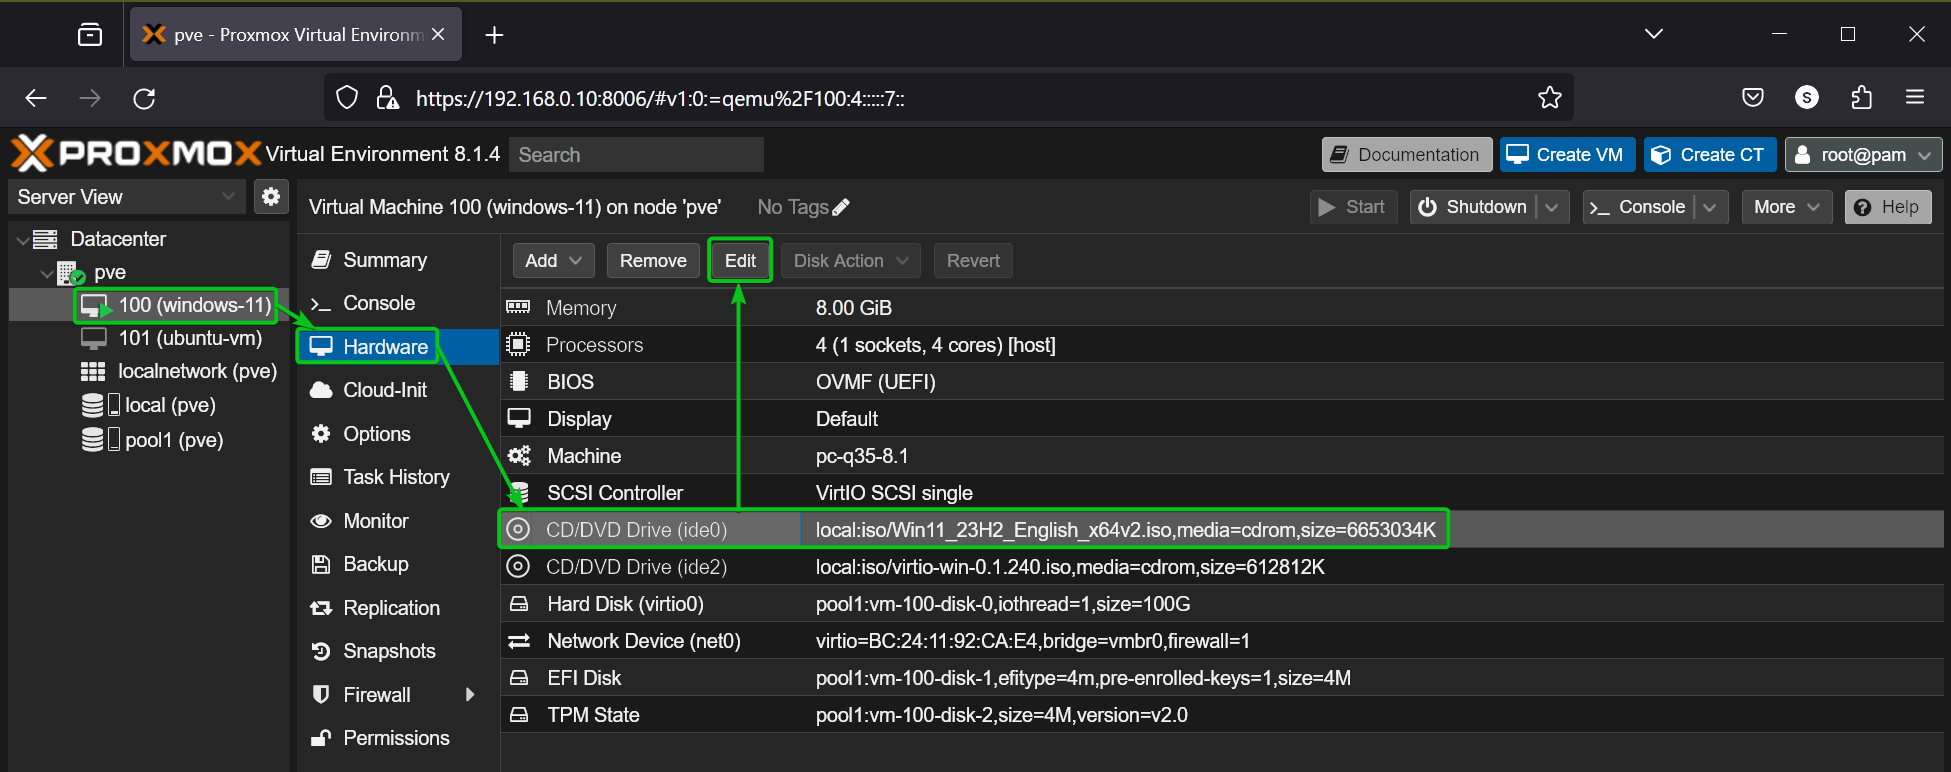
To remove the Windows 11 ISO image from the Windows 11 Proxmox VE virtual machine, navigate to the Hardware section of the Windows 11 virtual machine, select the CD/DVD Drive that has the Windows 11 ISO image file mounted, and click on Edit.
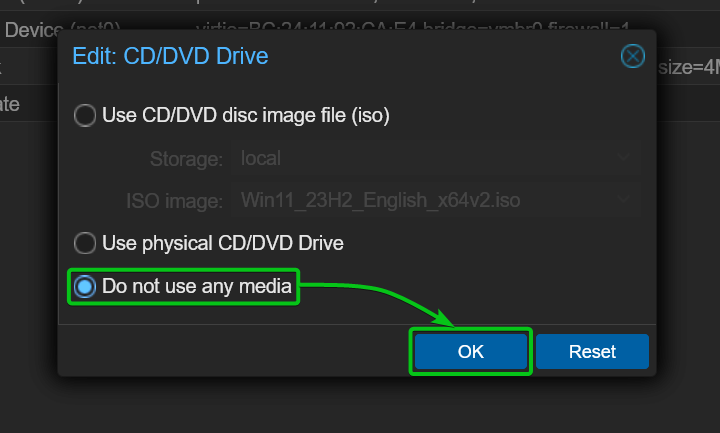
Select Do not use any media and click on OK.
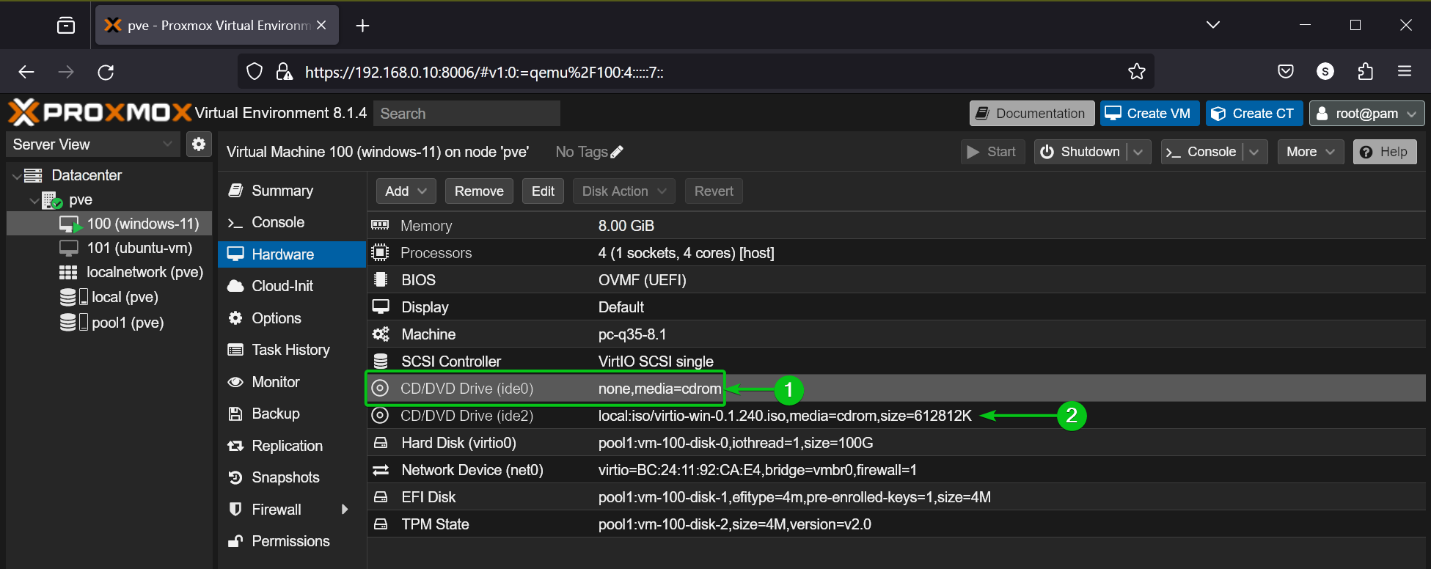
The Windows 11 ISO image should be removed from the CD/DVD Drive of the Windows 11 Proxmox VE virtual machine[1].
In the same way, you can remove the VirtIO drivers ISO image from the CD/DVD Drive of the Windows 11 Proxmox VE virtual machine[2].
Conclusion
In this article, I have shown you how to download/upload the latest Windows 11 ISO image on your Proxmox VE 8 server directly from Microsoft. I have also shown you how to download the latest VirtIO drivers ISO image for Windows 11 Proxmox VE 8 virtual machine. I have shown you how to create a Windows 11 Proxmox VE 8 virtual machine, install Windows 11 on it, and install VirtIO drivers and QEMU guest agent on the Windows 11 virtual machine as well. After Windows 11 and the VirtIO drivers and QEMU guest agent are installed on the Proxmox VE virtual machine, I have shown you how to remove the Windows 11 and VirtIO drivers ISO images from the Windows 11 Proxmox VE virtual machine.
References
More...