 Tweet
Tweet
Once you’ve configured your Proxmox VE 8 server and NVIDIA GPU for PCI/PCIE passthrough and created a Windows 11 virtual machine (VM) on your Proxmox VE 8 server, you need to add your NVIDIA GPU to the Windows 11 Proxmox VE virtual machine. You also need to install the NVIDIA GPU drivers on the Windows 11 virtual machine and connect a monitor, a keyboard, and a mouse to use the Windows 11 Proxmox VE 8 virtual machine as a normal PC.
Table of Contents
- Preparing Proxmox VE 8 for NVIDIA GPU Passthrough
- Creating a Windows 11 Virtual Machine on Proxmox VE 8
- Adding Your NVIDIA GPU to the Windows 11 Proxmox VE 8 Virtual Machine (VM)
- Adding a Keyboard and Mouse to the Windows 11 Proxmox VE 8 Virtual Machine (VM)
- Checking if NVIDIA GPU Passthrough is Working on the Windows 11 Proxmox VE Virtual Machine
- Downloading and Installing NVIDIA GPU Drivers on the Windows 11 Proxmox VE Virtual Machine
- Removing the Virtual Graphics Adapter of the Windows 11 Proxmox VE Virtual Machine (VM)
- Conclusion
Preparing Proxmox VE 8 for NVIDIA GPU Passthrough
Before you can passthrough your NVIDIA GPU on Proxmox VE virtual machines (VMs), you must configure your NVIDIA GPU for PCI/PCIE passthrough on your Proxmox VE 8 server.
For detailed information on how to configure NVIDIA GPUs for PCI/PCIE passthrough on Proxmox VE 8, read this article.
Creating a Windows 11 Virtual Machine on Proxmox VE 8
To passthrough your NVIDIA GPU to a Windows 11 Proxmox VE 8 virtual machine, you will of course need a Windows 11 virtual machine on your Proxmox VE 8 server.
For detailed information on how to create a Windows 11 virtual machine on Proxmox VE 8, read this article.
Adding Your NVIDIA GPU to the Windows 11 Proxmox VE 8 Virtual Machine (VM)
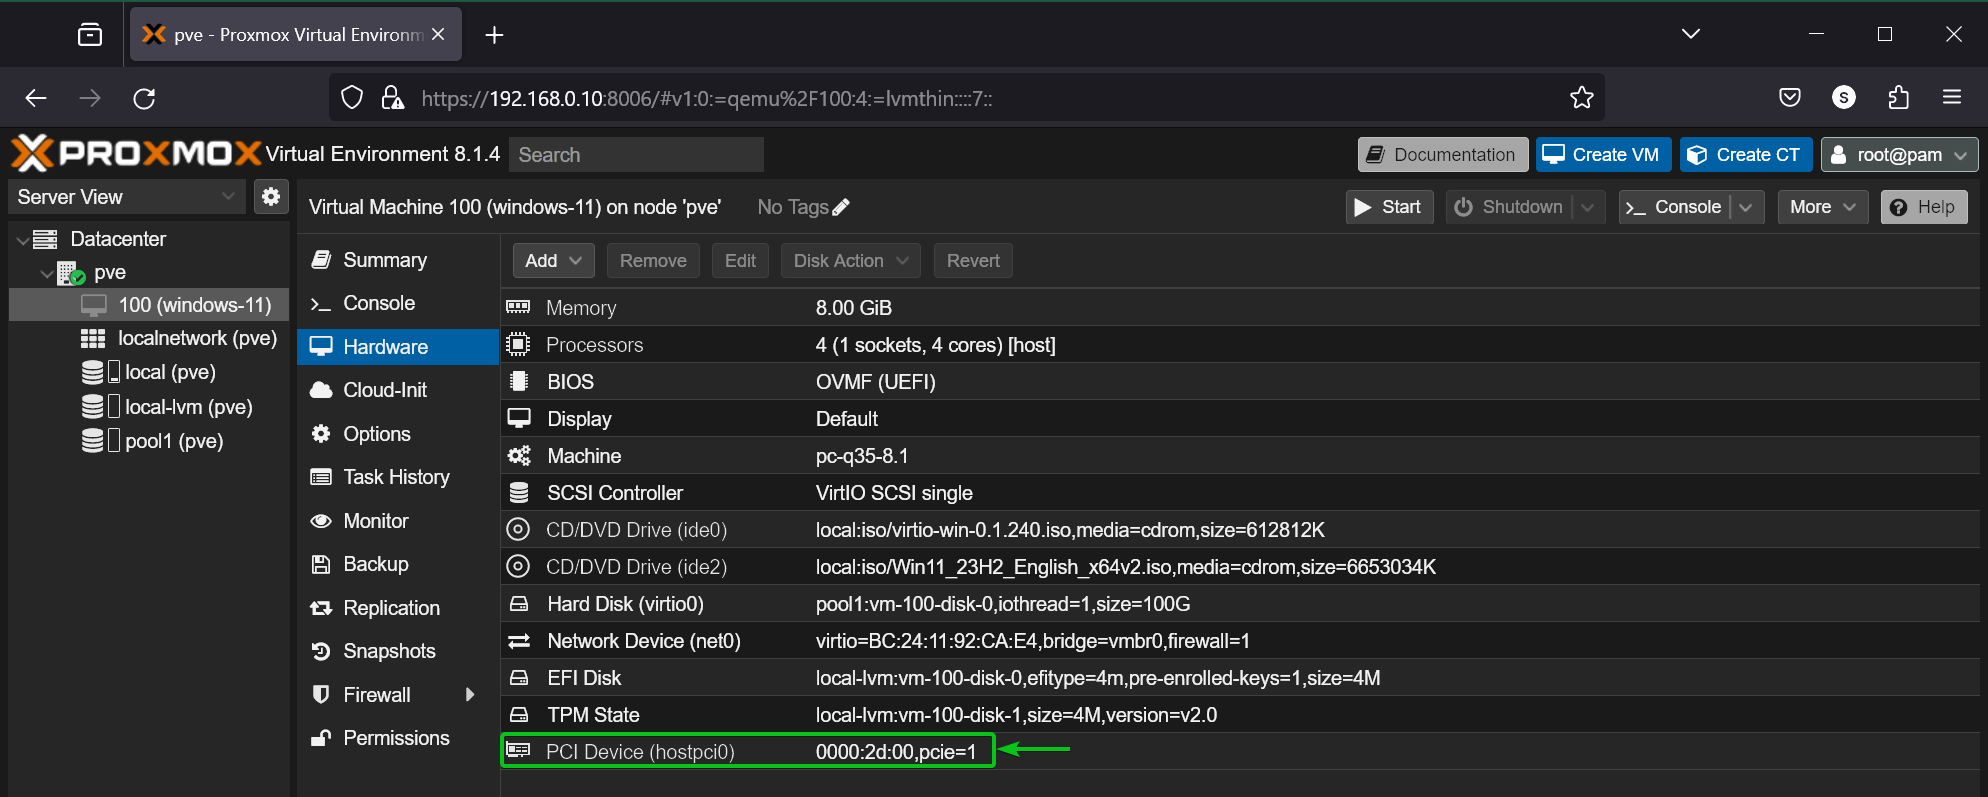
To add your NVIDIA GPU to a Windows 11 Proxmox VE virtual machine, open the Windows 11 virtual machine in your Proxmox VE dashboard, navigate to the Hardware section of the Windows 11 virtual machine, and click on Add > PCI Device as marked in the screenshot below.

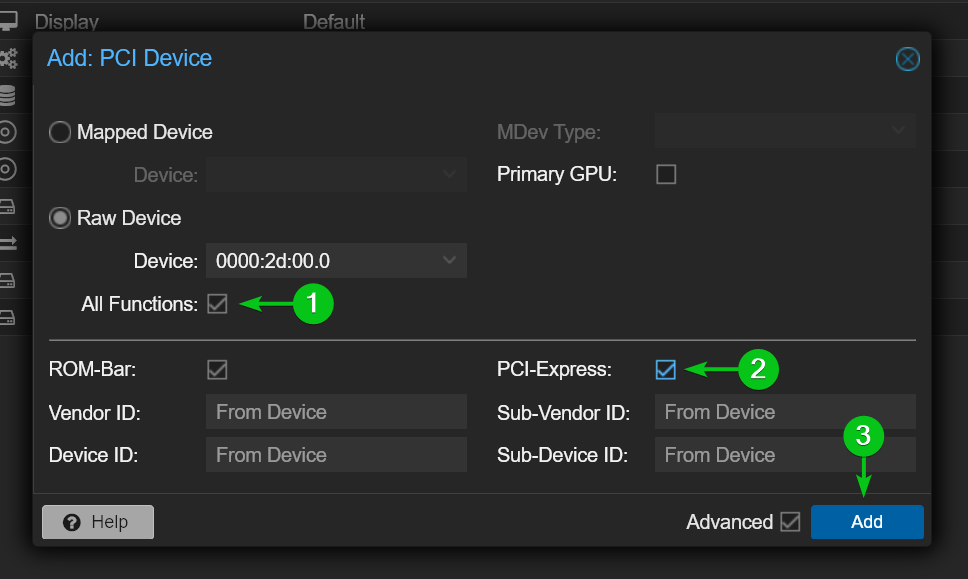
From the Add: PCI Device window, select Raw Device[1] and select your NVIDIA GPU (not the NVIDIA Audio Device of the GPU) from the Device dropdown menu[2].

Check All Functions[1], check PCI-Express[2], and click on Add[3].
Your NVIDIA GPU should be added to your selected Windows 11 Proxmox VE virtual machine (VM).
Adding a Keyboard and Mouse to the Windows 11 Proxmox VE 8 Virtual Machine (VM)
To use the Windows 11 Proxmox VE virtual machine as a normal PC, you need to add a keyboard and mouse to the virtual machine.
First, connect a USB keyboard and a USB mouse to the USB ports of your Proxmox VE 8 server.
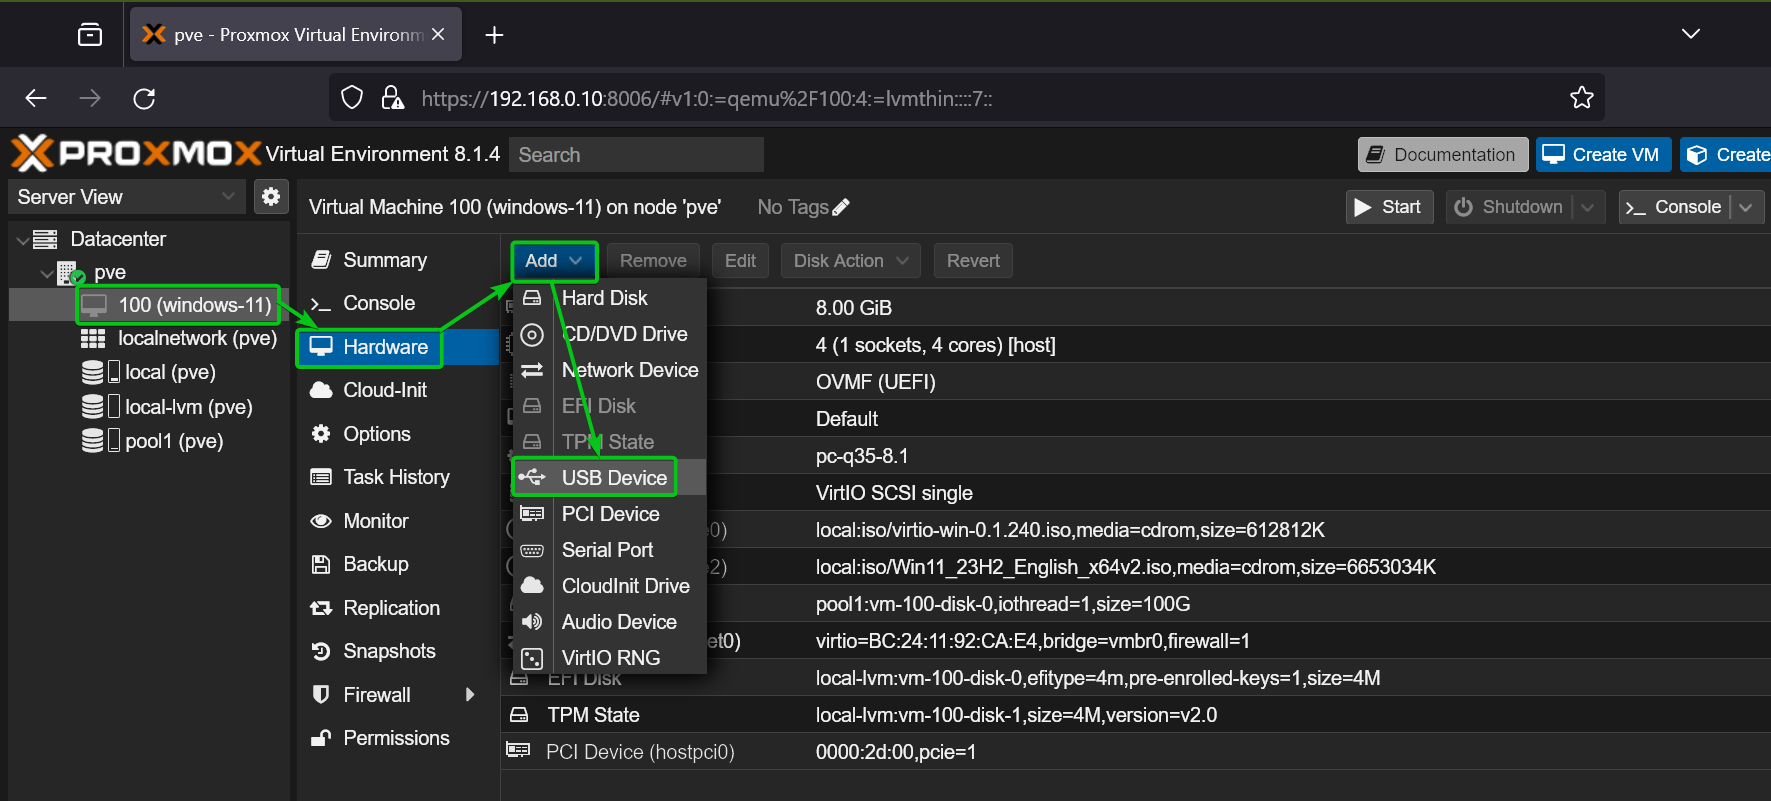
Then, open the Windows 11 virtual machine on Proxmox VE dashboard, navigate to the Hardware section, and click on Add > USB Device.
From the Add: USB Device window, select Use USB Vendor/Device ID[1] and select your mouse from the Choose Device dropdown menu[2].
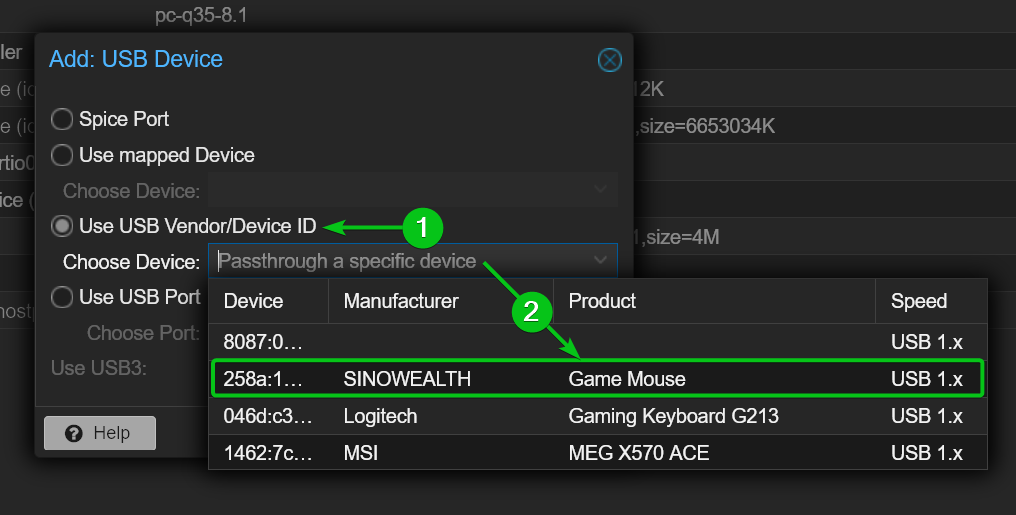
Click on Add.
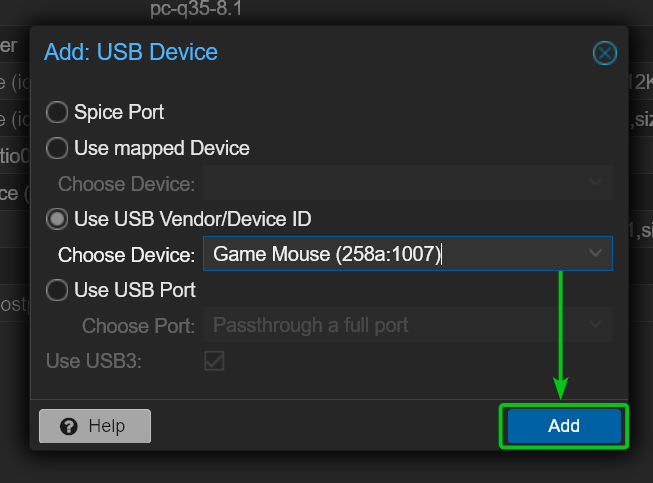
The USB mouse should be added to your Windows 11 Proxmox VE virtual machine.
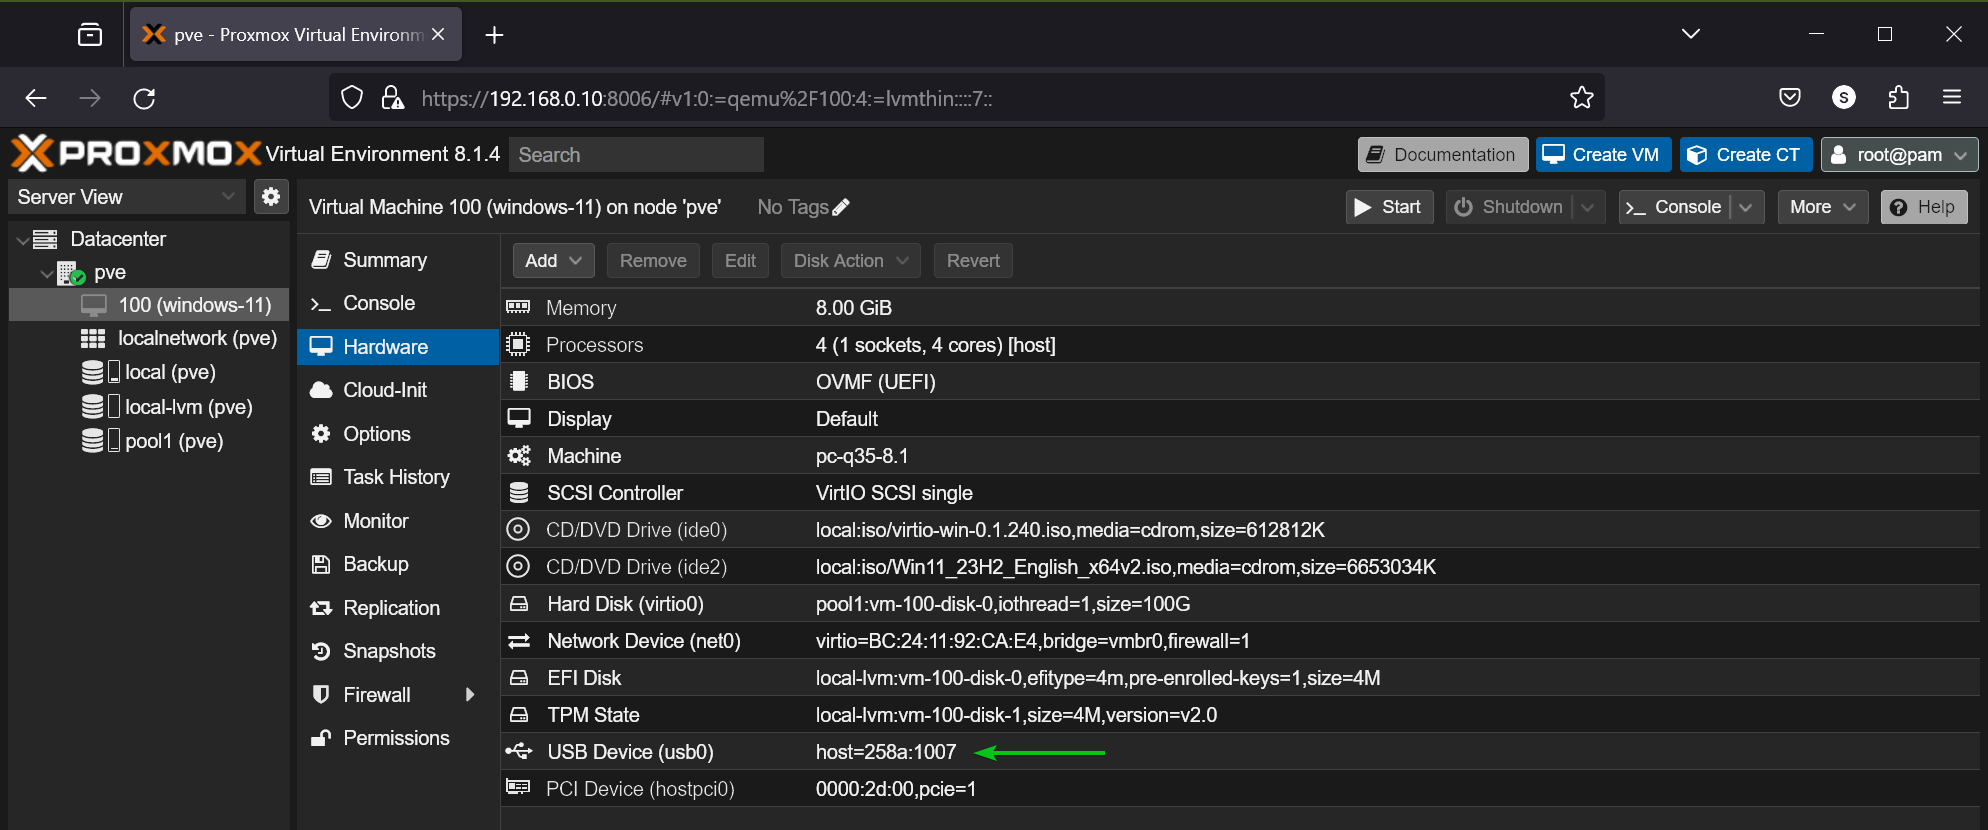
In the same way, add your USB keyboard to the Windows 11 Proxmox VE virtual machine.
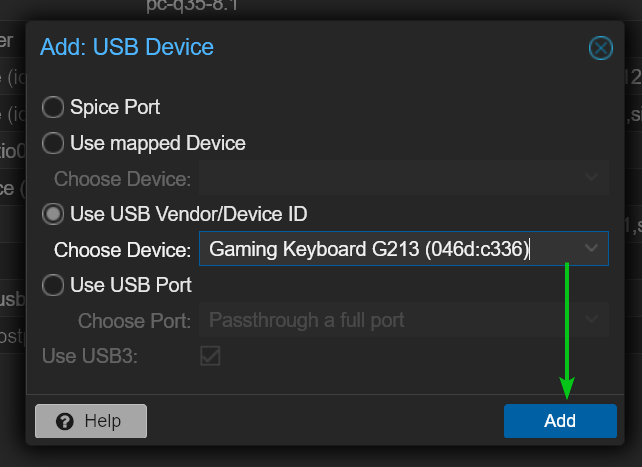
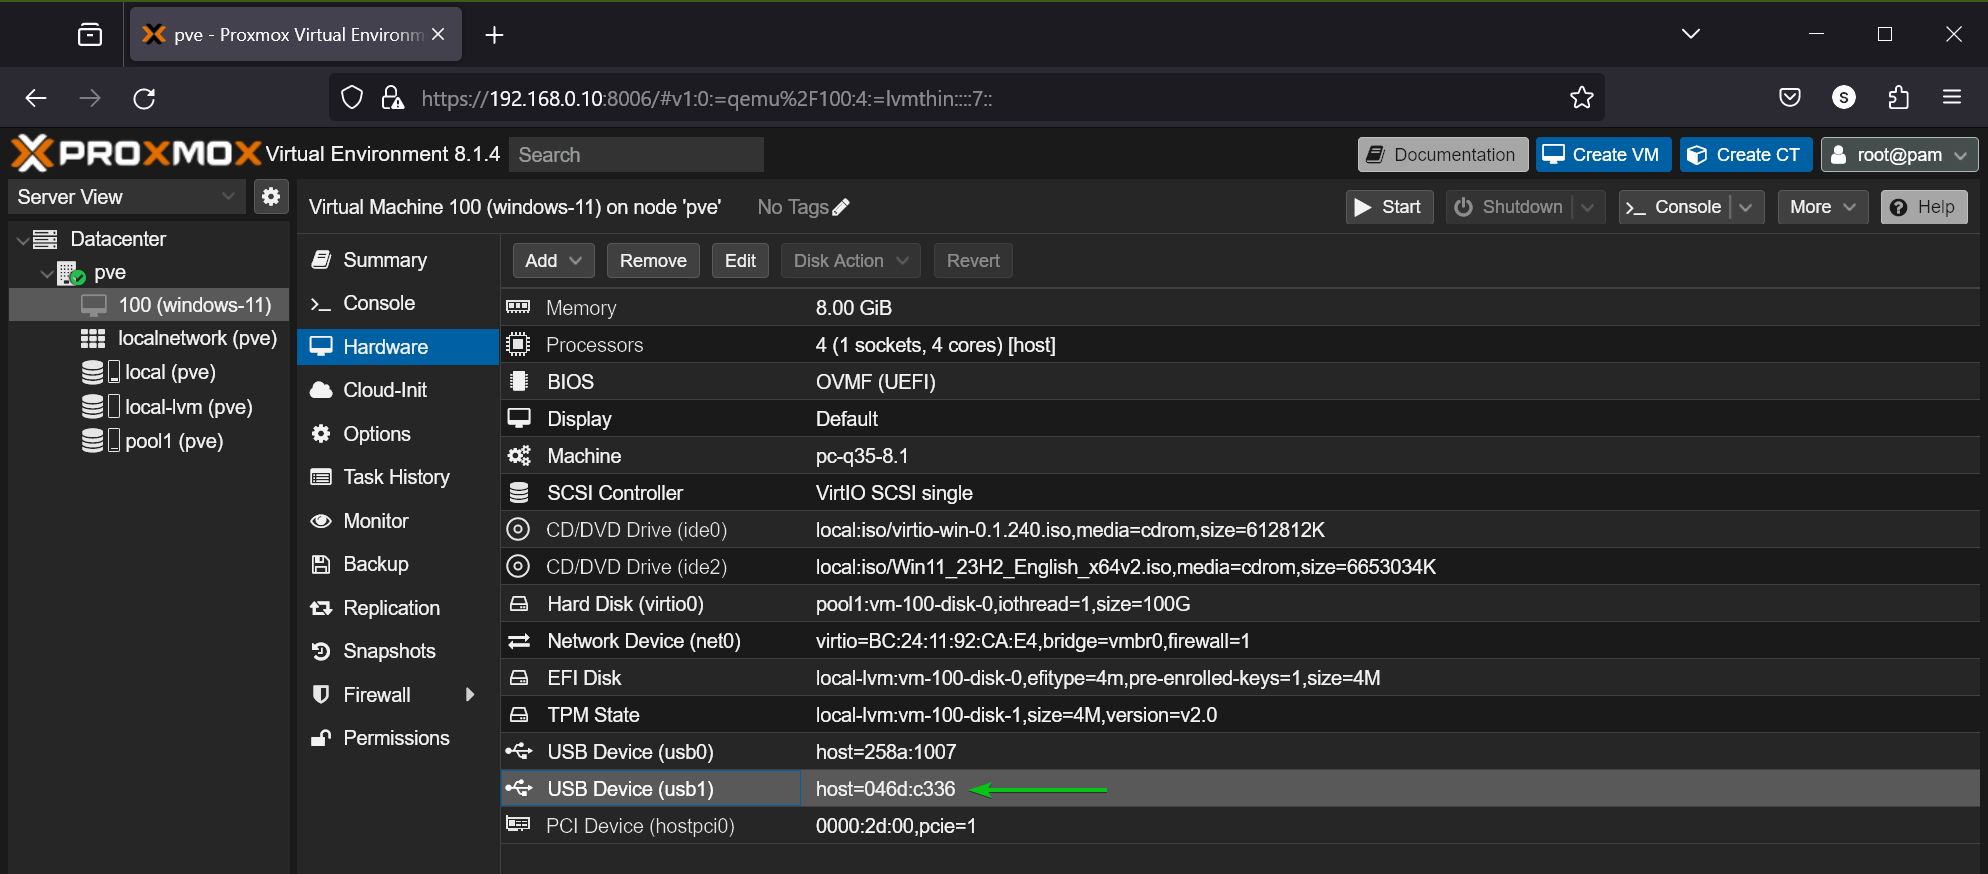
The USB keyboard should be added to the Windows 11 Proxmox VE virtual machine.
Checking if NVIDIA GPU Passthrough is Working on the Windows 11 Proxmox VE Virtual Machine
To check if the NVIDIA GPU passthrough is working on the Windows 11 Proxmox VE virtual machine (VM), you need to start the Windows 11 virtual machine and see if it starts without any errors. If the NVIDIA GPU passthrough fails, the Windows 11 virtual machine won’t start.
To start the Windows 11 virtual machine, open it on the Proxmox VE dashboard and click on Start.
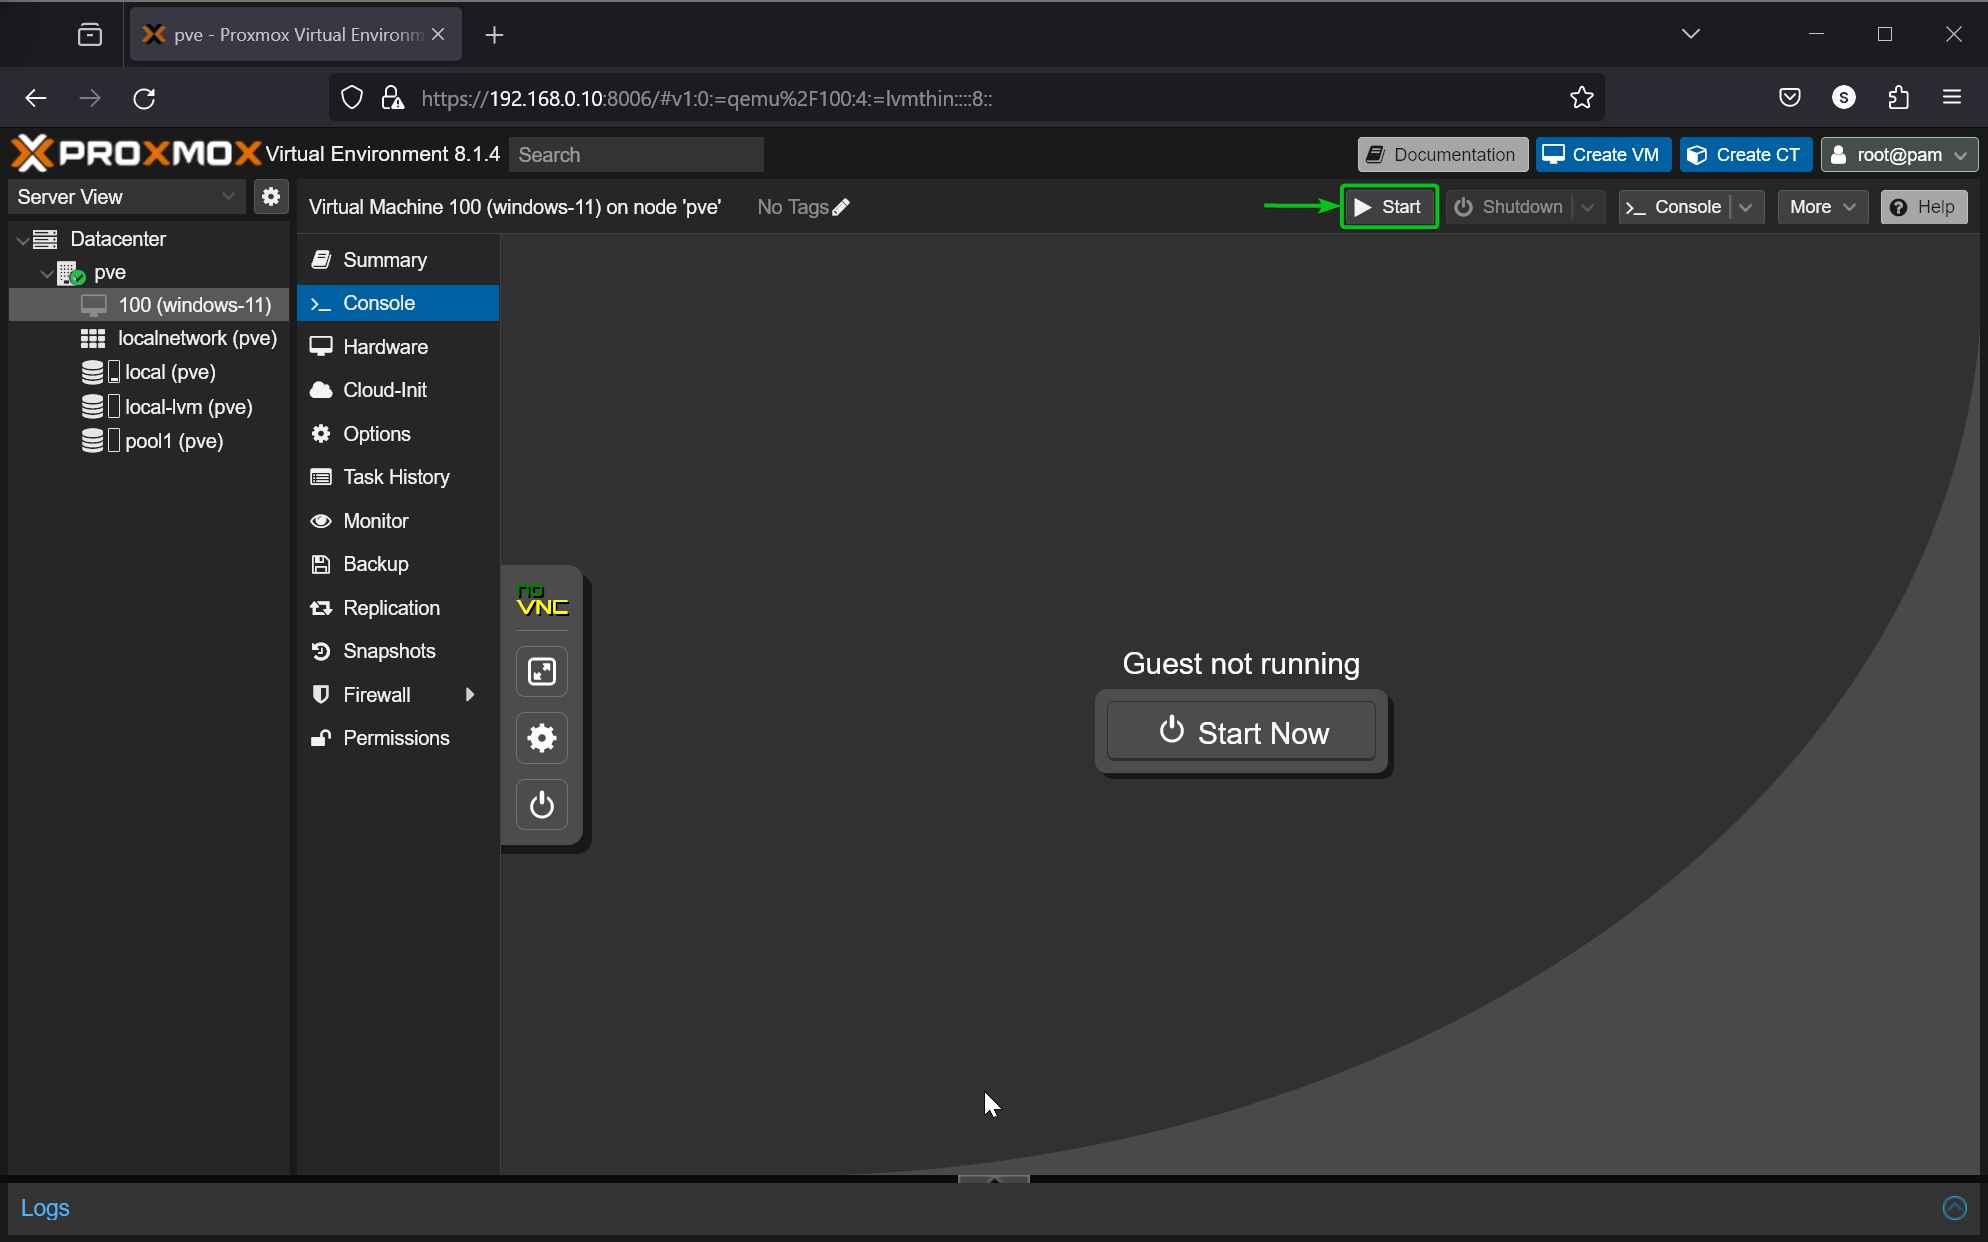
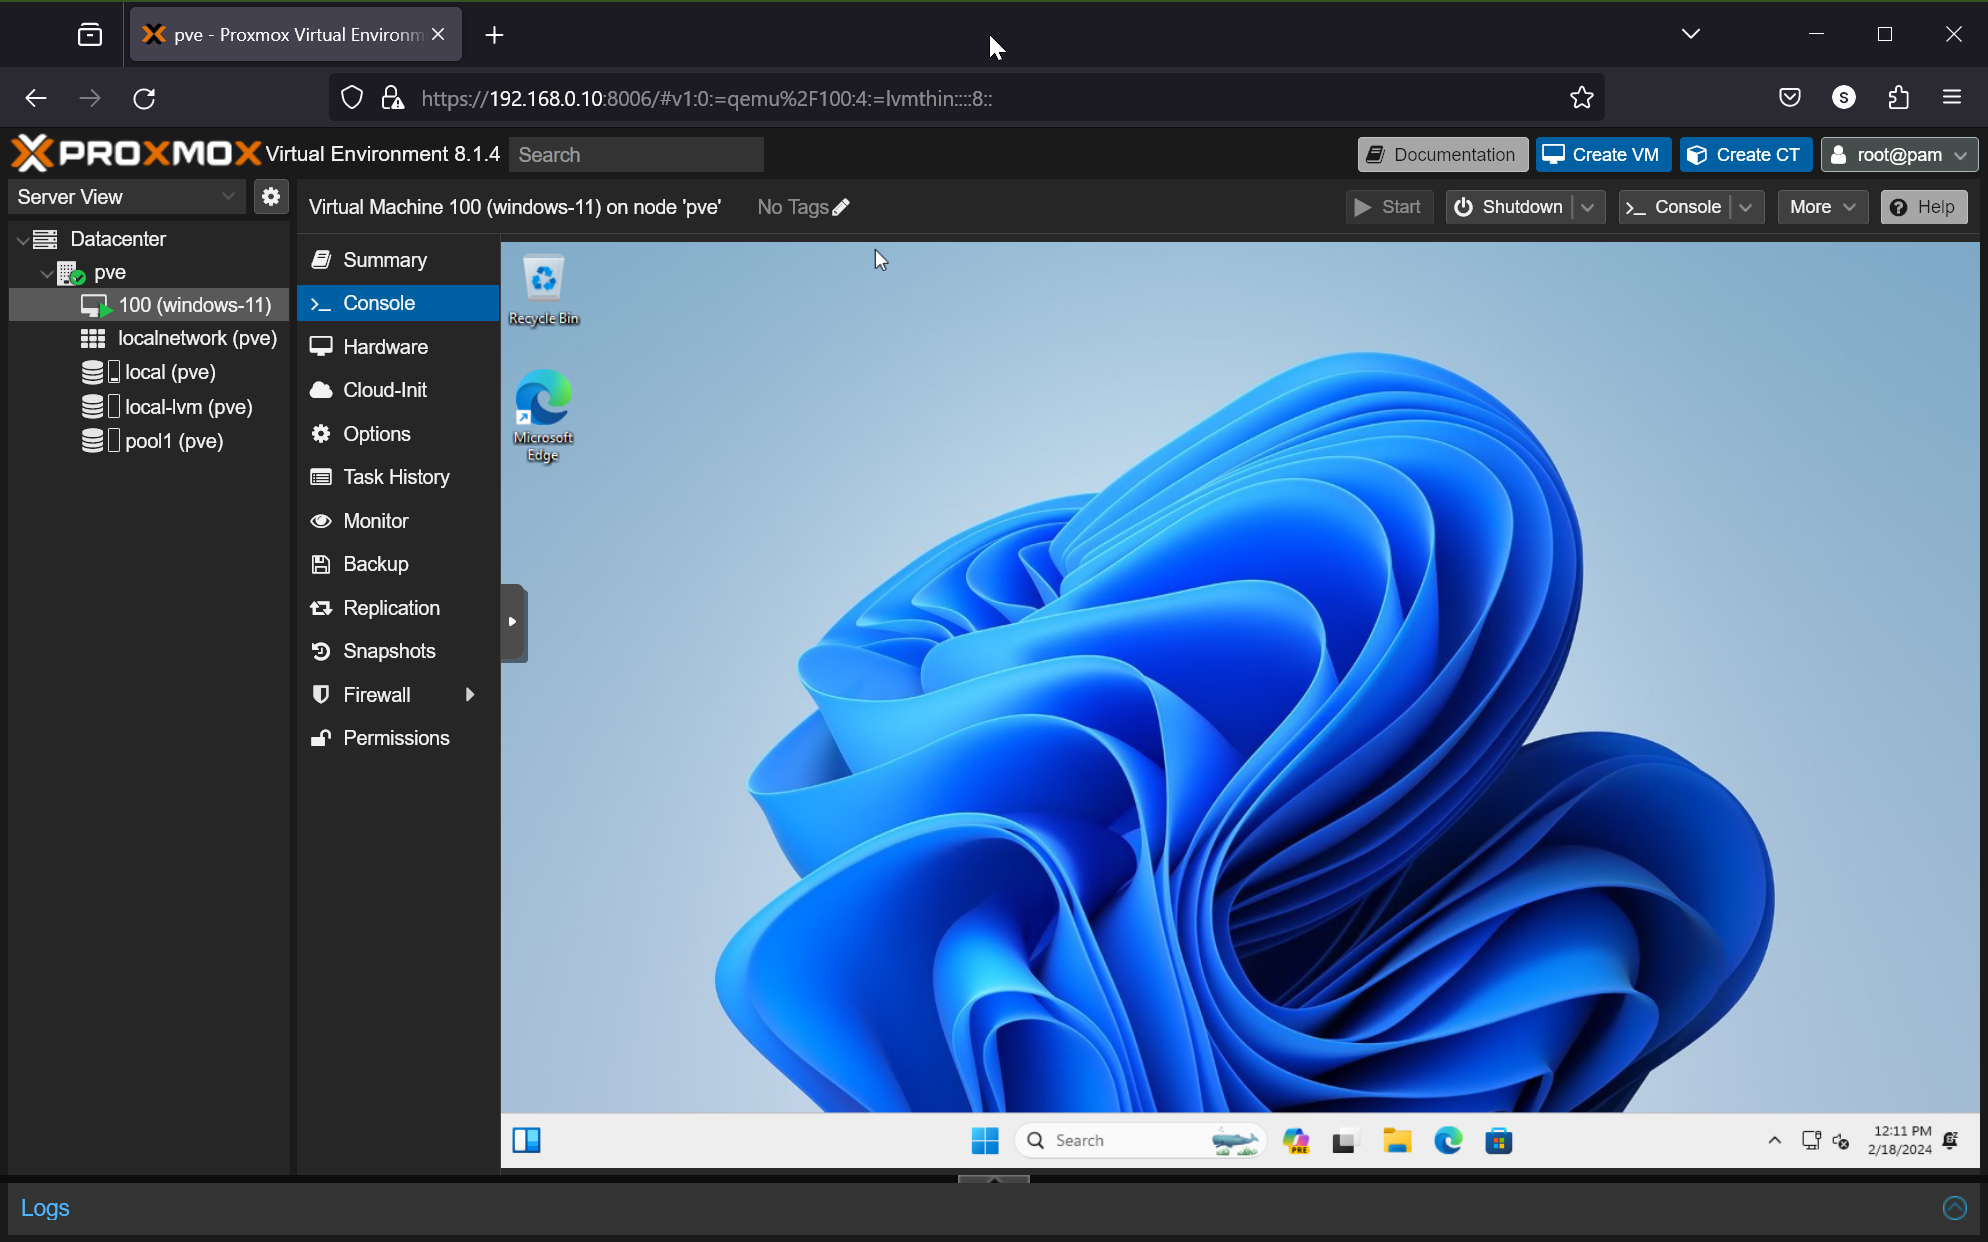
The Windows 11 virtual machine should start without any issues.
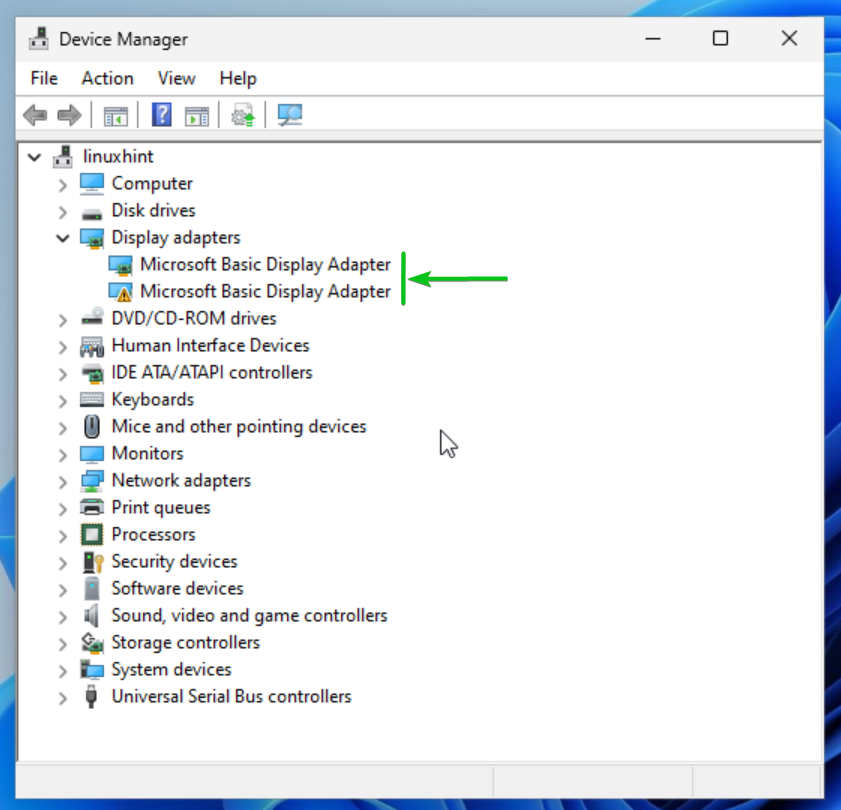
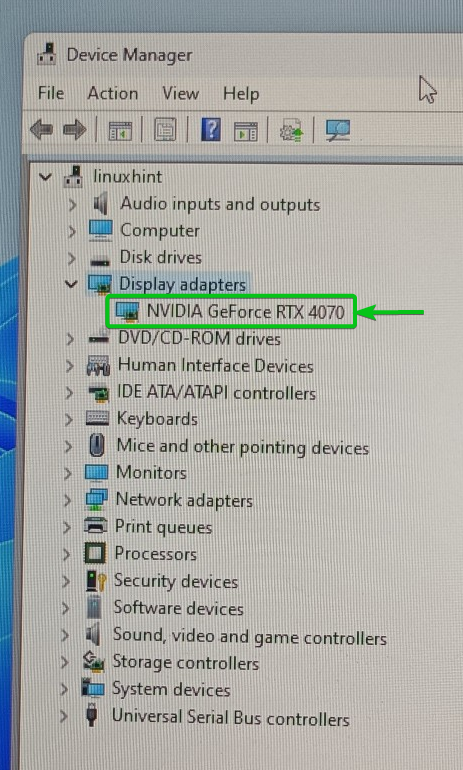
If the NVIDIA GPU passthrough is successful, you will see two display adapters in the Device Manager of the Windows 11 virtual machine.
NOTE: To open Device Manager on Windows 11, right-click (RMB) on the Start Menu and click on Device Manager.
Downloading and Installing NVIDIA GPU Drivers on the Windows 11 Proxmox VE Virtual Machine
Once you’ve added your NVIDIA GPU to the Windows 11 Proxmox VE virtual machine (VM), you need to install the NVIDIA GPU drivers on the Windows 11 virtual machine for it to work properly.
The process of downloading and installing the NVIDIA GPU drivers on the Windows 11 virtual machine is the same as on a real Windows 11 PC.
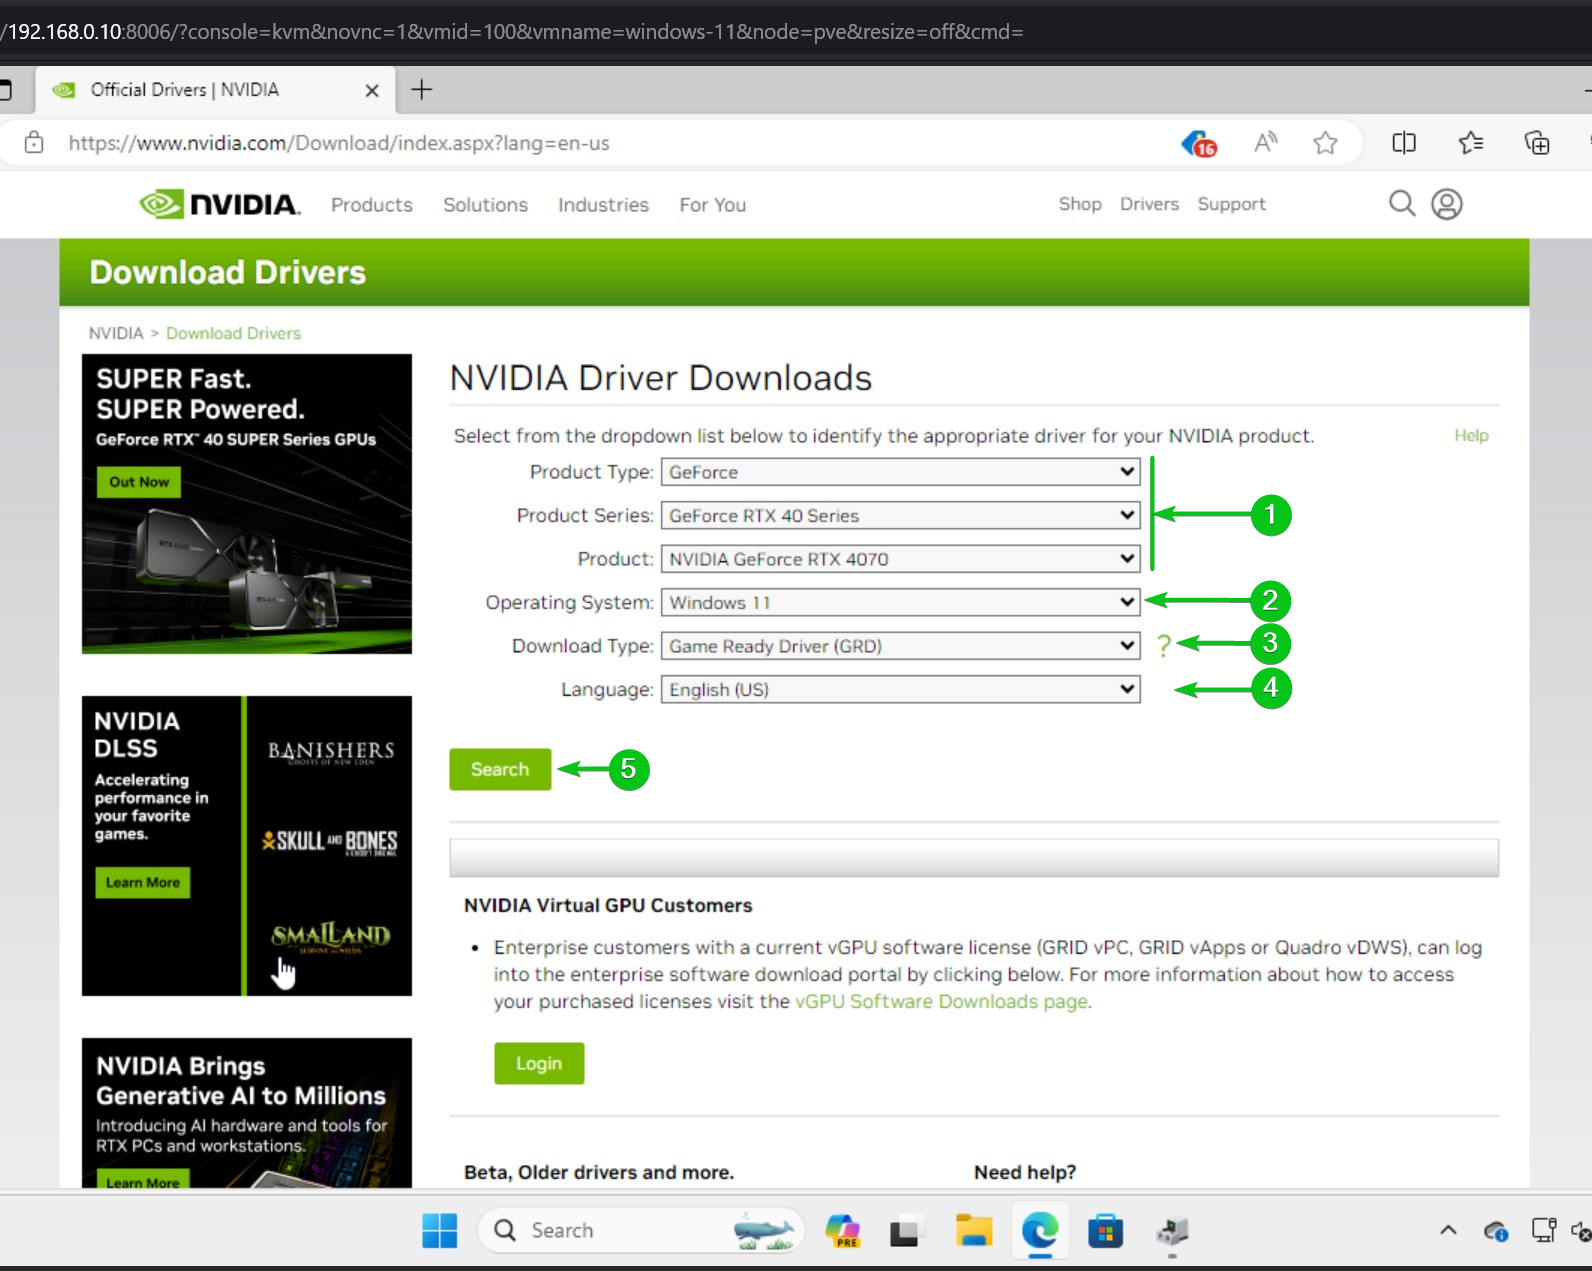
To download the latest version of the NVIDIA GPU drivers, visit the official NVIDIA GPU Drivers downloads page from a web browser on the Windows 11 virtual machine.
Once the page loads, select your NVIDIA GPU from the Product Type, Product Series, and Product dropdown menus[1]. Then, select Windows 11 from the Operating System dropdown menu[2], select the type of driver (GRD – Game Ready Driver or SD – Studio Driver) you want to download from the Download Type dropdown menu[3], select your language from the Language dropdown menu[4], and click on Search[5].
Click on Download.
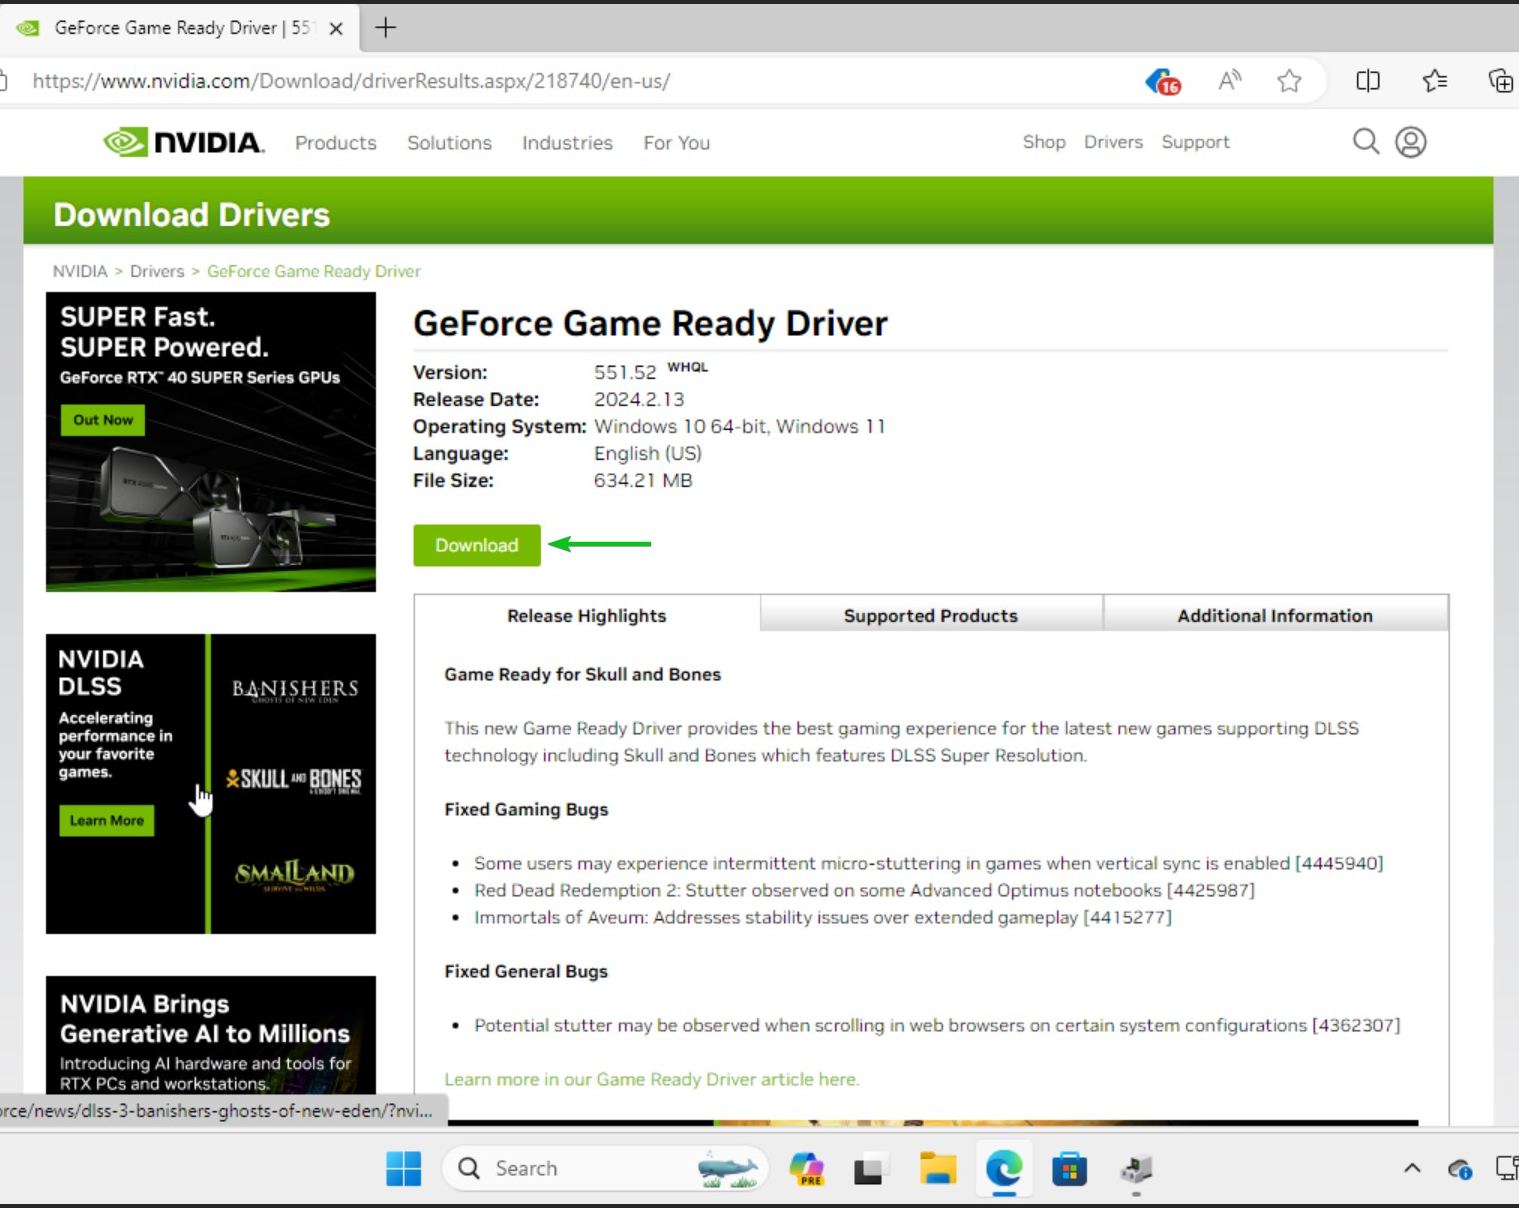
Click on Download.
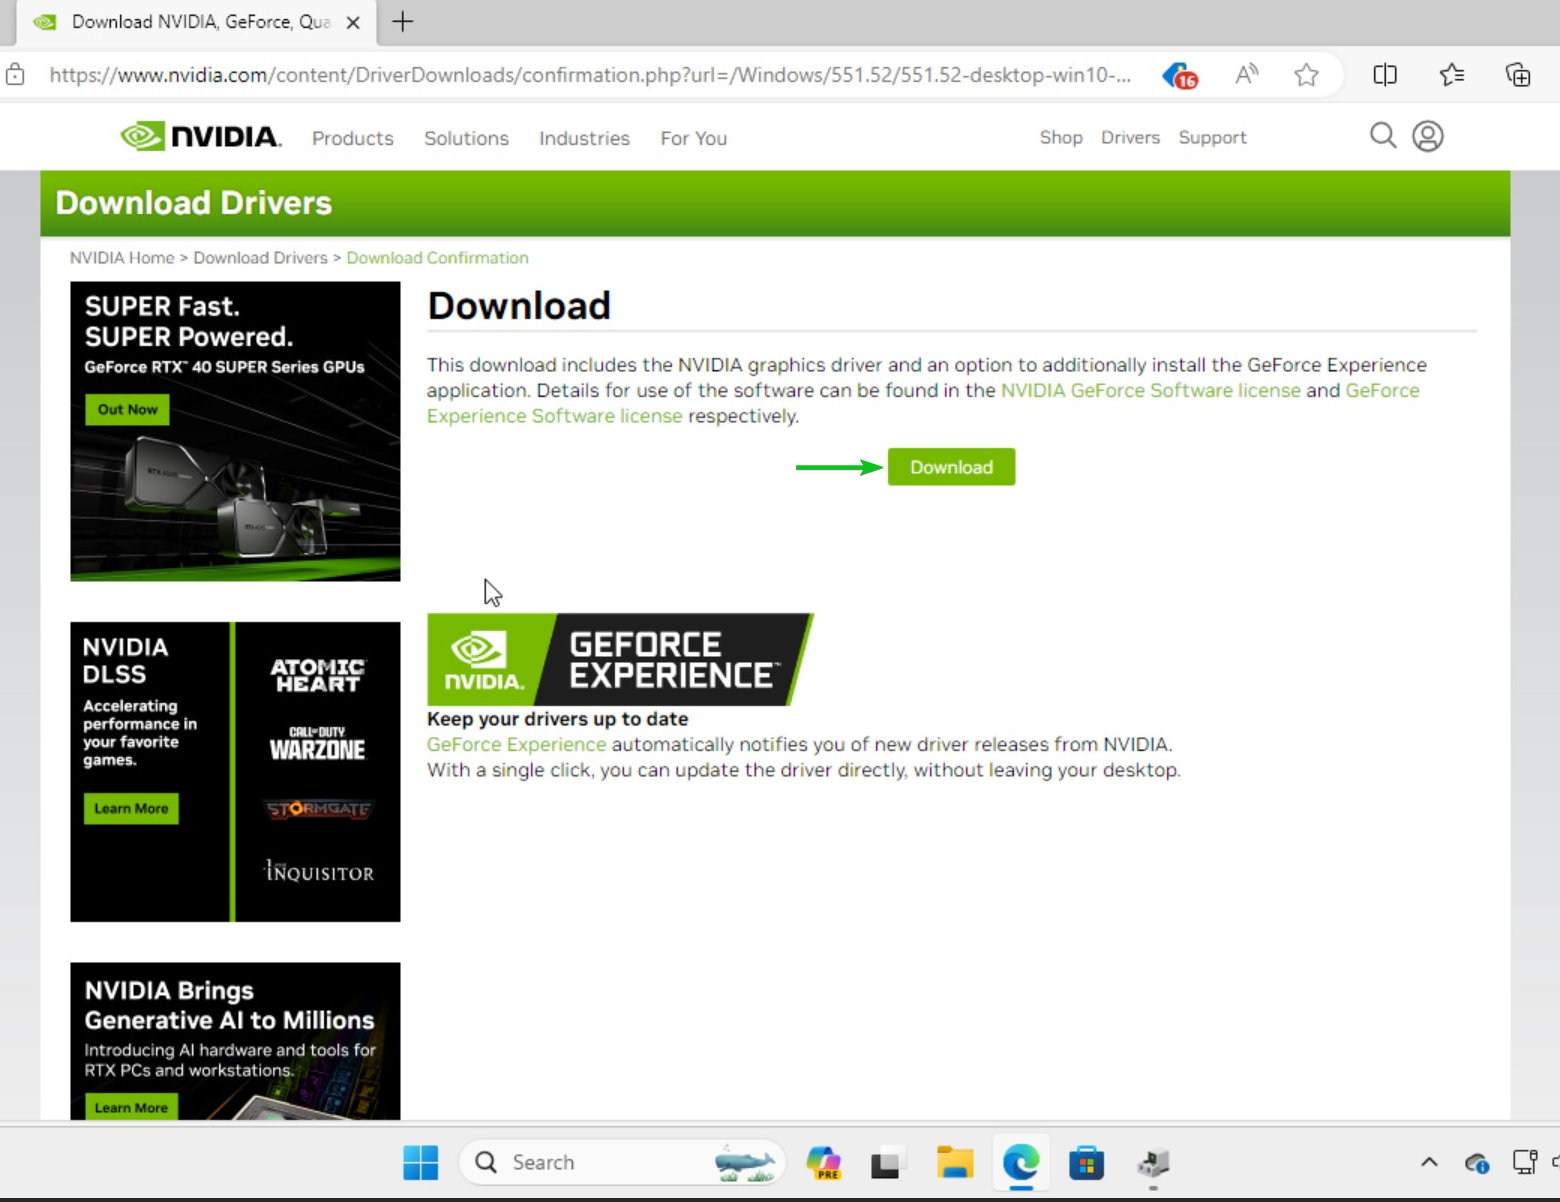
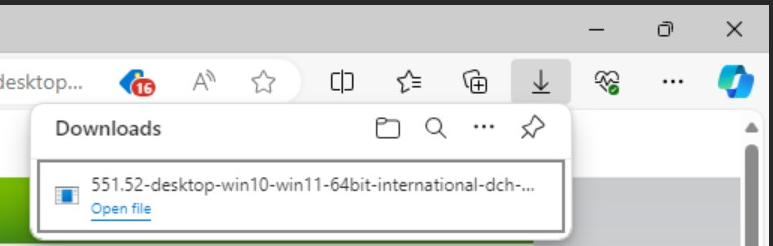
Your browser should start downloading the NVIDIA GPU drivers installer file. It will take a while to complete.

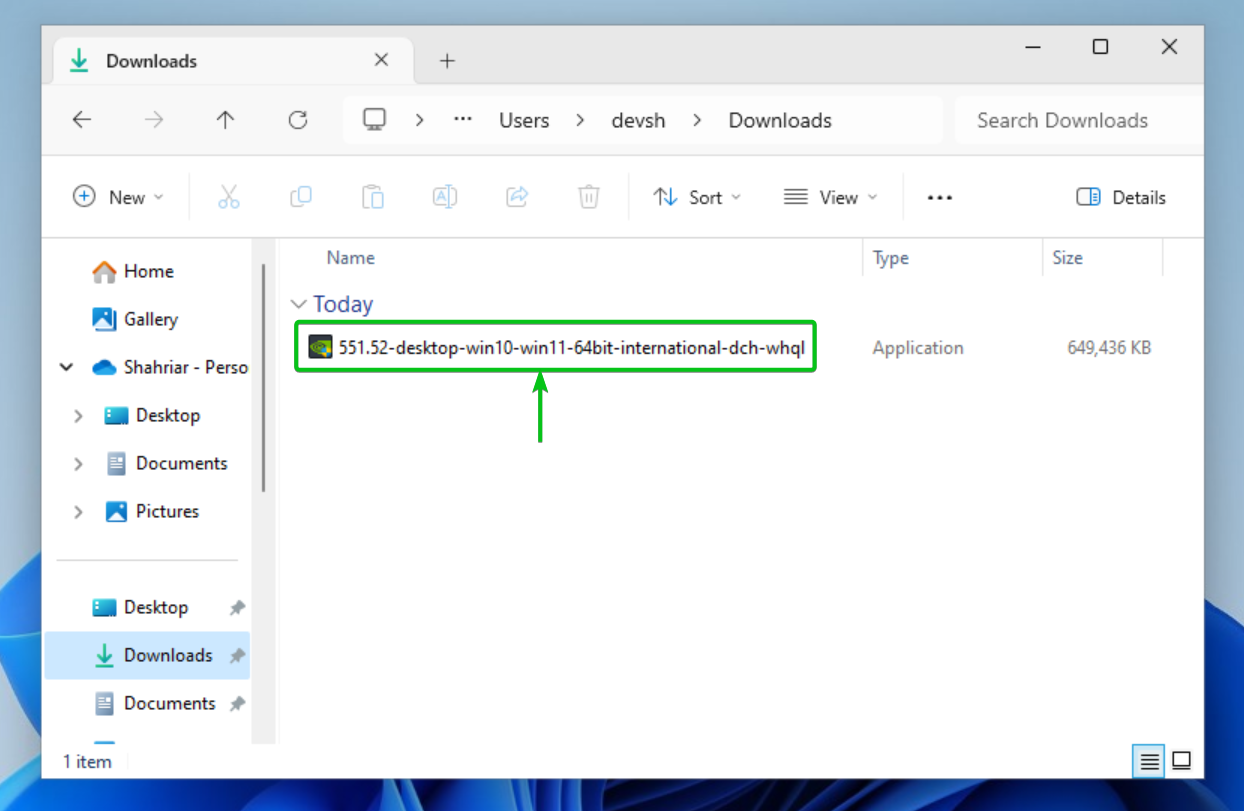
At this point, the NVIDIA GPU drivers installer file should be downloaded.
Once the NVIDIA GPU drivers installer file is downloaded, you will find it in the Downloads folder of your Windows 11 virtual machine.
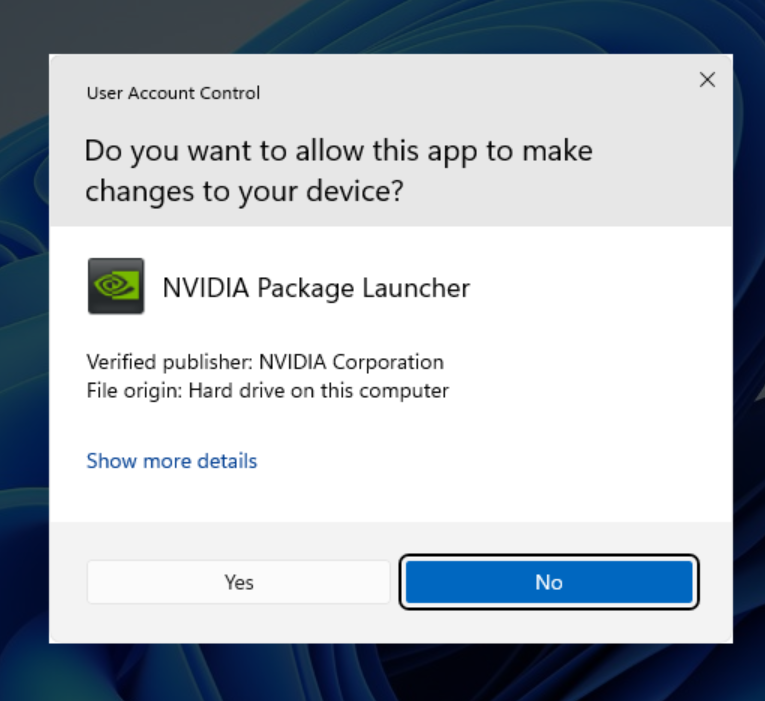
To install the NVIDIA GPU drivers on the Windows 11 Proxmox VE virtual machine, double-click (LMB) on the NVIDIA GPU drivers installer file.
Click on Yes.
Click on OK.
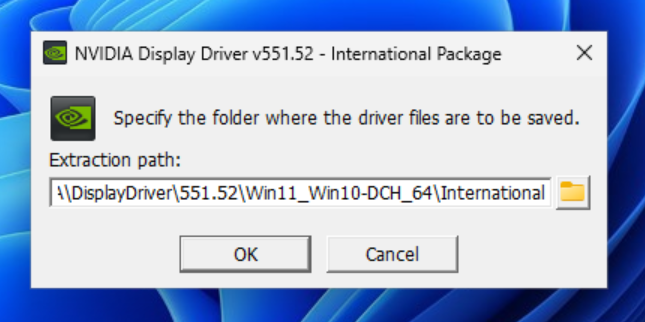
NVIDIA Drivers installer is being extracted to your computer.
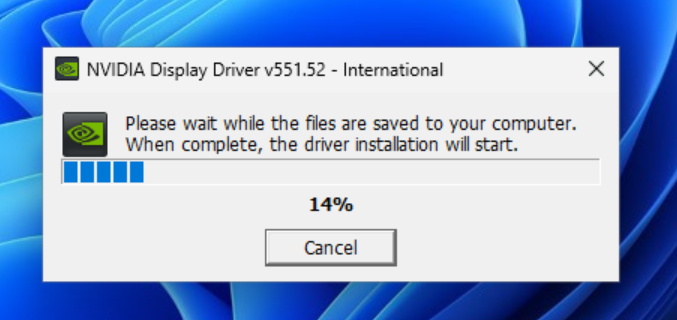
Once the NVIDIA Drivers installer is extracted, NVIDIA drivers installer should window be displayed.
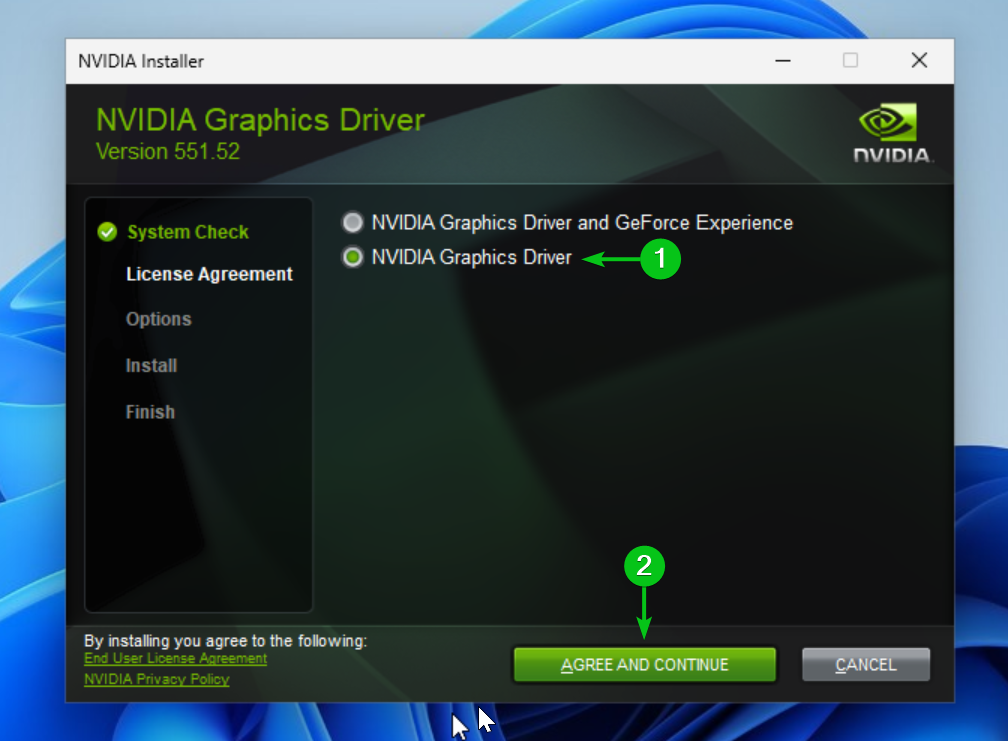
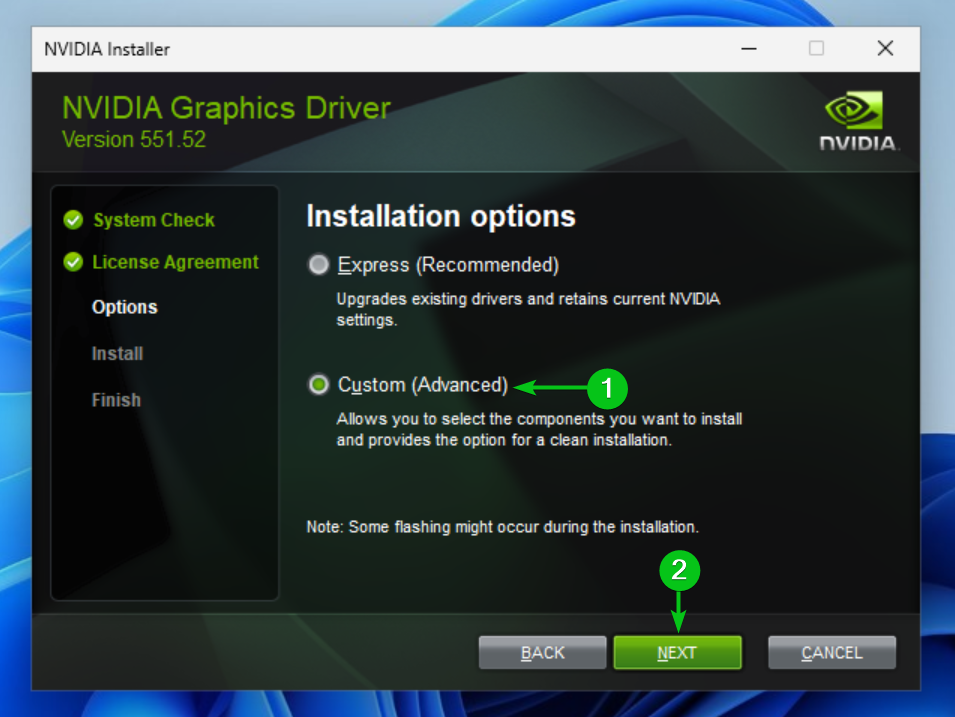
To install only the NVIDIA GPU drivers (not the GeForce Experience), select NVIDIA Graphics Driver[1] and click on AGREE AND CONTINUE[2].
Select Custom (Advanced)[1] and click on NEXT[2].
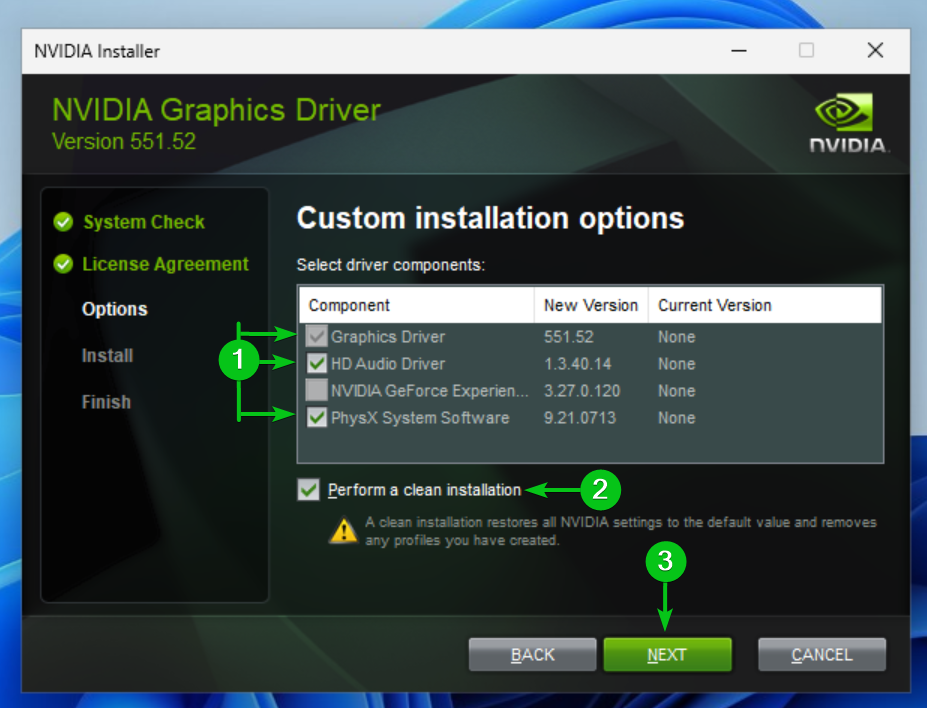
Check the Graphics Driver, HD Audio Driver, and PhysX System Software components from the list[1], check Perform a clean installation[2], and click on NEXT[3].
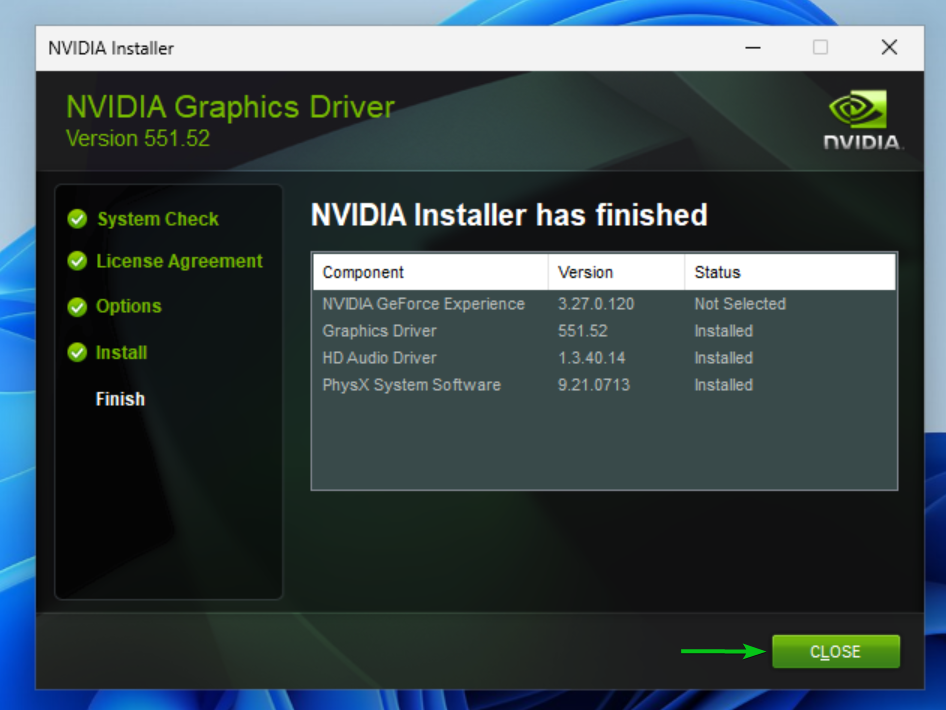
NVIDIA GPU drivers are being installed on the Windows 11 Proxmox VE virtual machine. It will take a while to complete.

Once the NVIDIA GPU drivers installation is complete, click on CLOSE.
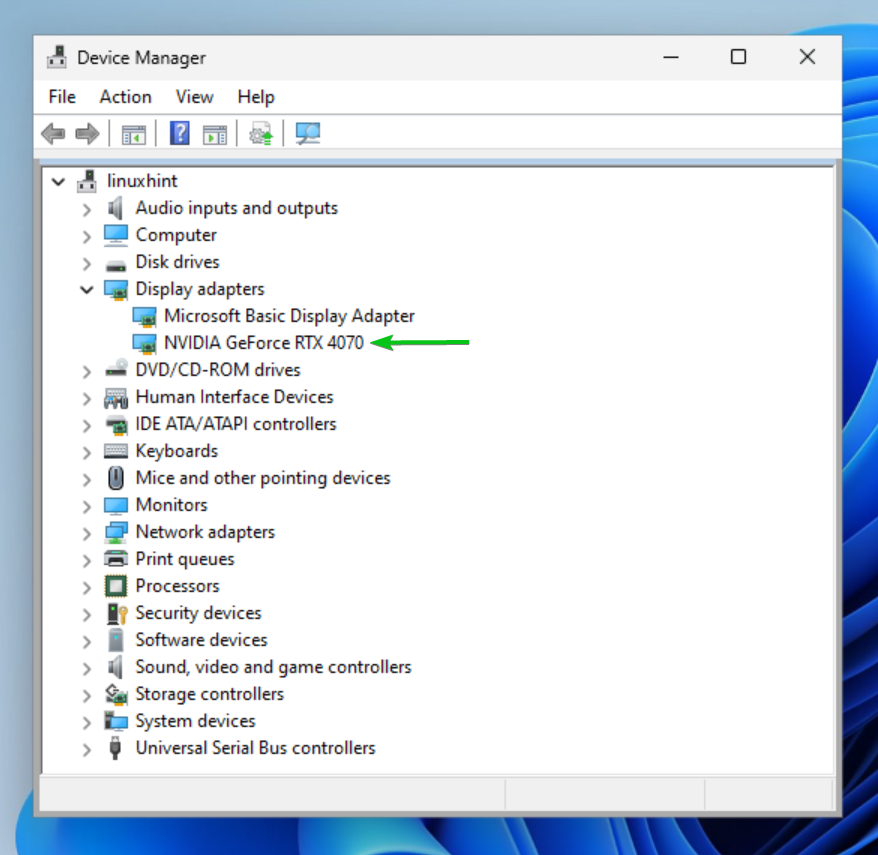
You can confirm that the NVIDIA GPU (that you’ve added to the Windows 11 Proxmox VE virtual machine) is recognized from the Device Manager app of Windows 11.
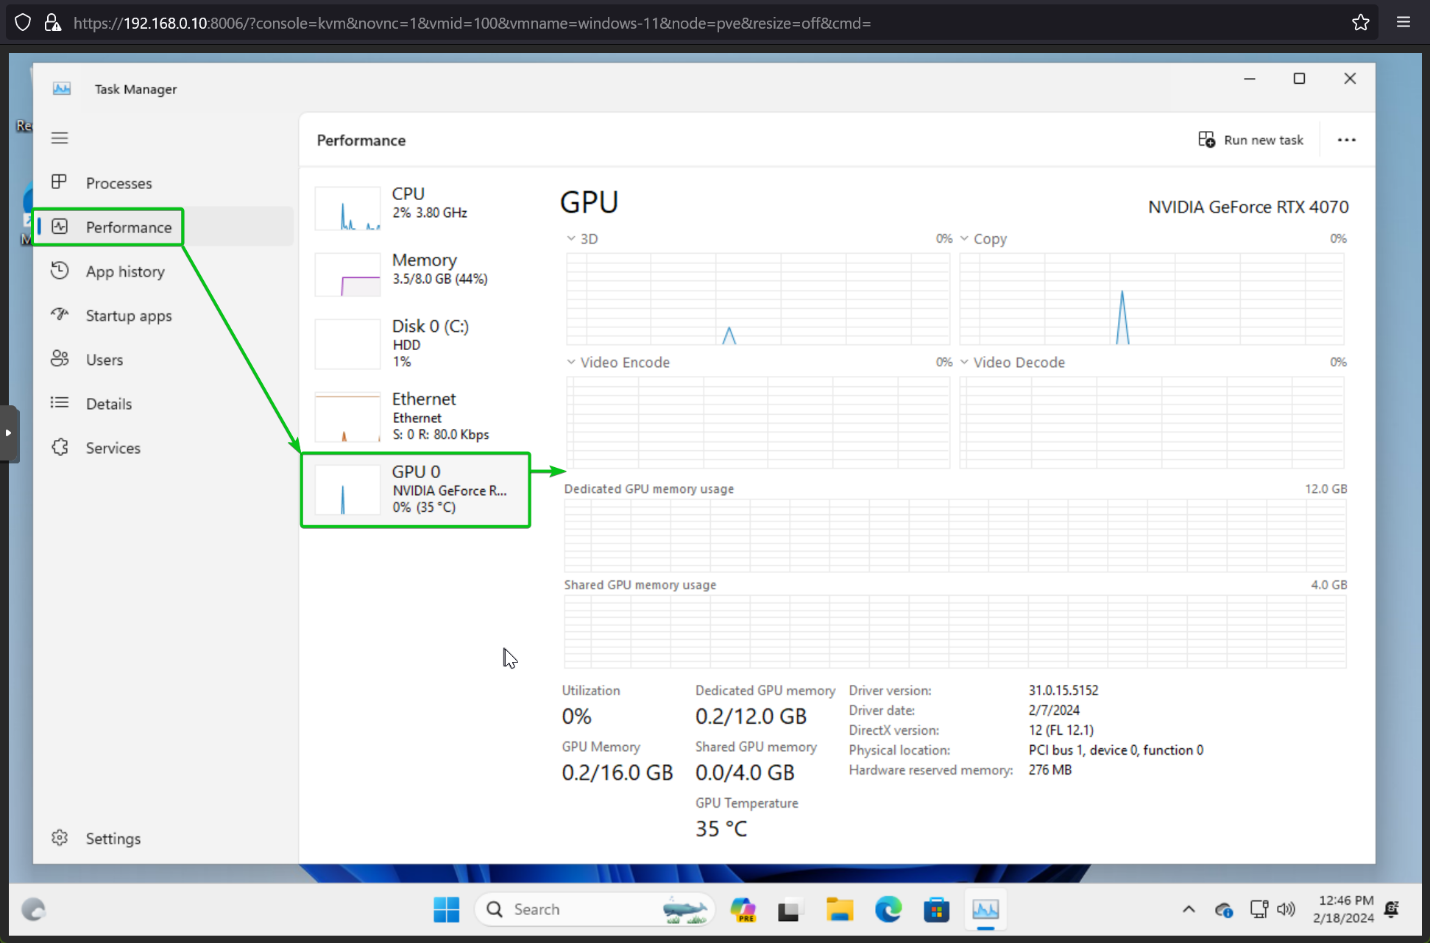
You can also confirm that your NVIDIA GPU is working correctly (on the Windows 11 Proxmox VE virtual machine) from the Performance section of the Task Manager app of Windows 11.
NOTE: The Task Manager app can be opened on Windows 11 using the keyboard shortcut + + . You can also right-click (RMB) on the start menu and click on Task Manager to open the Task Manager app on Windows 11. For more information on opening the Task Manager app on Windows 10/11, read this article.
Removing the Virtual Graphics Adapter of the Windows 11 Proxmox VE Virtual Machine (VM)
Once the NVIDIA GPU is added to the Windows 11 Proxmox VE virtual machine and the NVIDIA GPU drivers is installed on the Windows 11 virtual machine, you can remove the virtual graphics adapter of the Windows 11 virtual machine so that you only get video output on the monitor/monitors directly connected to your NVIDIA GPU and get the best performance from the NVIDIA GPU, just like your real computer. You can use it like you do your real Windows PC, you won’t notice any difference.
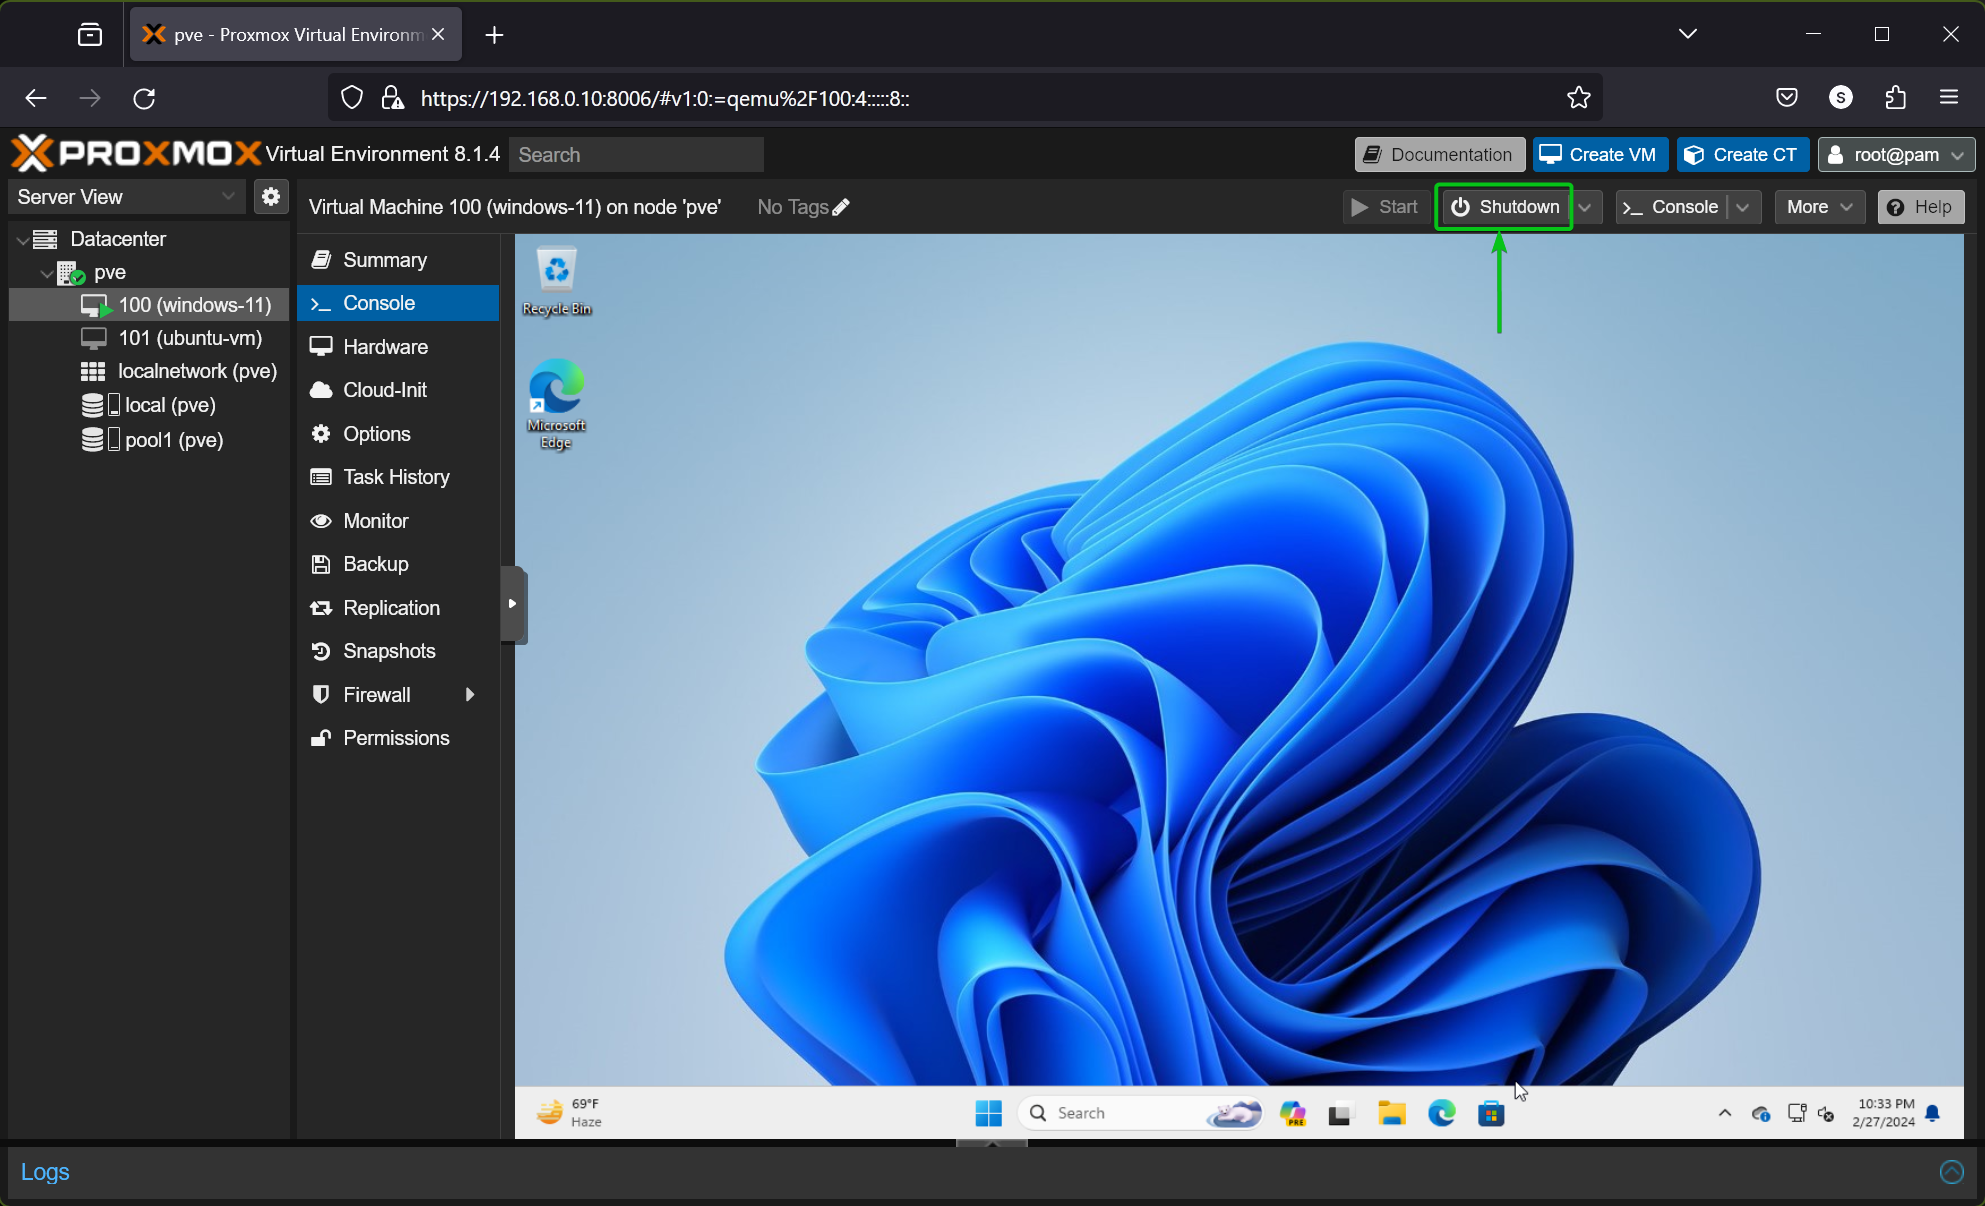
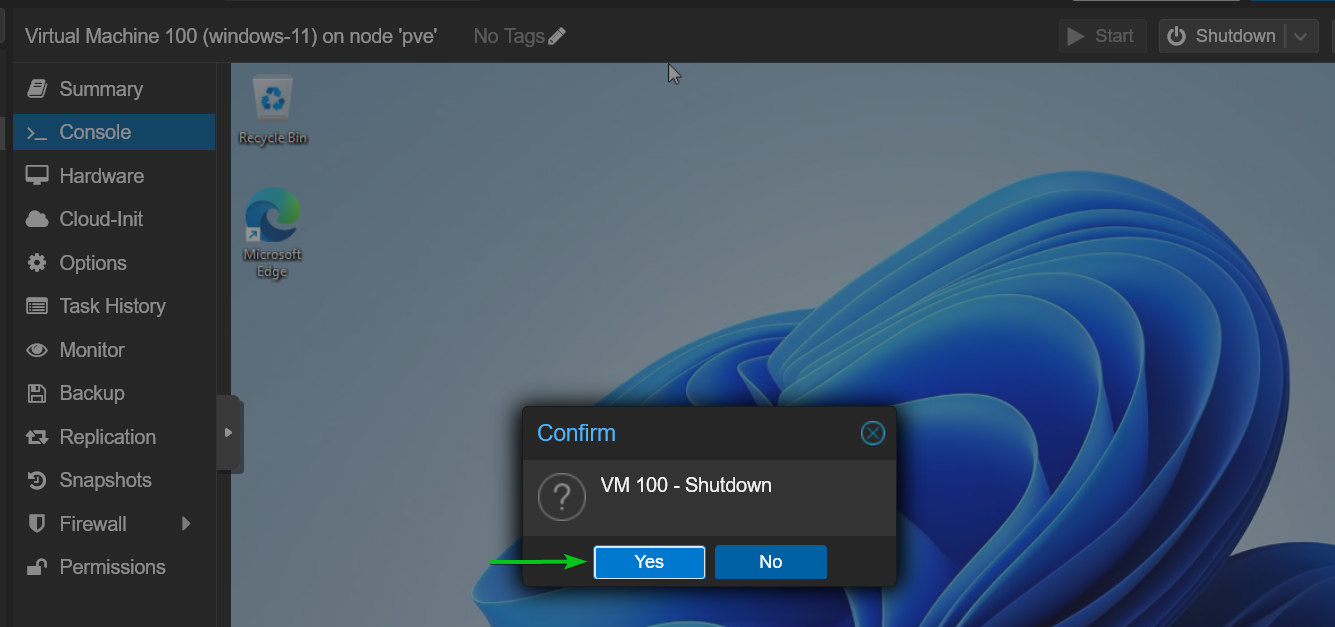
To remove the virtual graphics adapter from the Windows 11 Proxmox VE virtual machine (VM), first, click on Shutdown from the top-right corner of the Proxmox VE dashboard to shutdown the Windows 11 virtual machine.
Click on Yes.
Once the Windows 11 virtual machine is shut down, navigate to the Hardware section, select Display, and click on Edit.
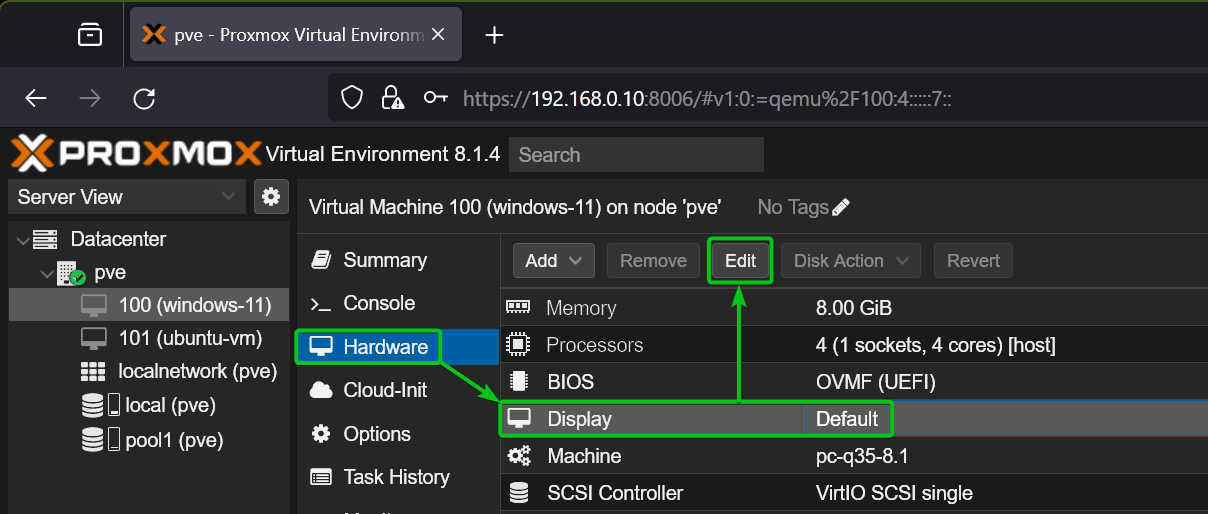
Select none from the Graphic card dropdown menu[1] and click on OK[2].
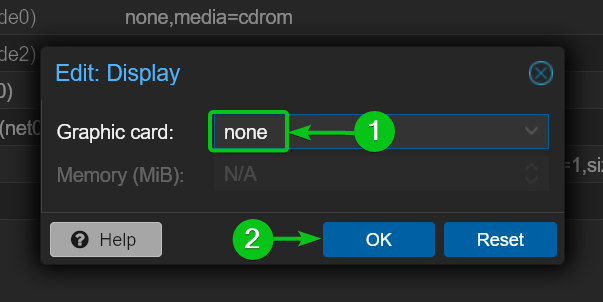
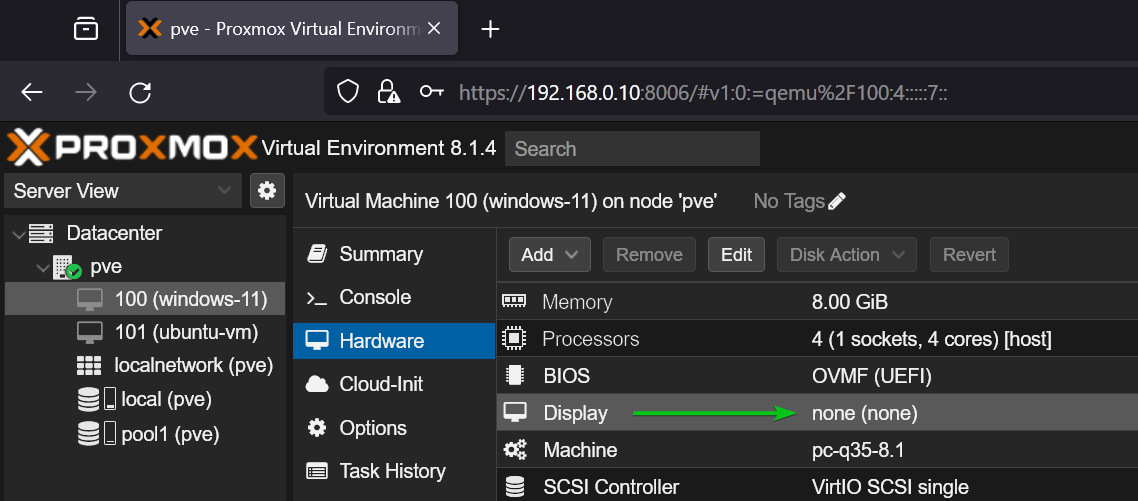
The virtual graphics adapter should be removed from the Windows 11 Proxmox VE virtual machine (VM).
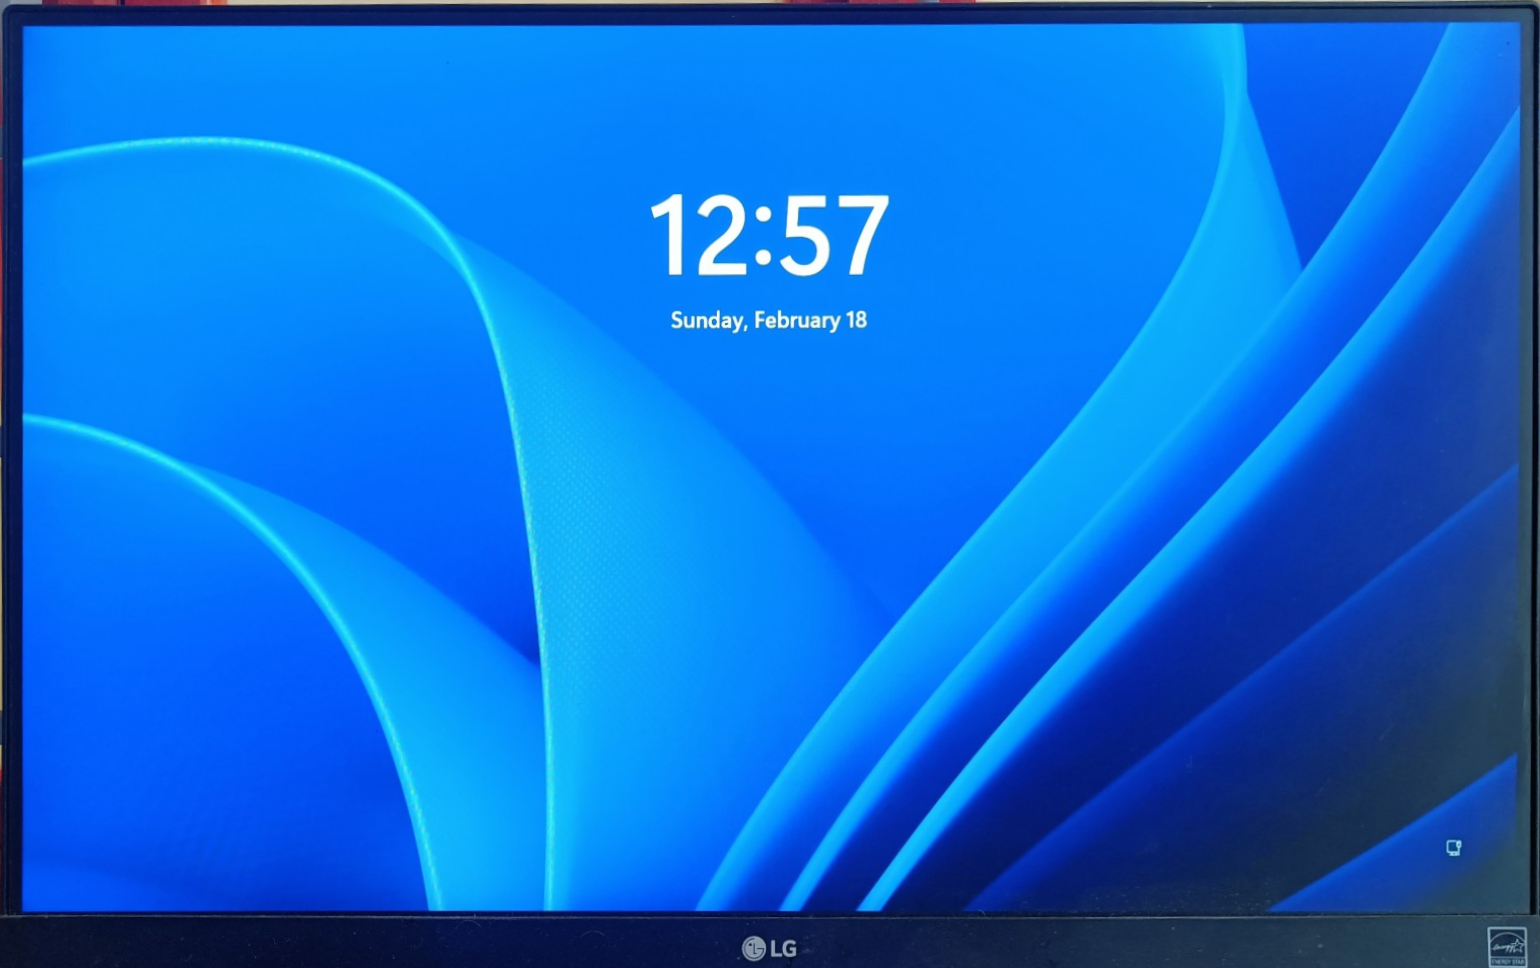
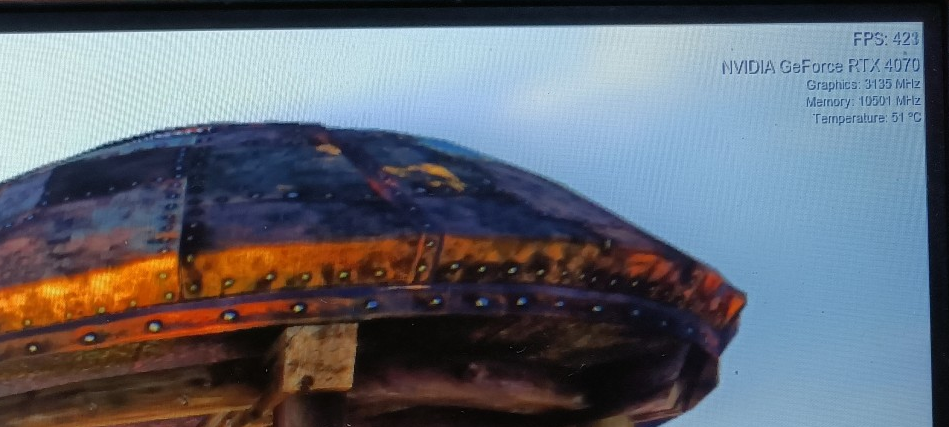
As you can see, the screen of the Windows 11 Proxmox VE virtual machine (VM) is displayed on the monitor connected to the NVIDIA GPU via HDMI cable, just like a real computer.
The virtual graphics adapter is removed from the Windows 11 virtual machine and only the NVIDIA GPU of the virtual machine is used for displaying the screen of the virtual machine.
I am running the UNIGINE Heaven benchmark on the Windows 11 Proxmox VE virtual machine and I am getting good framerates as you can see in the screenshot below.
Conclusion
In this article, I have shown you how to passthrough an NVIDIA GPU, a keyboard, and a mouse to a Windows 11 Proxmox VE 8 virtual machine. I have also shown you how to install the NVIDIA GPU drivers on the Windows 11 Proxmox VE virtual machine and configure it to work just like any other Windows PC.
More...